Buying a camera tripod can be a stressful event. In this article I will give you some advantages of using one, go over some of the features available, and help you wade through the myriad of choices to make your decision making a little more stress free. Let’s start with why you’d want a camera tripod in the first place.
Advantages of using a tripod
- a tripod steadies the camera for long exposures to avoid camera shake from hand holding
- you can use a lower ISO and very small aperture to get maximum depth of field
- keeps the camera steady for long exposures when shooting things like waterfalls and flowing water
- forces you to slow down and put more time and thought into composition, often resulting in a better image aesthetically
- helps keep the images better aligned when doing bracketed exposures for HDR photography
- a tripod is pretty much essential for night photography
- gives you a rest when using heavy equipment
- you’re able to shoot panoramic shots to be stitched together
- you can create self portrait and get in the photo yourself
- key for shooting macro or close up photos and getting them tack sharp


Disadvantages of using a tripod
- they are heavy, especially when you choose a solid one and add a good tripod head
- they are somewhat inconvenient to carry around and travel with
- it can be costly for a good one
- difficult to use in crowded places
- cumbersome to set up quickly, you might end up missing a shot
- if you get one that’s too small or flimsy you risk damaging your equipment if it collapses or sinks
What to look for when selecting a tripod
There are so many factors involved in choosing a tripod it depends on what you want to use it for, and what equipment you own. I actually own 3 tripods, and use each for a different purpose.
I have one for portrait jobs that is quite heavy and solid. It has a strong tripod head that angles in three directions (3-way head) which is better for that type of job than a ball head, in my opinion. Next I have another, lighter one, made of carbon fibre that I use whenever I’m walking any distance or traveling by car. I don’t want something super heavy if I’m walking miles, so finding a good balance between sturdiness and weight is necessary. Lastly I have a small bendy one that is great for travel, fits in my suitcase easily and most locations will allow it’s use.
Which features are important? How do you choose?
Weight capacity (load) rating
The very first, and most important, thing you need to look at is the maximum weight load the tripod can bear. Make sure it will hold more than your heaviest camera body and biggest lens combination. 1.5 to 2 times more than your camera weight is a good place to start. Keep in mind you may lean on the camera, add a flash, a heavier lens, or battery grip at a later date so allow for some room to expand your system. Web sites for tripod makers are a good resource for this information, and a good camera specialty store should be able to provide this information for any of their tripods in stock.
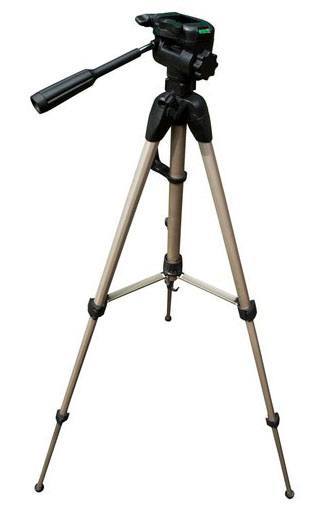
Tripod legs
When choosing a tripod there are generally two types. Ones that come as a one piece package with the legs and head combined, and ones that you can select the legs and head separately. I recommend the latter as you can mix and match (even from different manufacturers), or buy multiple parts and change the legs or head for different types of photography.
Within the legs alone there are also several choices: tubular legs with a twist lock vs ones with flip locks; how many sections are the legs composed of; maximum height of the tripod fully extended; and what material the legs are made from (steel, aluminum, carbon fibre or basalt). Let’s look at each choice individually.
Tubular versus other shapes and flip locks
This is basically a personal preference, but if you choosing one with the flip locks take a good look at the construction of them. If they are light weight plastic they may be easily damaged or broken off, or come loose frequently and need tightening. Try the both out at the store and see which feels easier to set up to you. Test it to make sure the legs lock tight and don’t slip if you put some of your weight on it (don’t break it in the store, they frown upon that).
Note: This is a good reason why you want to go to a store and not buy online as well. Something may look like a good deal, and have great features on paper but if it’s doesn’t stand up to the lean test and is clumsy to set up you’ll end up hating it and back at square one looking for a new one.
Number of leg sections
This will usually vary between three and five. More sections doesn’t necessarily mean the tripod will extend higher. There are several types that use 5 smaller sections which allow them to fold down to a smaller size, more compact for putting in a backpack or suitcase. Look at the options and see which is the best fit for you taking all the factors into consideration.
Maximum height
I am slightly vertically challenged (okay I’m short 5’0″) so finding a tripod that extends to my eye level isn’t that hard! If, however, you are over six feet, you will want to choose one that has long enough legs to reach your eye level. Bending over all the time is not a lot of fun and it will soon cause fatigue. If you are buying one with a head included make sure it comes up to at least your chin. If you are buying the legs separately look for them to reach shoulder level or higher (legs only, not including extending the centre column which reduces stability). Factor in the folded size of the whole unit as well if you intend to travel with it. Measure your luggage or bag in advance so you know the maximum length that will fit. My 4-section carbon fibre one will fit diagonally in my suitcase, with the tripod head tilted to the side or removed. You may find the ones with more sections fold down smaller, but you give up a little in stability with more sections because each one gets successively smaller inside the other. You need to decide on the balance and what’s most important for your needs right now.
Minimum height
How low can you go, basically. Check to see if the legs fold down small, or splay out so you can get closer to the ground. This is handy for those down and dirty shots, literally in the dirt.
Weight and construction material
Once again you will want to choose the legs based on what you will do with this tripod most often. If you do a lot of hiking into the bush, you’ll probably want to look at legs made of carbon fibre as they will are much lighter than the other options. It’s also extremely durable and doesn’t rust. Carbon fibre however, does come at a premium price and they are usually the most expensive options and will weigh in somewhere between 3-4 pounds. Aluminum is next most popular but heavier than carbon fibre, averaging 5-6 pounds. Basalt is becoming more common and popular as it weighs in between the other two but carries a lesser price tag than carbon fibre usually. Shop around, but go to the store and feel the difference for yourself by picking a few up to compare. Get the one that is best suited to your needs and your budget.
Here are a few different styles of tripod legs you can choose from, click on each to see them on Amazon.com.
Centerpost
Some tripods have a centre or additional column in the middle of the tripod that you can raise for added height. I don’t recommend using it to gain added height as it seriously limits stability. Imagine using a monopod and putting on top of a tripod, that’s what it’s like. When a centrepost comes in handy is when it’s reversible so you can mount the camera facing down, for those low to the ground shots.
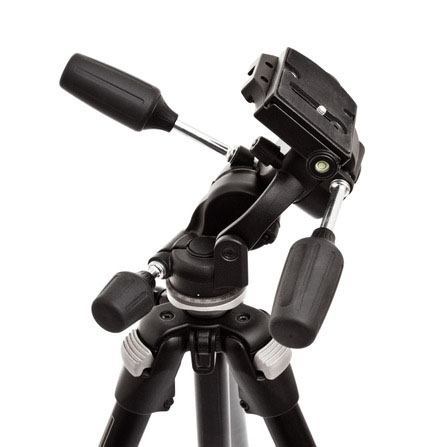
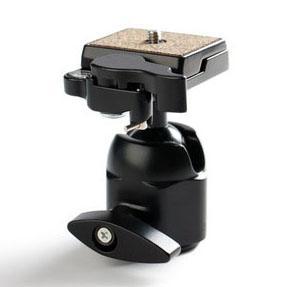
Tripod head
If you are opting for a module system choosing a tripod head can be overwhelming with the number of choices available. Make sure that it can hold the same weight as the legs you have selected (they are NOT added together, they each need to be able to bear the same load). The tripod head is the weakest link, so please don’t go cheap on this element because disaster can strike if the head fails or crashes your entire set up.
The five most common styles of tripod heads are:
- ball head – using a ball in the centre and one mechanism for tightening it, they are flexible, easy to use and one of the most popular all purpose tripod heads. Make sure it will tighten enough and hold the weight of your camera and not “creep” (loosen and fall)
- 3-way or pan/tilt head – one with separate controls or handles for horizontal and vertical tilts, as well as rotation. Common in low cost tripods and old style ones. This is what I use on my old beast of a heavy tripod.
- pistol grip head – has a sort of squeeze trigger to release, adjust and tighten the head for angle adjustments. Some people really like this style, I personally find them clumsy, and awkward. You really need to try one out to see if you like it or not.
- gimbal head – made for super long and heavy lenses to keep them balanced and for ease of motion. Often used by bird and nature photographers.
- panoramic head – specialized for shooting multiple images to create a stitched panoramic image, this type of head helps correctly align the images for stitching and helps eliminate parallax errors.
- other specialized heads include: macro focusing rails (allow for really precise focusing by minute distance adjustments on a gear system); video heads for fluid movements during filming
Note: make sure you do NOT buy a tripod head made for video unless that’s what you want to do with it. Video tripods are made for fluid movements and often do not lock in place or allow for shooting vertical images.
Here are some options for tripod heads for you, click through to Amazon for more info on each one:
Other options
Monopods – as the name implies this is a one legged option. Used often by sports photographers it allows for much more movement while adding some stability when using the longer heavy telephoto lenses. Can also be a good choice for travel as they’re easy to carry and places that limit tripod use will often allow a monopod.
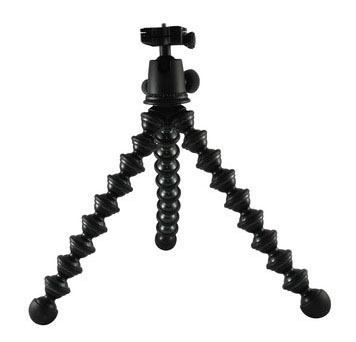
Bendy or Gorillapod tripods – these small tripods have flexible arms that can be bent to wrap around almost anything such as: fence posts, table legs, your own leg, etc. Great for travel, and putting your camera in hard to reach places. Just make sure you get the biggest one made for SLRs and a ball head for it.
Which one to buy? Quick summary
After all that info you may be feeling even more confused that when you started. Fear not, this is what I recommend.
First Time Buyer:If you have never used a tripod and are shopping for your very first one, look for a good, all in one tripod (legs and head combined) in the $100-150 price range. Get one that is sturdy enough for your current system and use it for a while. After a few months or a year you’ll know how often you use it, in what situations, if you travel with it, and if you’ve expanded your range of camera and lenses and outgrown it. But that will give you a good place to start, without breaking the bank, until you have a better idea what your needs even are.
Upgrading:If you’re looking to upgrade a tripod (maybe you’ve already done the step above) I’d suggest moving to a modular system. Expect to spend in the $300-500 range to get one that’s more versatile, lighter, and will take you a bit further. Eventually you may find that you need more than one tripod, as I do, for different purposes or if you get into any of the specialized areas (video, macro, pan). But by investing in a good modular system you can always upgrade one piece at a time and add to it.
Summary and bonus tip
- choose from either a one piece tripod or modular first
- decide what kind of tripod head you like best
- choose the legs and get the best you can afford (light weight, sturdy, max height, min height) that fits your shooting style and needs
- ensure both the legs and head will easily hold the weight of your equipment and then some
- bonus tip – get a tripod head with a quick release plate system. This has a plate you mount to the bottom of your camera and just clips in and out of the tripod head easily. Allows for quick and easy set up and removal from the tripod.
Cheers,