Editing images with software like Lightroom typically involves changing parameters like exposure, contrast, highlights, shadows, and so on for more than 90% of your work. These parameters are controlled using sliders that you have to drag with your mouse — sliders that emulate physical controls. But why not use such physical controls like sliders or control dials directly?
Instead of using the mouse to point to virtual controls and focus on these virtual controls, why not just use a physical control and focus on the effect on the picture while changing the values instead?
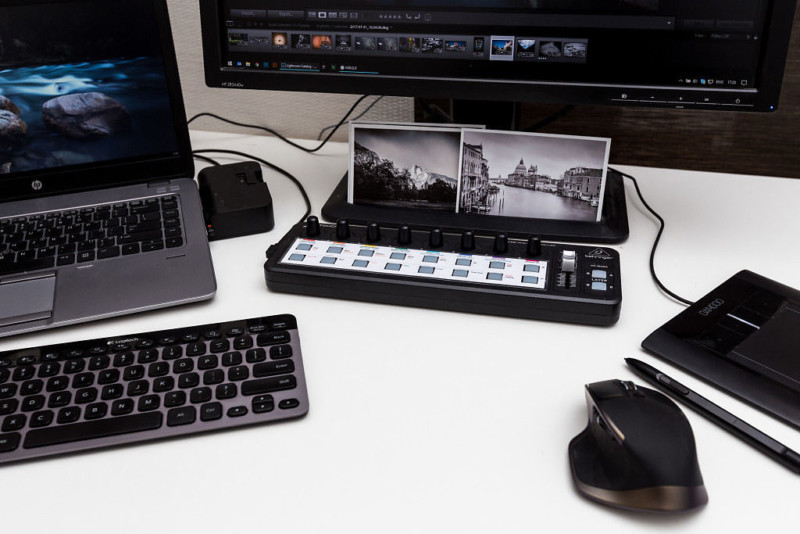
Trust me – once you get accustomed to using physical controls to directly control an image’s parameters instead of fiddling with these virtual slides in Lightroom you’ll never want to go back. It’s just way more natural and more efficient. Your workflow will benefit a lot once you focus on the image while blindly using a physical controller to adjust the parameters until the image looks right instead of focusing your eye on the mouse pointer hovering over the slider and looking at the image afterward to check whether the current position fits your desired result or not.
What’s a MIDI Controller?
A MIDI controller is a device that is typically used for music production. Each controller offers a set of various controls like buttons, control dials or faders (sliders). Movements on these controls are sent to the computer, either through specialized MIDI interface connectors or through a standard USB connector.
There is a huge variety of different MIDI controllers available today, but not all might be suitable for image manipulation since their primary purpose is music production.
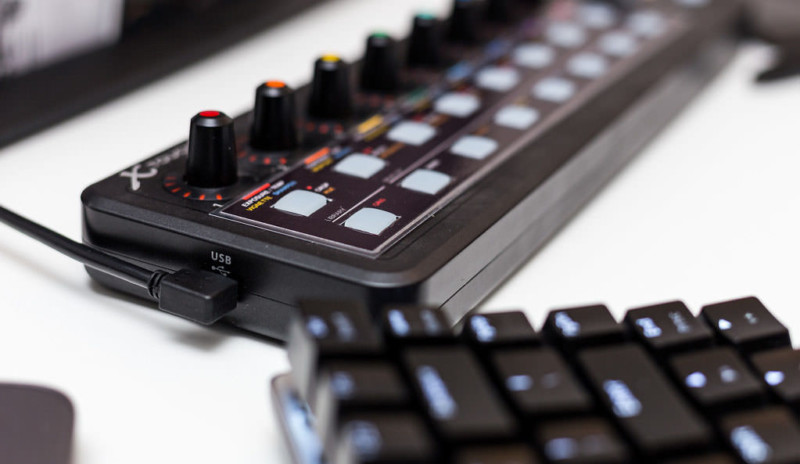
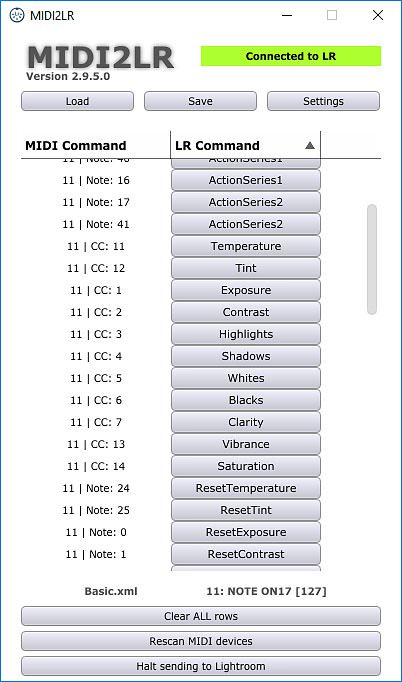
Using the free open source software MIDI2LR, signals from any MIDI controller can be sent to Lightroom to control an image’s parameters. For example, turning a control dial can increase or decrease the exposure of an image.
Comparison with Palette Gear and Loupedeck
Other alternatives to using a MIDI controller that allows you to use physical controls are Palette Gear and Loupedeck. I do not want to go too much into details of these alternatives, so here is a quick overview of my personal pro and cons. Check out the manufacturer’s websites to dive into more details.
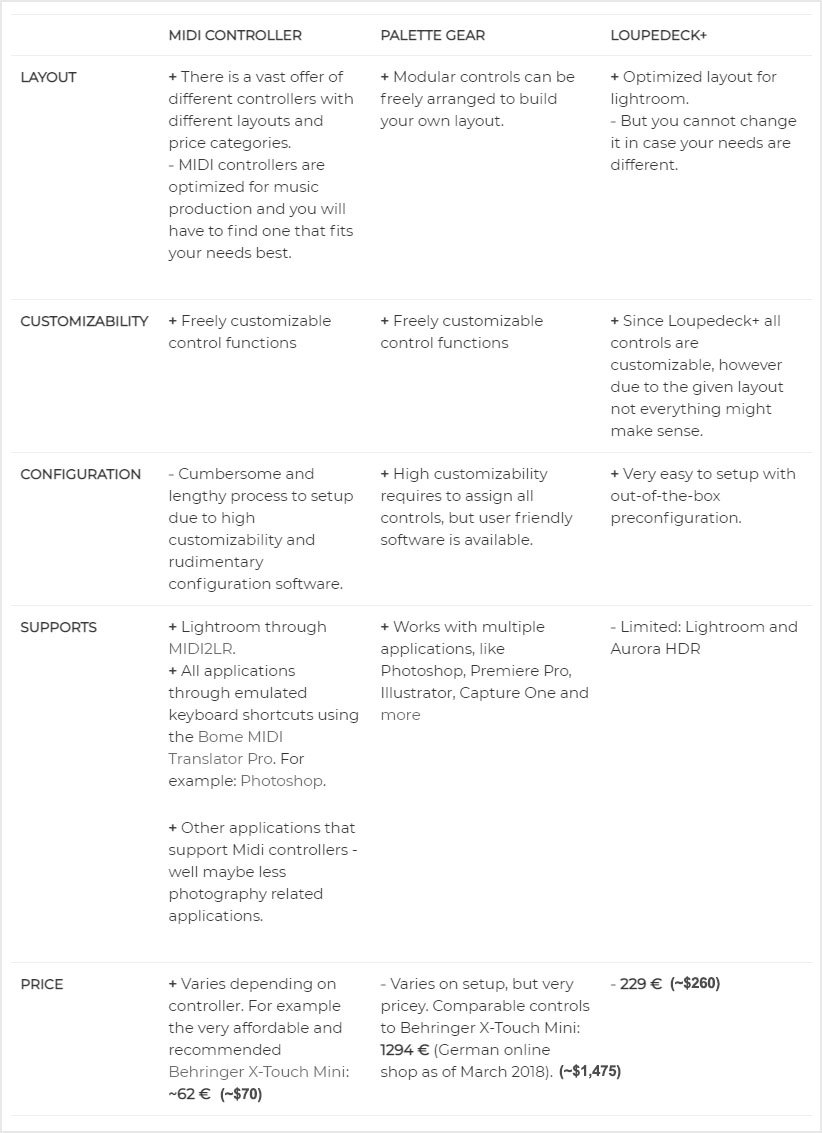
Correction: As of December 2018, Loupedeck+ has been compatible with Adobe Premiere Pro, Photoshop, After Effects and currently is in beta with Capture One.
As you can see from the comparison above, Palette Gear seems to be the clear winner feature-wise, but once you collect a couple of additional controls it becomes very pricey. Loupedeck+ is ideal for the Lightroom user, who prefers an easy-to-use pre-configured solution at a fair price.
At first glance, the MIDI Controller may not look too attractive in this comparison. Depending on the controller it can be either a cheap solution or a more expensive solution, but it always requires quite some effort: You first need to think about what controls you need, then find a suitable controller, and finally assign all the functions using a not so user-friendly software. However, the reason I wrote this article is to help you get started with these drawbacks and get your own MIDI2LR setup running more easily.
Now I will explain which controls you may want to have on a MIDI controller for Lightroom, give you some criteria for selecting a suitable MIDI controller, and also present a few MIDI controllers that might work well for you.
One of the biggest challenges, when trying to use a MIDI controller with Lightroom is to find a controller that works well for Lightroom. As already said in the first part of this series, MIDI controllers are optimized for sound production, not for photo editing.
So when you start you will face a chicken-egg problem: You do not know yet how well it works and which parameters can work best for editing, while you do not have a controller yet to try it out.
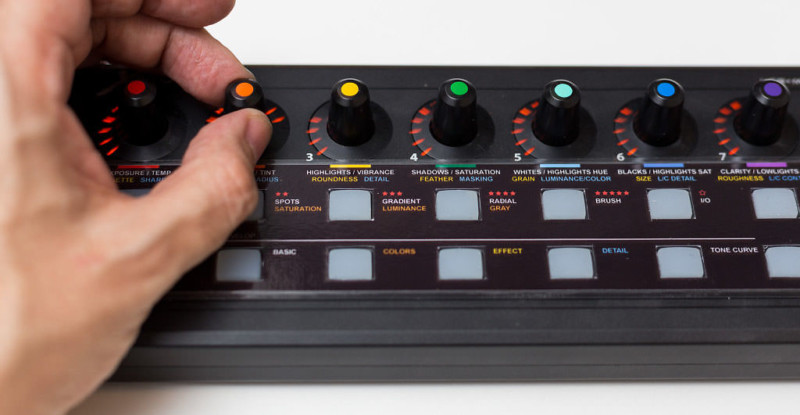
I would like to go over some basics and then suggest a couple of selected controllers I stumbled upon on my search for the perfect controller.
MIDI Controller Controls
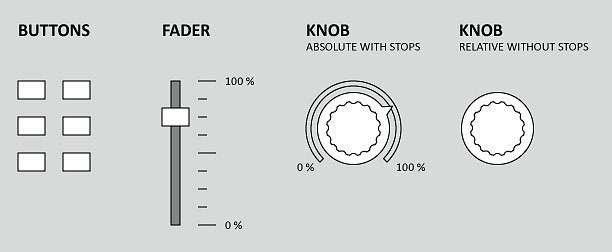
MIDI controllers typically feature three different types of hardware controls: buttons, faders, and knobs. Those may work more or less well for Lightroom depending on their implementation.
Buttons
The most simple controls are simple push buttons. With Lightroom you can use these for tasks like applying a rating, switching to certain panels, activating modes like crop, spot healing, brush,… and so on.
In addition the software MIDI2LR allows to load profiles by pushing a button. Every profile represents a different set of function assignments. So you can re-define all assigned functions for multiple different use cases.
For example imagine one profile for the library module, where the controls have different functions like supporting culling. With a single button’ press you can then switch to another profile for the development module that opens the development module and changes the controls for photo editing functions at the same time.
A Bit More Background
Buttons can send two types of MIDI messages: toggling states and momentary signals. Usually, MIDI controllers come with software that allows you to customize functions of a controller. For MIDI2LR make sure that all buttons are set to momentary signals. In MIDI terms a command sent by a button is called ‘note’.
The other major types of controls, faders, and knobs, which we’ll discuss next, are called ‘encoders’ and can send a number between 0 and 127. Such encoders are also called continue controller or control change and their commands are therefore called ‘cc’.
So why is this important? As soon as you start MIDI2LR you will see the terms ‘note’ and ‘cc’ as MIDI commands, when you start mapping functions.
Faders
Faders (also called ‘sliders’ very often) can be used to change adjustment values like exposure, white balance, shadows,… and so on: essentially every adjustment value that is represented as a slider in Lightroom.
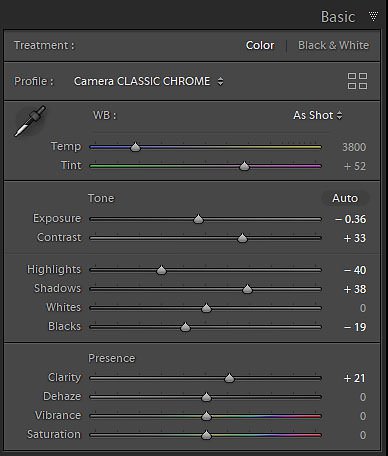
At a first glance, faders seem to be the most natural and best way to change values as Lightroom displays most settings as sliders. The current slider position will always reflect the absolute value. For example, when a slider like the one illustrated above is positioned at a position of 75% it will always translate to an exposure value of +2.50 EV in Lightroom.
Issues arise once you have adjusted the values of an image and then move to another image with different current adjustment values.
Motorized faders work very well in this case. Motors in the faders ensure that the physical location of the fader’s thumb always matches the current value of the currently displayed picture. In case of Lightroom once you move to the next photo the motor will automatically move the fader’s thumb to the position of the current value very quickly. However motorized faders can be found in the more expensive and bigger MIDI controllers only.
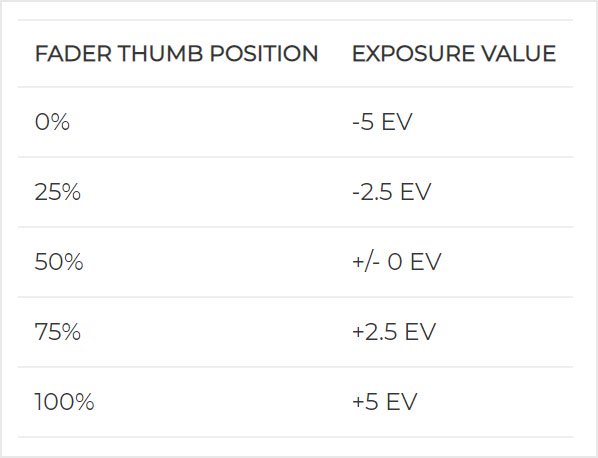
Cheaper MIDI controllers typically have non-motorized faders. So when you adjust the exposure of a photo for an image to +2.5 EV by moving the fader to the position 75% the thumb of the fader will stay in this position. Now you move to the next image, where the current value is still at 0 EV. The thumb position (75%, which would translate to +2.5 EV)) is no longer in sync with the value (0 EV, which should be a thumb position of 50%). However, once you start moving this non-motorized fader slightly now then the exposure value will jump to the current position at +2.5 EV no matter what the original value was.
Now imagine you have a set of already finished images, each with different adjustment values and not just adjusted exposures, but also highlights, shadows, whites, blacks, and so on. When moving through the pictures the non-motorized fader positions will almost never match the current value.
In essence this renders non-motorized faders useless for Lightroom usage, so do not buy a controller with non-motorized sliders.
Note: MIDI2LR provides the optional ‘Pickup Mode’ to minimize the danger of unintended changes with non-motorized faders. In this case, moving the fader will not change any values until the fader has been moved to the current value. However, I still consider this as a workaround for a wrong type of control — like how you can use a hammer to drive a screw into wood.
Knobs
Similar like faders turning knobs (or control dials) can change adjustment values. However when buying a controller be careful to select the right type of knobs here as there are absolute and relative knobs.
Absolute knobs have hard stops at the start and the end and therefore have the same disadvantages as non-motorized faders: The current position will not match the current adjustment value after changing photos most of the time. Therefore do not buy a controller with absolutely positioned knobs.
Relative knobs are the cheapest and the best solution. When you look at other solutions like Palette Gear or Loupedeck, you’ll notice that both are using relative turning knobs or similar relative dials as well. Such knobs have no stops and will simply increase or decrease the current value just like the scroll wheel of a mouse.
Some controllers like the Behringer X Touch Mini have dial knobs that can also act as push buttons at the same time. This is my recommended type of control, as such a pushable turning knob allows you to not only adjust a value by turning the knob but also to reset the same value by simply pushing it.
Another plus of some turning knobs is that they have a LED ring that displays the approximate current value.
MIDI Controllers
OK, so far we have discussed the different types of controls a typical MIDI controller can provide. This should already help you to find a fitting MIDI controller on your own. Let’s have a look at a few MIDI controller that I personally consider as good candidates.
Behringer X Touch Mini
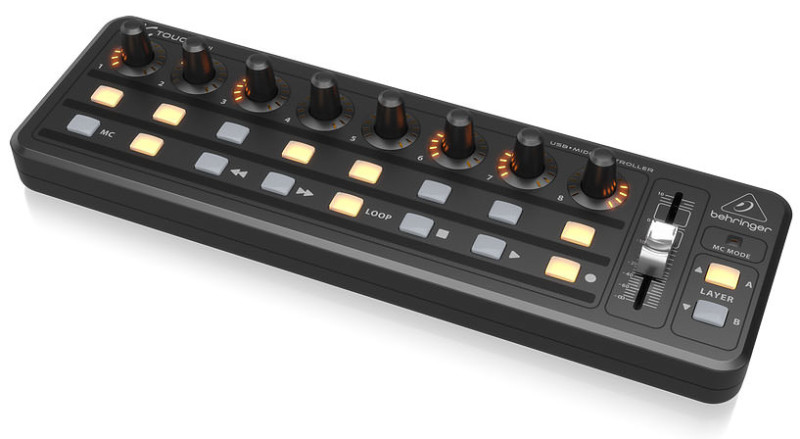
This is the controller I own and which seems to have been evolved as the most popular MIDI controller for controlling Lightroom as lots of tutorials indicate. One big plus is that at a price of less than €70 (~$80) this is a pretty cheap controller, which makes it an ideal first controller when you want to try out MIDI2LR for the first time. However, at the same time, it offers a great selection of controls for Lightroom as well.
It has 8 pushable knobs with LED rings – my favorite kind of control for adjustments. Below the knobs, you have 16 buttons. Then there is one fader on the right, which is unfortunately non-motorized and therefore more or less useless in my opinion for usage with Lightroom. I am not using it and would rather favor to not have it at all. All controls are organized into two layers (typically called ‘banks’) that you can change by pressing the A/B buttons on the right. This allows you to allocate two functions to every single control without switching MIDI2LR profiles. So in total, you have 16 knobs and 32 buttons available for mapping functions: 8 knobs and 16 buttons in layer A and another 8 knobs and 16 buttons in layer B.
Drawbacks are the already mentioned non-motorized fader and a cheaper build-quality (relatively spoken). However, I consider the build-quality very well for the given retail price.
Arturia Beatstep
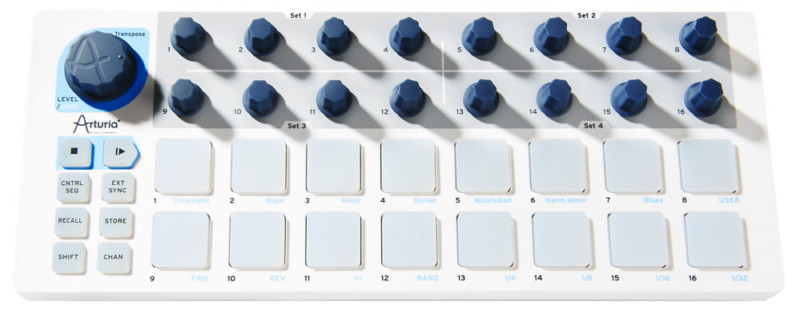
The Arturia Beatstep looks very similar to the Behringer X Touch Mini. But it offers an additional row of knobs, plus one larger instead of the useless slider. As far as I know, the knobs are not pushable and do not have LED indicators showing the current values, which are minor drawbacks. Also, it does not seem to have two banks like the Behringer. There are 8 additional buttons on the left, where I am not sure whether you can use these for MIDI2LR. The price of about €99 (~$113) is very reasonable.
So in case you want to have twice the knobs without the need to switch through Banks, you might favor the Arturia Beatstep over the Behringer X Touch Mini.
DJ TechTools Midi Fighter Twister & Midi Fighter 3D
If price is not a concern for you, you might want to take a look at the controllers Midi Fighter Twister and Midi Fighter 3D by DJ TechTools.
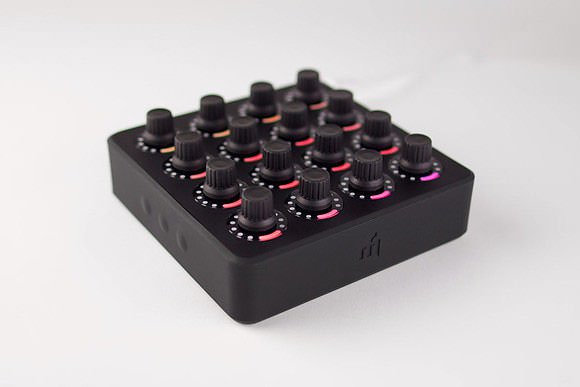
The Midi Fighter Twister offers 16 turnable knobs that are also pushable in four separate banks (64 knobs in total without having to switch a profile). What’s unique here is that you can configure the color of the knobs’ illuminations individually. For example, if you want to assign color adjustments, each knob can be illuminated in the color of the actual adjustment.
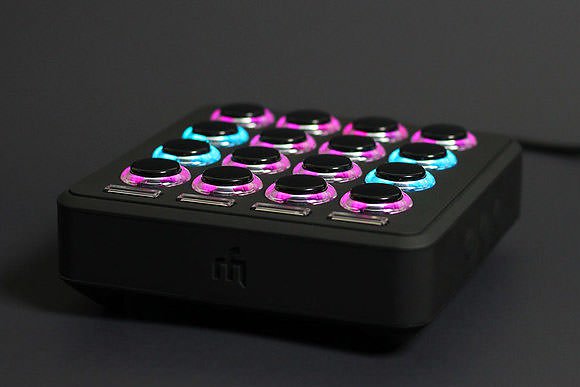
The Midi Fighter 3D supplements the Twister with 16 Buttons that are also organized in four separate banks. Also here you can change the color of the illuminated buttons. It also has motion detection, which might not be useful for this use case. If you are lucky you might be able to get the cheaper previous version Midi Fighter Spectra, which just had the buttons without motion detection.
I don’t have any doubts that both devices are made of the highest quality.
Now imagine the Midi Fighter 3D with its buttons below your left hand to switch functions and the Midi Fighter Twister with its knobs below your right hand to adjust values. I could imagine that this would make a great setup. However each controller costs about €250 (~$285), so the total setup will set you back about €500 (~$570). More expensive than a Loupedeck controller while still way less expensive than a comparable Palette Gear setup.
Behringer X Touch Compact
If you absolutely want a controller with motorized faders, have a look at the Behringer X Touch Compact.
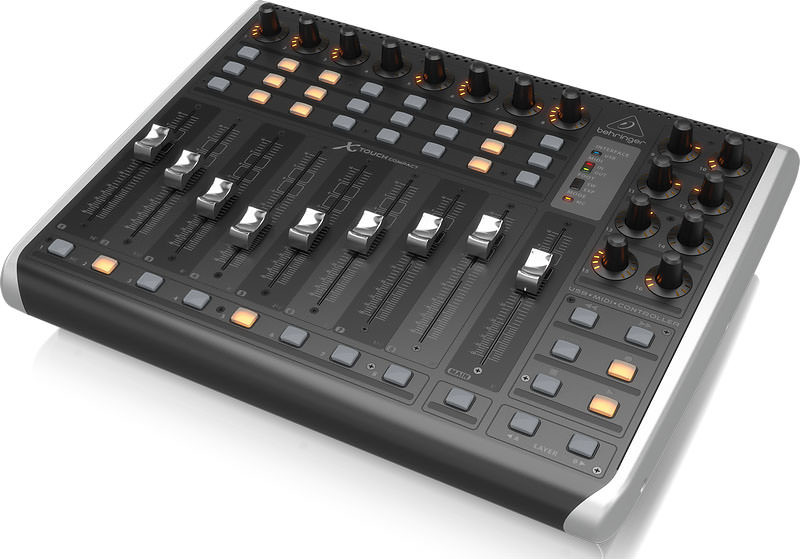
It has 9 motorized faders, 39 buttons and 16 knobs (the same as the X Touch Mini) in two banks. You might want to take a look at this video by Bryan Shattuck for some tips. By the way: The video also shows how motorized faders work when he is switching between photos. The faders jump to the position of the current value very quickly.
Given what the Behringer X Touch Compact provides at a price of around €300 (~$342) it looks very attractive. You just need to figure out what to do with all these controls. Also be aware that it will take away more space on your desk and it also needs an AC power connection.
Final Words
After reading this article, you should have gained the basic knowledge for selecting a MIDI controller.
Whatever MIDI controller you will use with MIDI2LR, once you are using it consider how much time and cost it will save you once you have gotten used to it. And then consider to donate a share of the saved costs to the MIDI2LR developer through his website. The developer, Rory Jaffe, is doing a great job and is very responsive.
About the author: Carsten Schlipf is a German software developer and amateur photographer. You can find his work and more of his musings on photography on his website. This post was also published here and here.