
It’s not often I get to shoot very simple, clean white light shots, but in a recent shoot the model asked if she could get some updated ‘Polaroids’. For those of you not familiar with the term when used in reference to a model shoot, it’s actually not the now-obsolete and ludicrously expensive single-shot film, but a request for very basic portraits of the model for their agency.
This ‘Polaroid’ term is a relic from the analog film days and it essentially now means shots that are un-retouched and with the model wearing very little makeup.
I was happy to shoot a few of these ‘Polaroids’ as it literally takes two minutes. You throw up some simple light, the model stands in for a couple of headshots, some three-quarter lengths and full body etc. You then send the shots with almost zero retouching over to the model and she then passes them on to her modeling agency so that they can be used as a reference point for those who are interested in working with the model in the future.
Tip: Just really quickly while we’re on this subject. If you’re a photographer selecting models from an agency, you really must insist on seeing the models ‘Polaroids’. In a world of amazing makeup and ridiculous post-production, you need to be looking at what the subject looks like without all of that. Failure to do so will result in you being caught out with a model with bad skin or worse.
So back to the setup. I knew that for these raw looking shots that the light had to be very clean and flattering and without many shadows. This way, the light and its shadows aren’t hiding anything and a soft light at least makes the model look her best under those raw conditions. Like I said at the start, I rarely shoot simple white light but I did have an idea that I’d wanted to try for some time and I thought this would be a perfect opportunity to do so.
Why You Never See a Globe Modifier Being Used
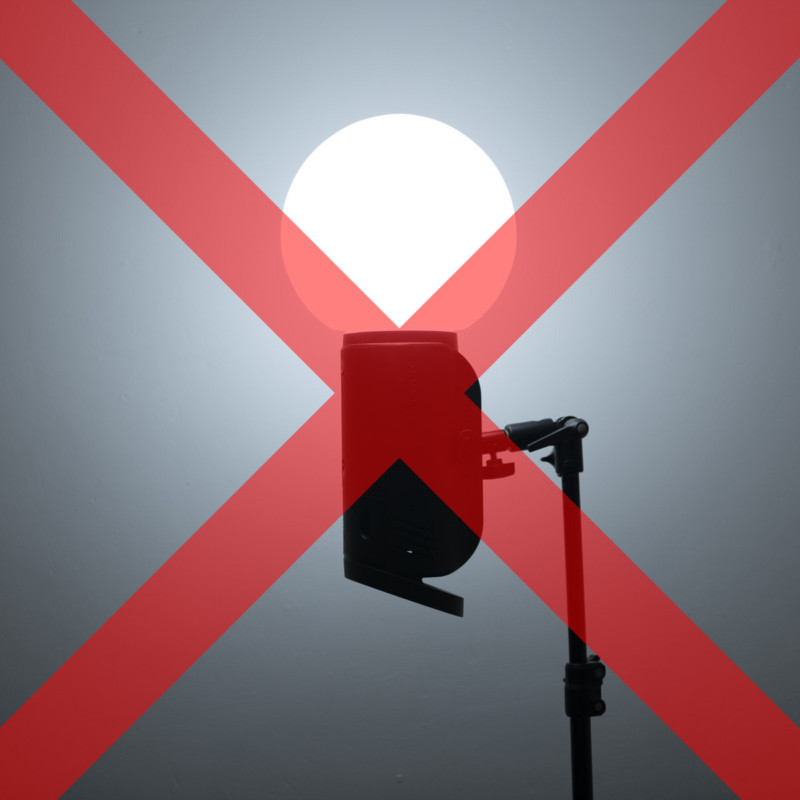
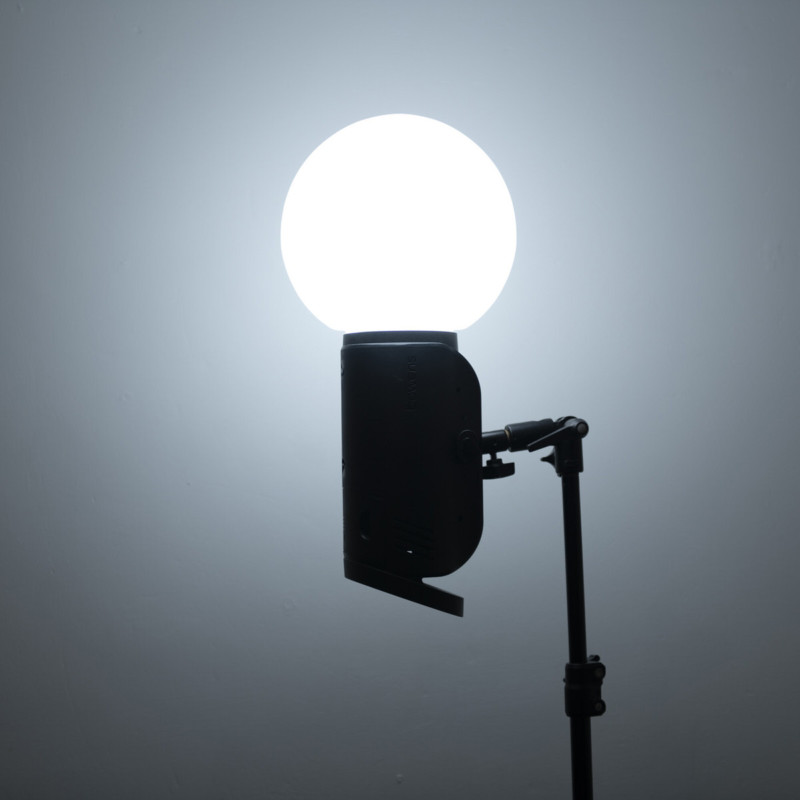
For this setup, I only used one light and the modifier I used was actually a DIY one. The modifier is essentially a very diffused globe that sits on top of my strobe. The resulting light from this throws light absolutely everywhere around the room, especially when pointing straight up. It throws light onto the model, onto me and all over the room that you’re in. You can see why this type of modifier is not often used, because as photographers we crave absolute control of the light and this diffused globe is not giving us any control whatsoever.
But we can use this one very fundamental flaw of globe modifiers to our advantage if we’re smart.
What Do I Need?
Firstly let’s see the DIY diffusion globe I was using. The globe itself is a simple FADO desk lamp that I bought from IKEA and its about 25cm in diameter. I then just removed all the wiring and bulb from the inside and it was ready to use in my photoshoot.

Once that was done, I simply mounted it to an old speedring with gaffer tape. A speedring, if you’re not sure, is the part of a softbox that attaches it to your light. Imagine if you removed all of the struts from a softbox, you’d be left with the speedring. You can either temporarily dismantle your softbox for the speedring for this setup, or just use a spare one so that you don’t have to keep re-taping the globe on each time. Speedrings are also really cheap depending on the strobe brand you use so it might be worth picking up an extra one anyway.

First Setup: Direct-Light
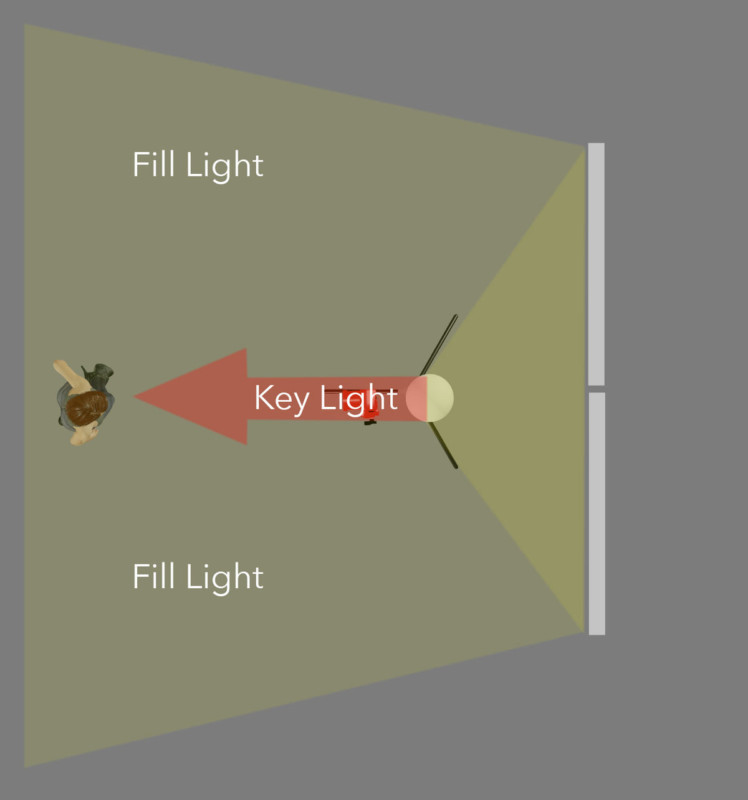
Now that we have our light ready to go, let’s take a shot of the model with the globe pointed directly towards her and see what the results look like. Here’s a diagram of the setup I used below.
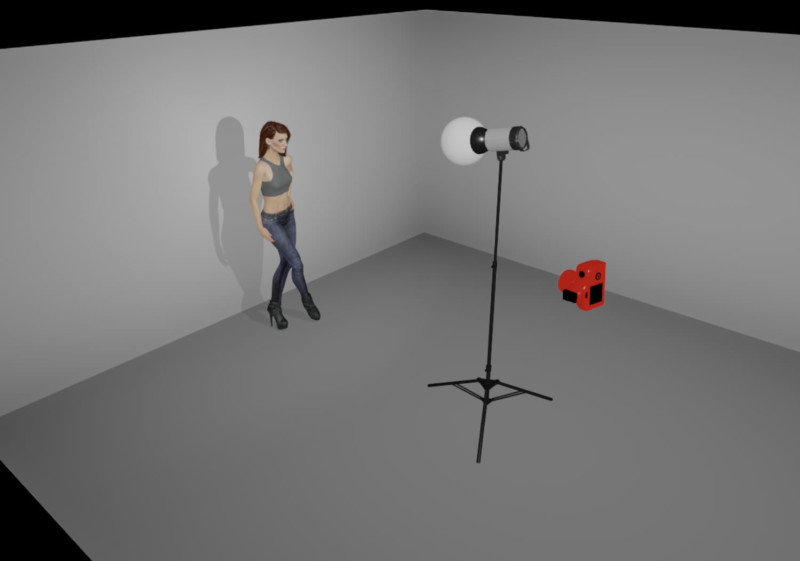
Now let’s take a look at the resulting images from this direct light setup.
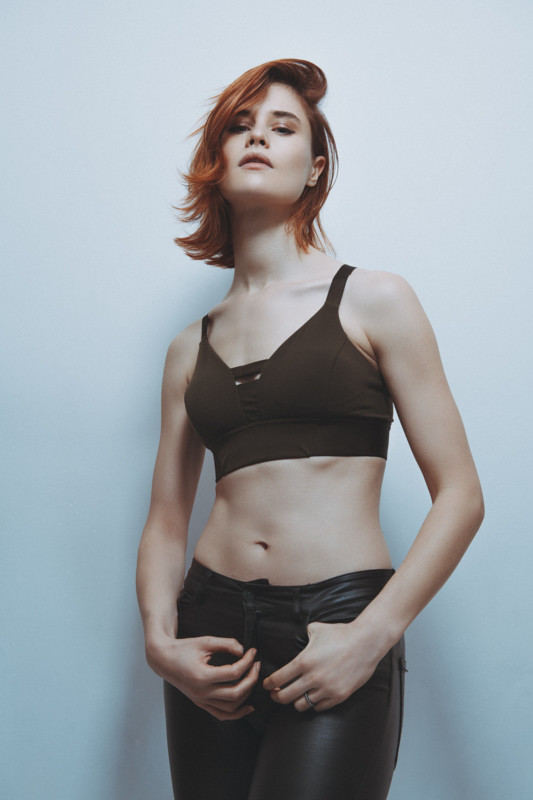
So you guys can see for yourself that although there nothing wrong with these shots, there is still a lot of shadowing going on, not only on the model but also the background as well.
You may actually like this look as it provides very clean and directional lighting that is still flattering due to its diffused softness. So if you’re happy with this, you’re done and you can X-out of here now…. but if you’d like to see a far more beautifying look without the need for any additional lights, read on.
Second Setup: Diffused-Light
Like I said earlier, the real beauty of this setup is to use its greatest flaw as its greatest strength. I mentioned that this diffused globe throws light absolutely everywhere, including onto the model, you the photographer as well as all over the room that you’re in. So here is the trick. By throwing up a couple of big white polyboards behind you, (or a big white sheet like I did), you’re effectively creating two lights. One light is the small globe that is a single point of light in front of the model, and the second light is now that big white sheet behind you.
Take a look at the lighting setup below and then I’ll go on to explain why and how this works so well.

Now take a look below at some of the resulting images from this diffused-light setup.
Remember: the images below are from a SINGLE light setup!
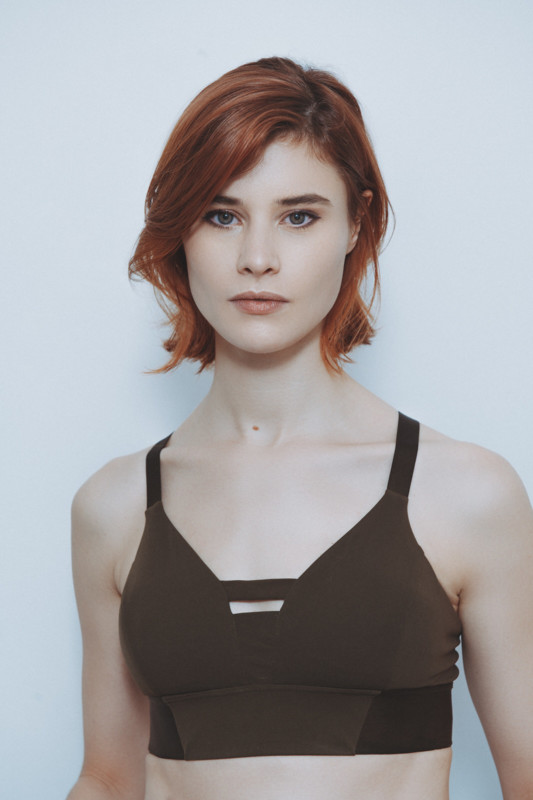
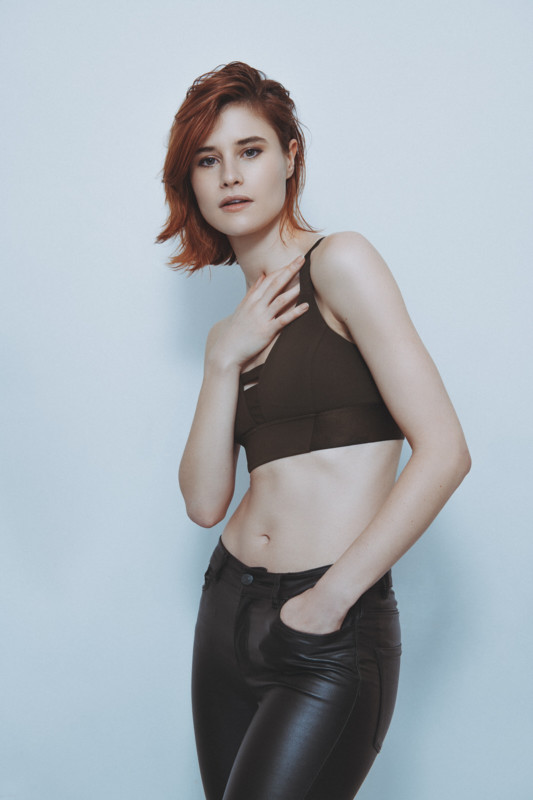
Look at the strong edge of the shadows yet filled with plenty of soft light. Look at how this setup still creates highlights, as can be seen on the legs, and look at how there are highlights and shadows on the arms in the three quarter length shot. All of this results in a very flattering light because it cast shadows to create shape but those shadows are also incredibly soft.
As those of you who’ve followed my work for a while will know, I rarely shoot this type of bright white imagery, but even I have to admit that the light from this setup is absolutely beautiful! Plus this is just ONE light in a small room! This setup could really be used anywhere. Also, this setup only gets better the smaller the room you’re in and that includes home studios as long as the walls are white or at least close to white.
White Polyboard Substitute
I mentioned in the description of this setup that you could use white polyboards to bounce the light if you’re in a studio. These are just large sheets of 2×1 meter polystyrene that can be positioned around the studio to either block or bounce light. Most of us don’t have access to them all the time so a large white reflector or even a big white sheet is just as good.
Two Lights in One
So what on earth is going on here? How can we have defined shadows from a key light, as well as a fill light, but only be using a single light?

Here’s what’s actually happing in the setup. Light from the globe facing the model goes straight to her like any key light to create a strong directional shadow. The resulting look of this is just like the original shots at the top of this article where the globe was pointed directly towards the model without any white bounce behind. The defined shadow of this key light is due to the small size of the globe in relation to the subject.
But with the globe now pointing up, the globe’s light is also hitting the white boards/sheet behind you and bouncing back onto the model. This bounced light now fills in those shadows giving the illusion of an additional fill light.
This ‘two-lights-in-one’ effect of the bounced light has a double bonus too as that bounced light is now incredibly diffused after bouncing off of the sheet, plus it has lost some of its power due to bouncing and having to travel further. Both of these things make for the perfect fill light.
By The Way…
Now you didn’t hear this from me…. but I’ve been told that this setup can also produce some very beautiful black and white portraits… if you’re still into that sort of thing.

Closing Comments
I love that I finally got the chance to try out this setup as it really does produce some utterly stunning light and in such a simple way too. I know there are a thousand and one ‘phenomenal’ single light setups out there, but ultimately most of them either involve an expensive modifier or simply require you to move the light to a different position around the subject.
This single light setup doesn’t require an expensive modifier as you can pick up one of these diffused globes very cheaply indeed, and with two minutes of tinkering you can have it on your light and ready to go. Of course, you can play with moving the light around the scene if you like, but I personally preferred the globe above the camera so as to throw any shadows directly behind the model. This worked particularly well as the subject was always engaged with the camera, but if you were shooting with the model looking away from the lens, moving the globe around could create some cool looks too.
P.S. You can sign up to the Jake Hicks Photography newsletter to receive my free Top Ten Studio Lighting Tips and Techniques PDF.
About the author: Jake Hicks is an editorial and fashion photographer based in Reading, UK. He specializes in keeping the skill in the camera and not just on the screen. If you’d like to learn more about his incredibly popular gelled lighting and post-pro techniques, visit this link for more info. You can find more of his work and writing on his website, Facebook, 500px, Instagram, Twitter, and Flickr. This article was also published here.