A common post-production question involves Opacity and Fill, and what the differences are between them when it comes to photography. In this 14-minute video, Marc Newton from The School of Photography explains what sets them apart and how properly using them can dramatically improve your images.
On any image, if you look over at the Layers panel in Photoshop, you’ll see both the Opacity and Fill options for any given layer. Newton says that while these might seem like they’re redundant features at first glance, there is a distinct difference. Opacity will change the transparency of everything that is in the selected layer, while Fill will change the transparency of whatever is filling the layer but will ignore any effects that have been applied to it.
As Newton explains on The School of Photography, graphic designers often use Fill to adjust how text effects appear. For example, if you apply a stroke to a text layer and then reduce the fill to 0%, the stroke will remain but the original color of the text will fade away and appear transparent. If you were to do this with just the Opacity slider, the entire layer would fade, including the stroke.
That’s all well and good, but photography is a different animal, right? How can a technique that is more commonly used by graphic artists for text effects benefit photographers?
“Well in general it will benefit you when using blend modes with your layers,” Newton says. “The fill will only make transparent the fill of the layer and not change any effects that have been added to that layer. Below we have a typical sunset picture. When shooting into the sun like this you are likely to get bright spots in your picture, i.e. the sunburst.”

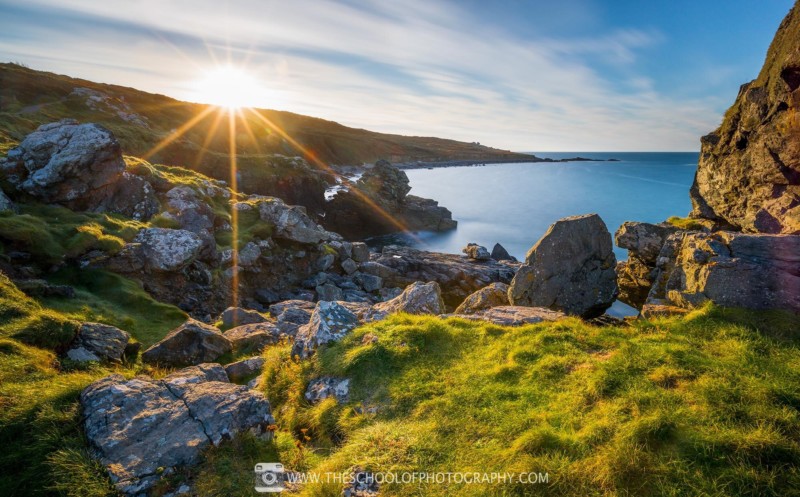
The image above is a “typical” sunset that Newton has provided, characterized by blown-out highlights.
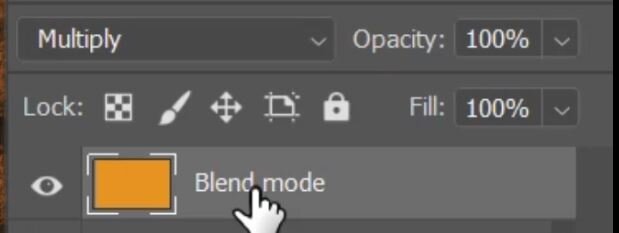
“To tone down the highlights you can add a layer above the photo, fill this layer with orange (copied from the sunset), then change this layer’s blend mode to Multiply,” Newton says. “This will tell Photoshop to stick this color to only the highlights below. This will become the effect of this layer and this effect will now not be made transparent when reducing the fill.”
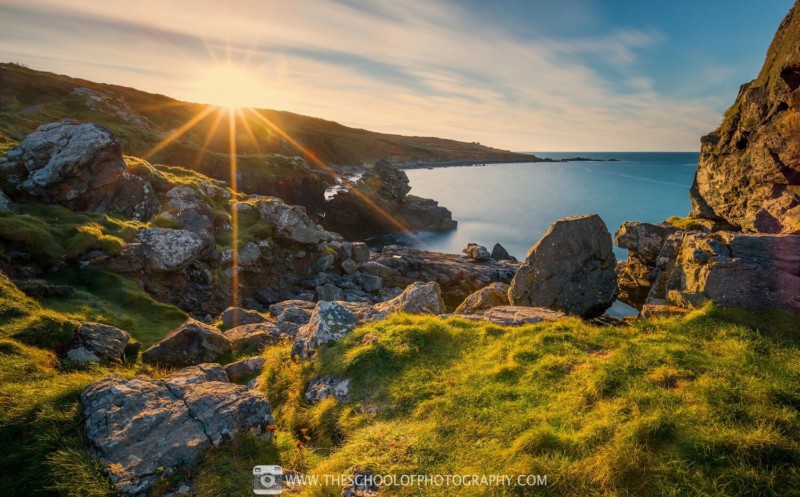
“Below are two examples with the same orange layer over the top of the original photograph,” Newton says. “They have both had the fill of this layer reduced to 20%, however one had the blend mode of Multiply attached to it. As you can see with this example the effect of the multiply blend mode has been left behind whereas the fill of the layer has been made transparent thus toning down and warming up only the highlights in the photo.”
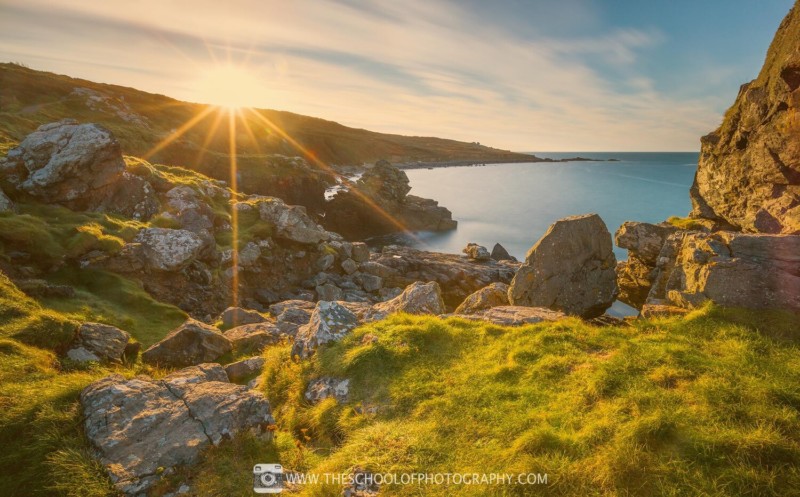
In the example where a blend mode has not been added, Newton just did a 20% transparent orange ove the whole image: “The fill here is making the whole layer transparent as there are no effects attached to it.”
Newton says that this technique is used frequently with fill and texture layers by skilled photo editors to dramatically improve landscape photography. If you would like to learn more from Marc Newton, you can find more techniques and tips on The School of Photography’s website and YouTube Channel.
Image credits: Images by Marc Newton and the School of Photography and used with permission.