Upsampling is a tool in most post-processing software that allows you to increase an image’s resolution after taking it. Upsampling lets you boost, say, a 24 megapixel image to 48 megapixels, 96 megapixels, or 240 megapixels! But doing so doesn’t mean you’re actually capturing more detail.
This article covers everything you need to know about upsampling, including the best upsampling software today and my recommendation for how much to upsample a photo.
What Is Upsampling?
Upsampling is a tool in post-production software to increase resolution. It’s most common in photography and graphic design to increase the resolution of an image, but it can also be used to increase the resolution of a video file (say, from 360p to 720p) or any other visual data.
However, upsampling isn’t a magic bullet. A 12 megapixel image will never contain as much detail as a comparable 48 megapixel image no matter how much you upsample it or what algorithms you use. Even if it could, you could just upsample the 48 megapixel image by a corresponding amount and still come out ahead!
Rather, upsampling is a fairly niche tool to solve a couple specific problems that you may come across occasionally when you work with images. It’s not something meant to be used all the time; doing so would only take up space on your hard drive without meaningfully improving the quality of your images.
When to Upsample an Image
There are two major situations where upsampling an image is a good idea. The first is when you’re working with a digital file that is extremely small, maybe just a few hundred pixels across. The second is when you’re printing an image and want to avoid pixelation in the details. I’ll go through both of those below.
1. Low Resolution Images
If you come across a tiny image online (public domain hopefully) and you want to put it in a presentation or send to someone, you may be wondering if you can use an upsampling algorithm to increase its level of detail.
In general, the answer is no – there is no possible way to increase an image’s detail if it wasn’t there in the first place. But what you can do is decrease its pixilation. Rather than a jagged “stair step” of pixels along a diagonal line, upsampling can give you a bit of a smoother edge.
This is a typical example scenario of what you’d be able to do with upsampling on a low resolution PNG (click to see larger):
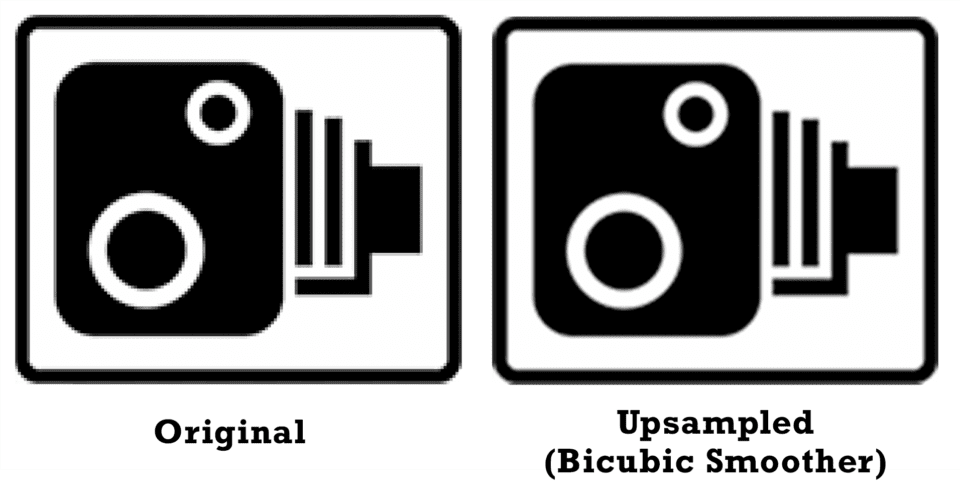
As you can see, it’s not a great improvement, but the second image does look a bit better. The pixellation has been replaced with some general softness, which I find preferable.
Although this isn’t the best upsampling algorithm that exists today, it’s representative of a typical process (in this case, Photoshop’s “bicubic smoother” enlargement). There are some artificial intelligence upsampling algorithms can do better – I’ll get to those in a moment – but there’s still no substitute for a high resolution starting image.
2. Printing Photos
Along similar lines, pixellation can show up if you try to make a large print in photography. Even with a fairly high resolution sensor like a 24 megapixel DSLR or mirrorless camera, massive print sizes (in the range of 24×36 inches and up) can look a bit pixellated upon close inspection.
Just like before, upsampling doesn’t actually add more details to a photo, although some of the newer artificial intelligence algorithms come close. Instead, upsampling can minimize pixellation and replace it with a bit of a blurriness instead.
Here’s a (very, very extreme) crop from a 24 megapixel image showing a palm leaf. Note how the detail looks before and after upsampling using the same “bicubic smoother” algorithm:
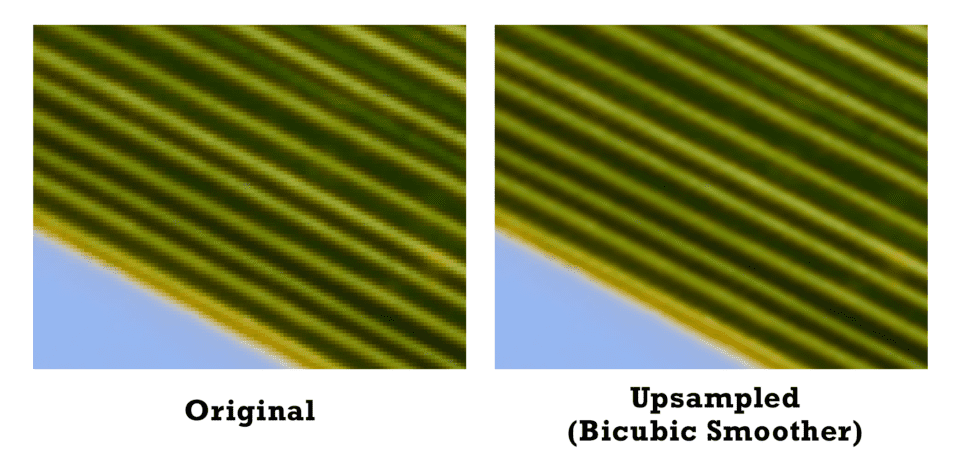
It didn’t exactly get sharper, but it did get less pixellated.
Best Upsampling Algorithms Today
If you’re going to upsample, not all algorithms or software options are equally good. I have no allegiance to any particular company, but there is one general class of upsampling algorithms that is way ahead of the competition these days: artificial intelligence upsampling.
As far as I know, AI upsampling is available in five different software options at the moment: Adobe Lightroom, Adobe Photoshop, Adobe Camera Raw (which is part of Photoshop), Topaz Gigapixel, and Bigjpg. I haven’t tried Bigjpg but the other four all work similarly well as one another. (See my review of Photoshop Super Resolution for a few comparisons).
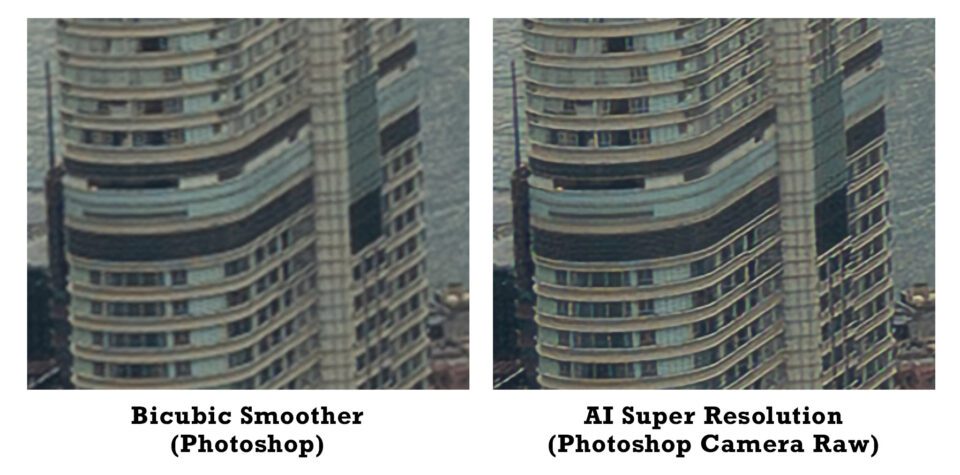
In the image below, you can see the difference between the traditional “bicubic smoother” upsampling algorithm versus an AI upsampler:
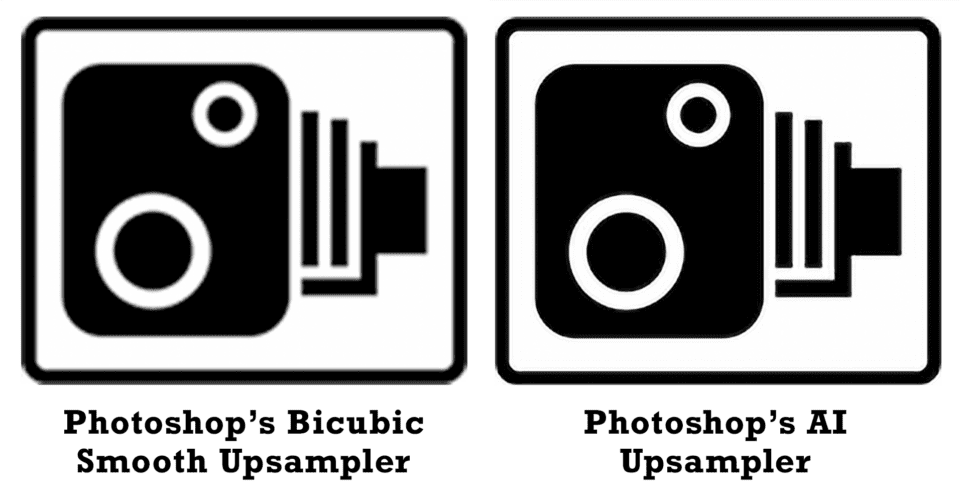
The difference is even clearer in the vector image, although this is a best-case scenario for the AI upsampler because it’s just some lines and curves:
If you don’t have Photoshop, Topaz Gigapixel, or any of these software options, you may not be able to use AI upsampling. But there are plenty of free software options which can upsample your photos, too, plus a few websites. Just Google around and you’ll find one that works. All of the free ones use similar algorithms as one another – about like Bicubic Smoother – and they get the job done if you just need some basic upsampling.
How Much to Upsample?
The usual goal of upsampling, at least for a print, is to eliminate low-level pixelation. So, it’s worth asking how much pixellation we can even see in the first place – in other words, how many pixels per inch (PPI) our eyes can resolve.
In doing research for this article, I found answers that ranged from about 600 PPI (source here) to 876 PPI (source here). Anecdotally, I can notice small differences between a 600 PPI print and prints with lower pixel densities if placed side by side, and some people definitely have better eyes than I do. However, this assumes you’re staring at the print as closely as your eye can focus rather than standing back from it as you’d usually do.
The typical standard for printing is 300 PPI, and while you may think that sounds low compared to 600 or 876, it’s hardly a bad standard and doesn’t give prints that look pixellated. But just to be on the safe side, when I’m printing on a paper with low texture, I generally upsample to at least 400 PPI instead and sometimes a bit higher. It’s hardly a difference worth worrying about, but if you’re already upsampling, there’s not much harm in aiming above the generally accepted 300 PPI.
Here’s a chart of some common print sizes with a 2×3 aspect ratio, plus the image resolution that will result in 400 PPI prints at each size:
| Print Size (Inches) | Print Size (cm)* | Resolution Needed for 400 PPI | Megapixels Needed for 400 PPI |
|---|---|---|---|
| *Approximate | |||
| 4×6 | 10×15 | 1600×2400 | 3.8 megapixels |
| 8×12 | 20×30 | 3200×4800 | 15.4 megapixels |
| 10×15 | 24×36 | 4000×6000 | 24 megapixels |
| 12×18 | 30×45 | 4800×7200 | 34.6 megapixels |
| 16×24 | 40×60 | 6400×9600 | 61.4 megapixels |
| 20×30 | 50×75 | 8000×12,000 | 96 megapixels |
| 24×36 | 60×90 | 9600×14,400 | 138 megapixels |
| 30×45 | 76×114 | 12,000×18,000 | 216 megapixels |
| 40×60 | 100×150 | 16,000×24,000 | 384 megapixels |
If these seem like surprisingly high resolutions needed for basic print sizes, remember that the figures above aren’t necessarily meant to be your camera’s resolution, but your resolution post upsampling.
An AI upsampling algorithm like that of Photoshop, Lightroom, or Topaz Gigapixel will quadruple your photo’s original resolution without major issues. Again, it doesn’t really add any more detail, but it does reduce pixellation and give a cleaner print. So, whatever resolution your camera has, multiply it by four to see your equivalent on the chart above.
For example, if you’re shooting with a 24 megapixel sensor, you’ll end up with a 96 megapixel image after the usual upsampling. Per the chart above, that’s a good fit for a 20×30 print or smaller. If you don’t need to stare at the print from a few inches away – which, let’s be honest, is almost never needed on such a large print – you can push it up to a 24×36 print and more. This article isn’t a treatise on how large you can print, just whether you should upsample before printing. Plenty of 8-megapixel and 12-megapixel images have been printed on billboards and look great, so don’t let the numbers above stop you.
That said, smaller prints (like 12×18 in the case of 24 megapixels) are going to look crisper than a huge enlargement, even if you used the best upsampling algorithm in the world. It all depends on how strict your standards are and how closely you’re viewing the print.
How to Upsample an Image
The actual process of upsampling couldn’t be easier. You load the image into your post-processing software and find the upsampling or image size tool. If you don’t already know where it is in your software, a thirty-second Google search should answer that. In Photoshop, for example, the AI algorithm is found in Image > Image Size > Resample > Preserve Details 2.0. In Adobe Camera Raw, you right click on the image and click “Enhance.” In Lightroom, you click on the image and go to Photo > Enhance in the top menu.
Once you’ve done that, it’s a simple matter of inputting your desired resolution (if that’s even an option; in Camera Raw and Lightroom, it just upsamples 4x automatically) and that’s it. All that you need to do now is save your image to be published or sent wherever you want.
Conclusion
Upsampling doesn’t add any more detail than you originally captured – it just reinterprets your image to reduce pixellation. Even in the best of cases, with a high-quality AI algorithm, the image won’t look as clean as a high resolution original.
Also, upsampling doesn’t work well unless you captured a pin-sharp photo in the first place, with minimal blur and minimal noise. So, make that your priority! The difference between a sharp versus blurry photo is far greater than the difference between an upsampled versus non-upsampled photo.
Still, in certain cases, upsampling can make a noticeable difference. Any time that you make large prints (or small/medium prints from a low resolution image), I recommend upsampling before sending the image off to the lab or home printer. Same if you’re trying to improve the detail in a low-resolution image online for a presentation.
Even though the differences may not be drastic, you’ll still get some more detail and less pixelation by upsampling compared to using the original. For a technique that requires very little effort, it’s hard to ask for more than that.