Adobe Lightroom is an incredibly powerful tool for photographers, but it can be a little overwhelming if you are new to Lightroom. There are so many sliders, settings, and tools that it can be easy to get lost and confused.
There are many different ways you can use Lightroom to improve your photos, and in this article we’ll look at some of the most useful and practical ways you can work specifically with landscape photos. As a landscape or nature photographer there are some challenges that you will face over and over again with your photos. The topics that we’ll cover in this article will be relevant to many of these situations.
There are a few different ways you can work in Lightroom. You can do everything manually by adjusting each slider or setting. Another approach is to make use of presets to speed up the process. You could create your own presets for settings that you use frequently, or use presets created by someone else. We sell our own Landscape Legend Lightroom Presets to help with all of the most common challenges that you’ll face in processing your landscape photos. Landscape Legend includes 4 different components: one-click presets for instant effects, stackable workflow presets that give you more flexibility, graduated filter presets that can be used in combination with any of the other presets, and adjustment brush presets for working with the fine details of your photos.
In this article we’ll mention some specific presets that are a part of the Landscape Legend pack. If you already own Landscape Legend hopefully this article will help you to see some new ways that you can use the presets. If you don’t have the presets, the content in this article will still be relevant to you as we’ll cover the settings that you can adjust manually. And of course, if you decide you want to try the presets and see how they can help you to save time, you can learn more about the presets or get them here.
Now, on to the specific ways that you can use Lightroom with your own images.
1. Increase Dynamic Range
One of the most common challenges of landscape or nature photography involves dynamic range. Camera sensors have come a long way in the past few years, but no current camera sensor is capable of replicating the same dynamic range that you are able to see with your eyes. The result is that many of your photos are likely to suffer from shadow areas that are too dark, and/or highlight areas that are too light. You may be disappointed when you open the photos on your computer and you notice that the results don’t match up to how the scene looked to your eyes.
There are a few ways to handle this. First, you could bracket your photos and merge/blend multiple exposures of the same scene to create an HDR image. Lightroom has a built-in HDR merge feature, and software like Aurora HDR is even better. The downside is that processing HDR images can be very time consuming, and it’s probably not something you are going to want to do with every photo.
Fortunately, Lightroom offers us some possibilities for improving the dynamic range without needing to go through the process of creating an HDR merge for every image. In the “Basic” panel you’ll find sliders for Highlights, Shadows, Whites, and Blacks. These are some of the most powerful sliders in Lightroom’s Develop Module. Move the Highlights slider to the left (negative settings) to darken the highlights and recover some of the detail that may be lost in washed out highlights. Move the Shadows slider to the right (positive settings) to lighten the dark shadow areas of the photo and reveal more detail.
How far you push the settings will depend on the photo, but moving the highlights slider left and the shadows slider right is probably something that you will do with almost every landscape photo that you process.
The Whites and Blacks sliders are also very powerful. These sliders set the white and black points (the edges of the histogram). Moving the Whites slider to the right will give you more bright white in the photo, but be sure that you’re not pushing it too far and losing detail. Moving the Blacks slider to the left will give you more solid black in the photo. In general you’ll want to avoid having too much pure white or pure black in the photo.
Most of the one-click presets included in Landscape Legend will open up the dynamic range of your photos to some degree. There are 6 one-click HDR presets that really open up the shadows and highlights.
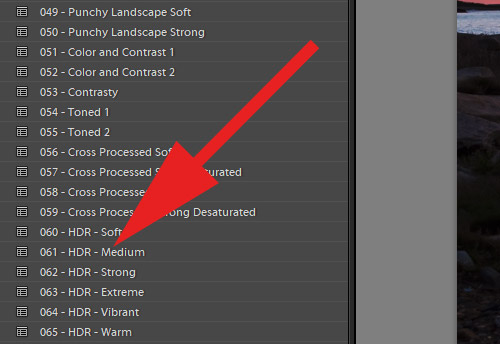
HDR Presets in Landscape Legend
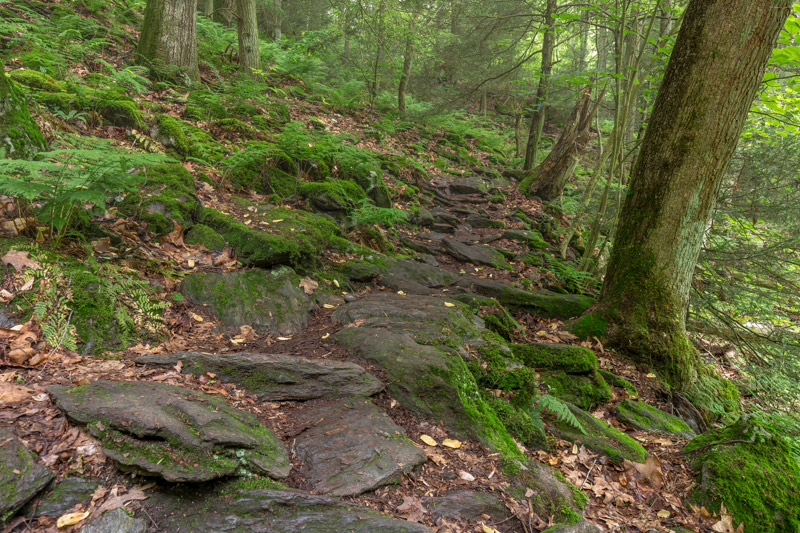
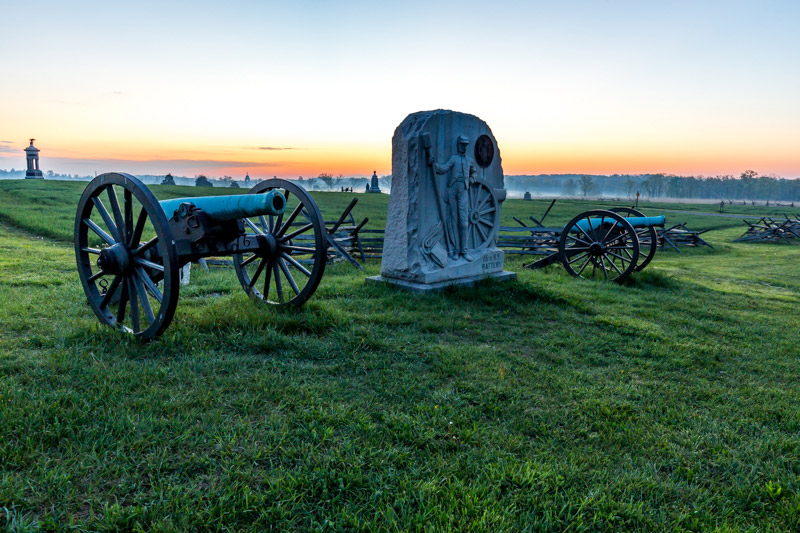
The workflow presets in Landscape Legend include a section for creating the tone base for your photos. These tone adjustment presets will impact the settings for the Highlights, Shadows, Whites, and Blacks sliders only. There are several different options, so you can click on each and very quickly see how it impacts your photo. As an example, the photo below has the Highlights, Shadows, Whites, and Blacks at the default setting of “0”.
Dark Shadows
As you can see, the shadow areas are very dark. If the exposure slider is increased it will lighten everything in the photo, which will make the highlights in the sky too bright. So the solution is to use the Highlights, Shadows, Whites, and Blacks sliders to get the best look.
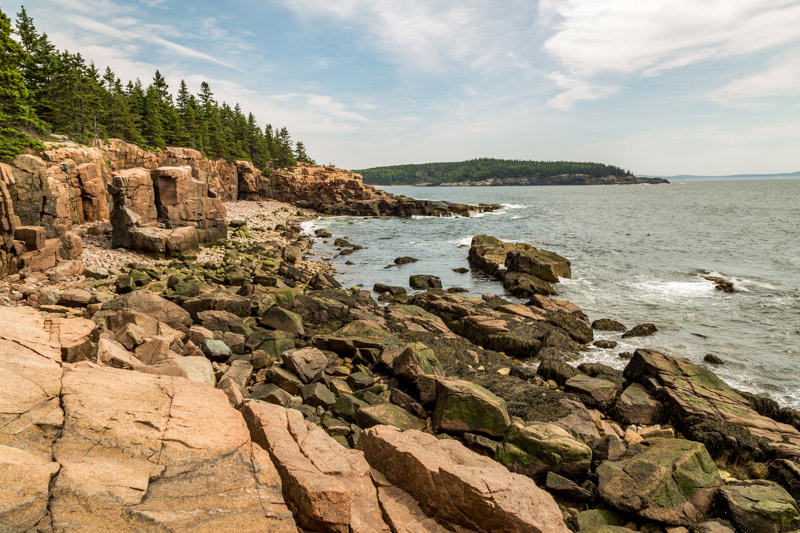
I tried a few different tone presets in the Landscape Legend workflow presets, and the one I like best for this photo is called “Bold HDR Tones 1“, which easily opens up the shadows. After clicking that preset the photo looks like this:
Increased Dynamic Range
2. Adjust White Balance
The white balance will also have a big impact on how your photo looks. Of course, you can adjust white balance settings in the camera, but if it’s not quite right you can always adjust it in Lightroom during post processing. You can either warm up the photo, or cool it down.
Also in the “Basic” panel of the Develop Module, Lightroom gives us Temperature and Tint sliders to adjust the white balance. If you’re working with RAW files you’ll have a few presets that Lightroom presents in a drop down menu (daylight, cloudy, shade, etc.). There is also an “auto” setting that is available with both RAW and JPG files. Of course, you can also adjust the Temperature and Tint sliders manually with both RAW and JPG files.
Let’s take a look at an example photo. The photo below is too cool, especially in the water.
Too cool
If I move the Temperature and Tint sliders to the right to warm up the photo it looks better.
Warmer
The workflow presets in Landscape Legend include several presets just for adjusting white balance. You can use these with both RAW and JPG files, and you won’t need to access the dropdown in the Basic panel to use them, saving you some time.
3. Selectively Sharpen Specific Areas of the Photo
Lightroom’s Develop Module includes several sliders for sharpening your photos, but in some cases you may want to have fine control over the specific areas of the photo that are sharpened. If you don’t want to apply sharpening evenly over the entire photo you have a few options.
One of my favorite approaches is to use local adjustment tools like the graduated filter or the adjustment brush to control what is sharpened and what is not sharpened. For example, if you want to sharpen everything in the foreground you could use the graduated filter. But for this example, I’m going to work with the adjustment brush tool.
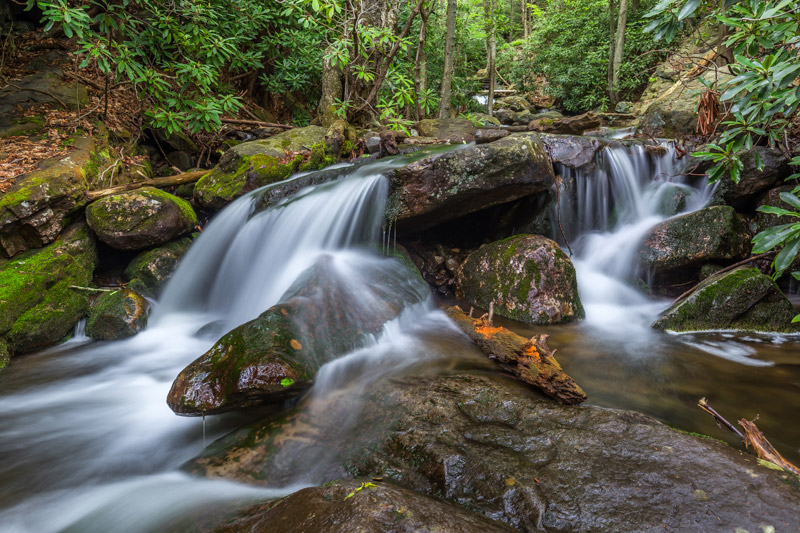
In the photo below I would like to sharpen the rocks along to coast, but I don’t want to sharpen the water or the sky.
Before Selective Sharpening
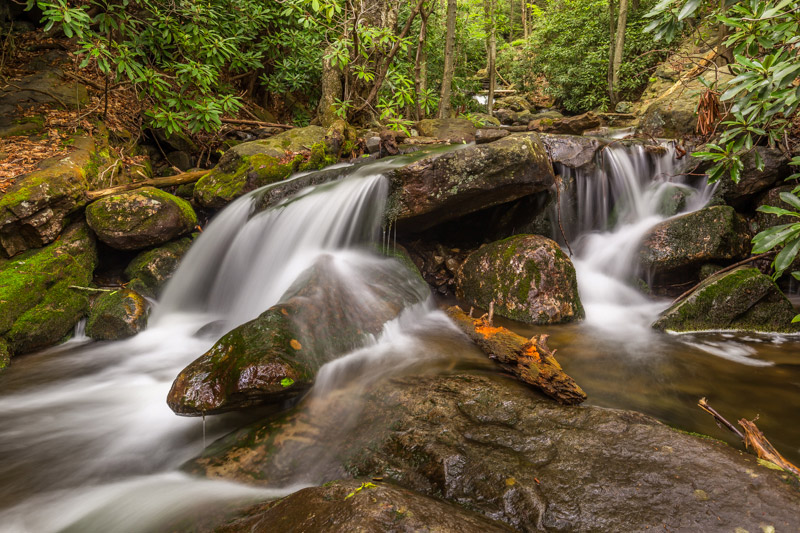
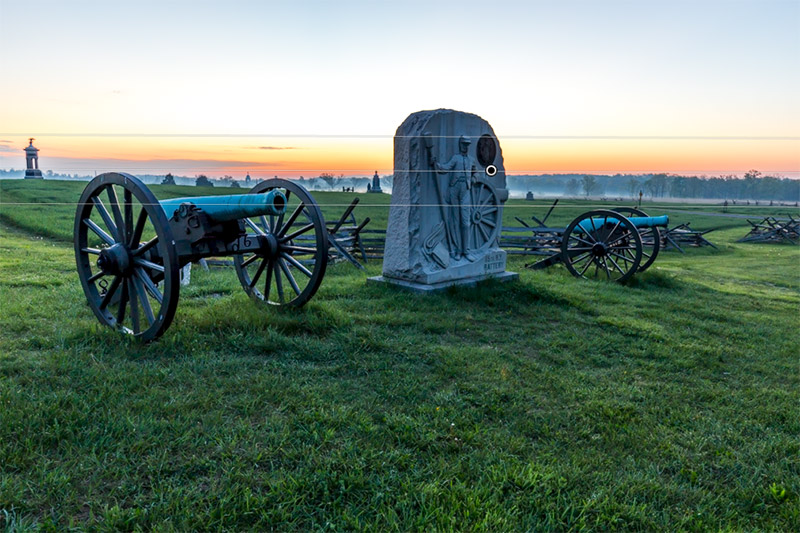
To do this I can select the adjustment brush tool (keyboard shortcut “K”). I can then brush over the areas of the photo that I want to sharpen. The image below uses a red mask overlay to show the areas where I brushed over the photo.
Selective Sharpening
Now I can adjust the Sharpness slider of the adjustment brush and it will only impact the areas of the photo that were brushed, so it won’t sharpen the water or the sky. You may also want to adjust the Clarity slider of the adjustment brush, which also helps to give it a sharper look.
Landscape Legend includes brush and graduated filter presets for sharpening. There are presets for 3 different levels of sharpening, so you can get just the right look for your photo. So with this photo I am selecting one of the sharpening presets and the sharpening will be applied to areas that I brushed.
Sharpening Presets
4. Use Selective Blur
Just like sharpening, you can also use the graduated filter of the brush tool to selectively blur specific parts of your photo. For example, you may want to blur the foreground or objects in the photo that are off in the distance. To do this just use the graduated filter or adjustment brush to select the area of the photo that you want to blur, and the move the Sharpness and Clarity sliders to the left to introduce some blur.
In the next point we’ll talk about haze, and for the demo photo I am going to combine these two points. I’ll be adding selective blur and haze together.
5. Add or Remove Haze
A few years ago Adobe added a really useful slider, Dehaze, to Lightroom. You can move the Dehaze slider to the right to cut through the haze in a photo. An example would be if you have a cityscape photo and there is some smog or haze that reduces the visibility. Move the Dehaze slider to the right and it will reduce the haze (be careful not to move it too far or you will get some extreme looks). And if you move the Dehaze slider to the left it will actually introduce more of a hazy look to the photo.
The Dehaze slider will impact the entire photo (a global adjustment). However, the local adjustment tools (graduated filter, radial filter, and adjustment brush) also include a Dehaze slider, which gives you a great deal of control. Let’s take a look at an example.
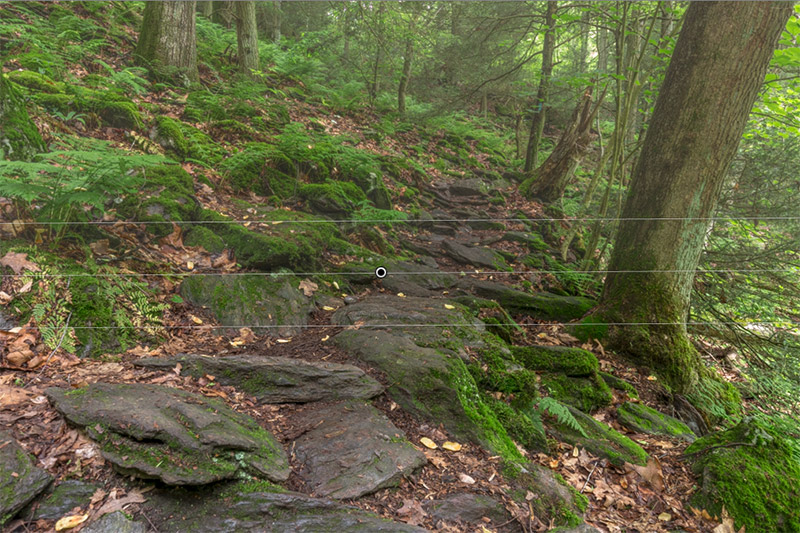
The photo below is the “before” sample. I want to add a subtle amount of haze in off in the distance, so I am going to use the graduated filter to accomplish this.

Before Blur and Haze
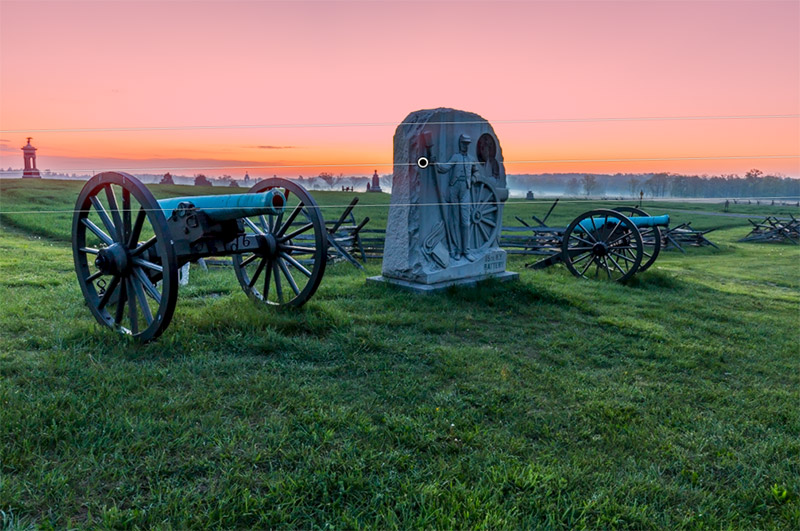
First, I’ll select the grad filter tool (keyboard shortcut “M”). I’ll add the graduated filter by dragging down on the photo so the settings will be impacting the top part of the photo. Then I will move the Sharpness and Clarity sliders to the left to blur the top part of the photo a little. I’ll also move the Dehaze slider to the left to add a small amount of haze to the top of the photo.
Adding Haze and Blur
Now the only problem is that part of the large tree in the foreground is also impacted by the haze and blur because the tree extends to the top of the photo. I don’t want the haze and blur to impact this tree because I want the haze and blur to appear to be in the distance. So what I need to do is click on “Brush” and then “Erase”.
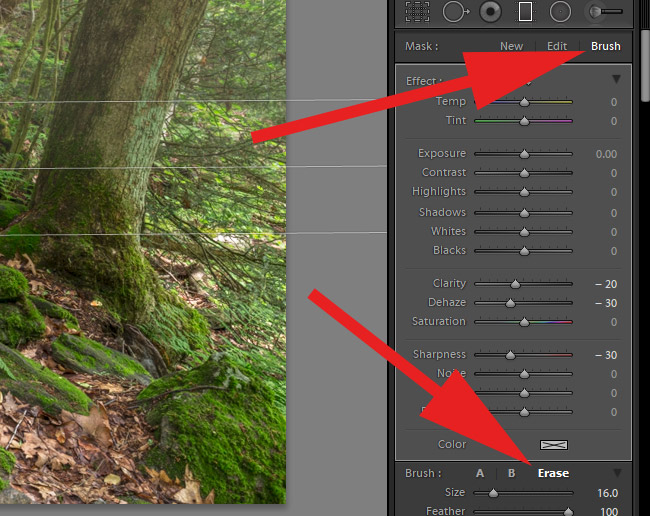
Erase
I can then brush over the tree to erase the graduated filter. Here’s how it looks with the mask showing that the tree has been brushed out or erased.
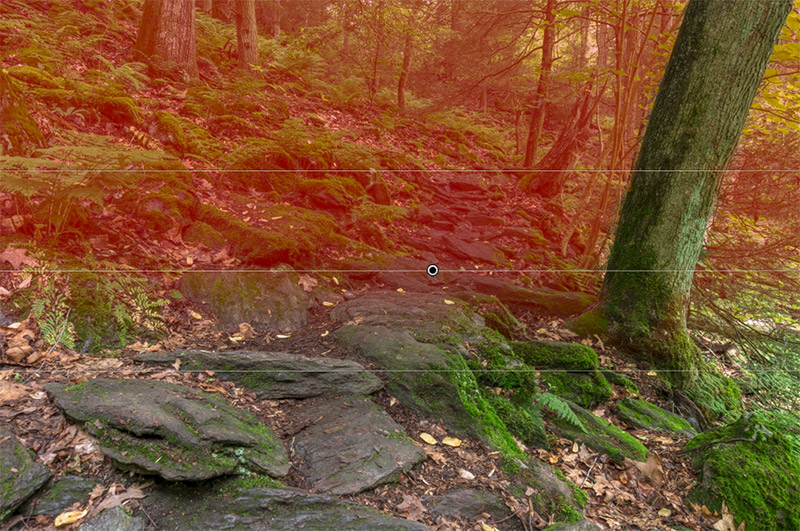
Erased
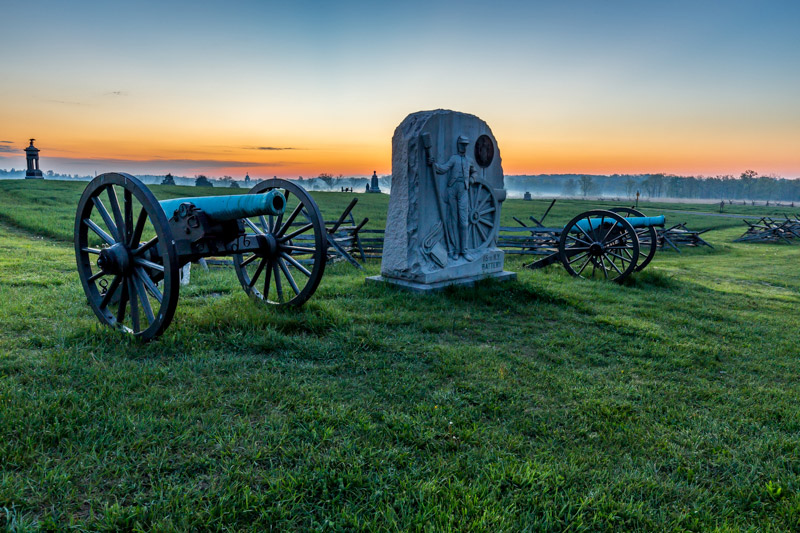
And now, here is the final photo. I only applied a small amount of blur and haze, so it would be a subtle look and not so obviously altered. But you can see that off in the distance it does look a little hazy
After Selective Dehaze and Blur
Of course, you can use the graduated filter or brush and adjust the settings manually to accomplish this. Landscape Legend includes grad filter and brush presets for adding blur and adding or removing haze. With this photos I used one of the graduated filter presets for adding haze, which also adds a small amount of blur. Then I just brushed out the tree. The grad filter presets allow you to blur the distance or the foreground, whichever you prefer (and of course, you can turn the grad filter to the side if you want to use it horizontally).
6. Boost Blue Skies
The sky is a critical part of many landscape photos, and of course, the sky will look a lot different depending on the weather and the time of day. In some of your photos the sky may be a little dull, and boosting the blue color could give it a much better look.
Lightroom gives us some great sliders and ways to work with colors. Of course, you can use the Vibrance and Saturation sliders in the “Basic” panel to add some color to your photo, but those sliders will impact all of the colors in your photo. If you push those sliders too far, especially the Saturation slider, you’ll get some pretty extreme colors.
For situations where you want to boost only specific colors, the HSL (Hue, Saturation, and Luminance) sliders are extremely useful. You can find the HSL sliders right below the tone curve. If you want to boost a blue sky you can push the Blue Saturation slider to the right. You can also move the Blue Luminance slider to the left, which makes the blue colors a bit darker and deeper.
Let’s take a look at a sample photo. Here is the before version.
Sky Lacking Some Blue
The sky will look much different after adjusting the Blue Saturation and Blue Luminance sliders. You can also adjust the Aqua Saturation and Aqua Luminance sliders a little, since the sky usually isn’t completely blue.
The Landscape Legend one-click presets include a few presets for boosting blue skies. The workflow presets also include a section for color adjustments. There are 3 presets for boosting blue skies (light, medium, and strong). All I did with the photo below was apply one of the workflow presets to give the sky more blue.

Boosted Blue Sky
Another option for boosting blue skies is to use the graduated filter. When you’re using the HSL sliders you will be impacting the entire photo. So for example, bumping up the blue saturation could have a negative impact on the water in some photos. In these cases you’re better off using the graduated filter and lining it up on the horizon so it only impacts the sky. At the bottom of the settings for the graduated filter you’ll be able to add some color (see screenshot below).
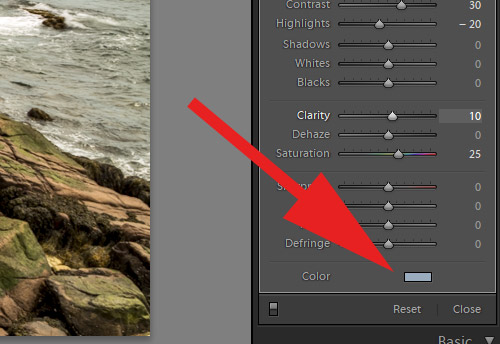
Adding color with the graduated filter
You won’t want to add too much color here, but select a light blue and it can help to enhance the sky in your photo. With the grad filter you can also adjust settings like Saturation, Exposure, and Temperature to get the blue that you want.
Landscape Legend includes graduated filter presets (as well as brush presets) for boosting blue skies. You can simply click on one of the grad filter presets and the adjust the pin, if needed, so the grad filter lines up with the horizon.
7. Improve Greens
Many landscape photos include a lot of green grass, trees, or plants. In some cases those greens may be a little dull and lacking life. You can use the HSL sliders to improve the greens as well. Be careful not to take it too far, as too much green will give the photo an unrealistic look.
I’m not going to go into great detail here, because the previous point showed how to use the HSL sliders. For boosting greens you’ll want to push the Green Saturation slider to the right. You can also try adjust the Green Luminance slider. Move it to the left if you want the greens to be darker, and to the right if you want the greens to be lighter.
Landscape Legend includes some one click presets for boosting greens (and blues). The Field and Sky presets boost both blue and green.
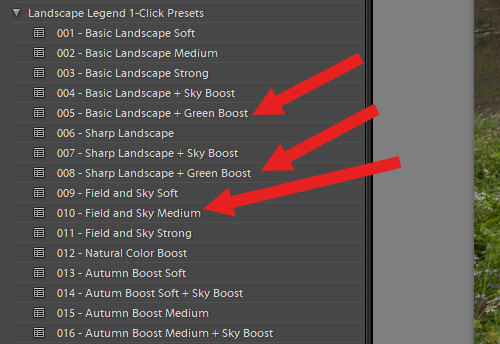
Boosting Blue and Green
The Landscape Legend workflow presets also include presets for boosting green (3 different strengths), as well as presets for boosting both blue and green at the same time (3 strengths).
8. Make Autumn Colors Pop
Autumn is one of the best times of the year to photograph landscapes. Fall colors can really create amazing photos, but there will be some situations where the fall colors in your photos don’t seem to be as bold or vibrant as they appeared to your eyes. Fortunately, Lightroom’s HSL sliders also make it possible to boost these autumn colors.
Let’s take a look at an example photo. The photo below lacks colors that pop.
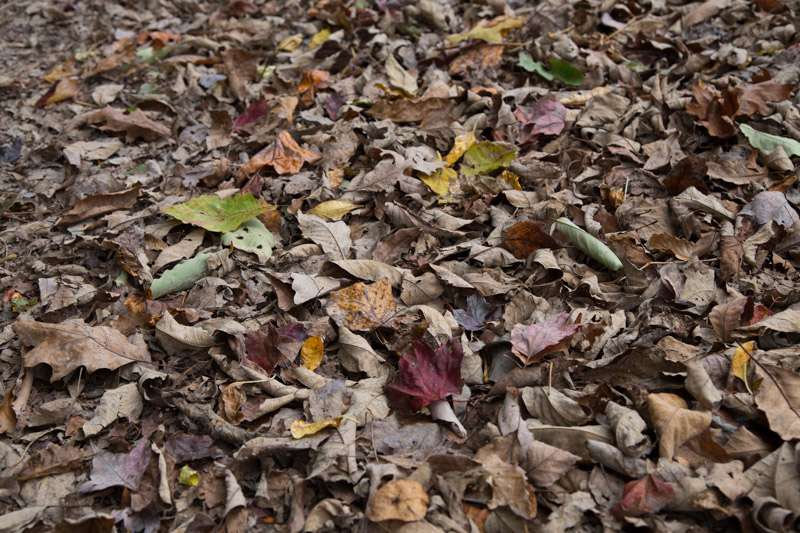
Dull Autumn Colors
You can use the HSL panel to boost the Saturation sliders (move it to the right) for red, orange, and yellow. You can also adjust the Luminance slider for each of those colors as well.
Landscape Legend includes one-click presets for boosting autumn colors.
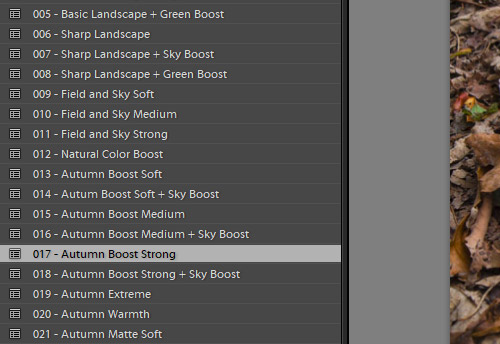
Autumn Boost
With the photo below, all I did was click on the “Autumn Boost Strong” preset in the one-click presets.
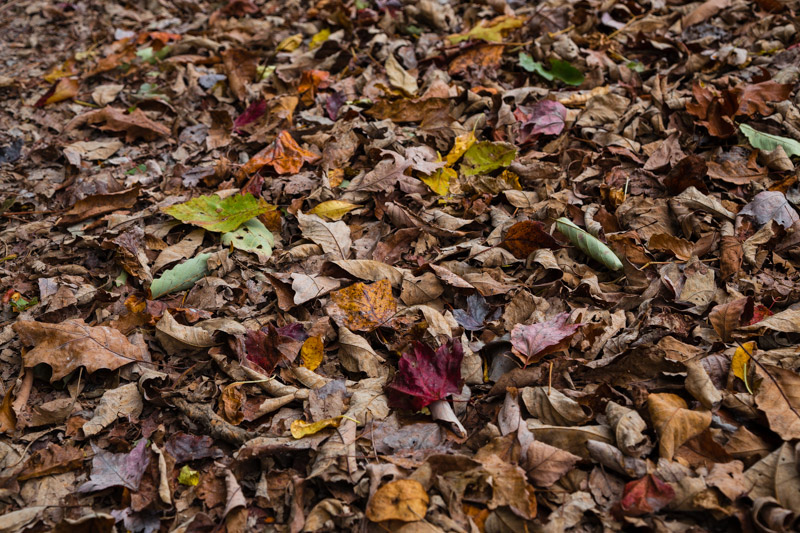
Autumn Boost
The Landscape Legend workflow presets also include presets for boosting autumn colors (3 different strengths). They’ll handle the adjustments in the HSL sliders for you. All you need to do is check and see which strength works best with your photo.
9. Enhance a Sunrise or Sunset
Sunrise and sunset are my favorite times of the day to photograph. The colors and lighting are spectacular (on good days). But sometimes the photos don’t do justice to the colors that you saw with your eyes. In these cases you can enhance the colors in Lightroom to get a more powerful image. Or, in some cases the colors were a little dull in real life and you just want to make your photo a little more appealing.
There are a few ways that you can do this. First, you can use the HSL sliders to adjust specific colors. If the sky had some purple in it you can push the Purple Saturation to the right to give it stronger color. You can also adjust the Luminance slider to make it lighter or darker.
The other option is to use local adjustments, like the graduated filter or the brush tool. I typically use the graduated filter, line it up with the horizon, and then brush/erase out some areas if needed (like mountains or other objects that protrude into the sky).
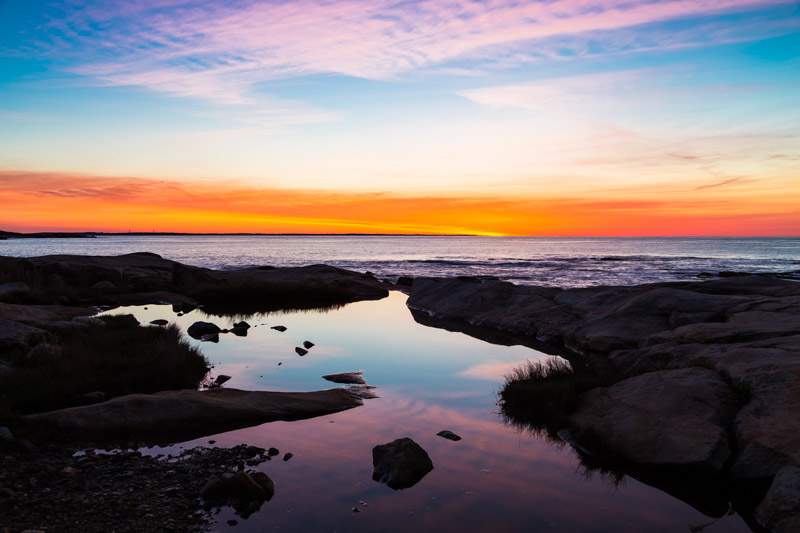
Let’s take a look at an example. This sunrise on the beach was lacking color, so I want to add some color to the sky.
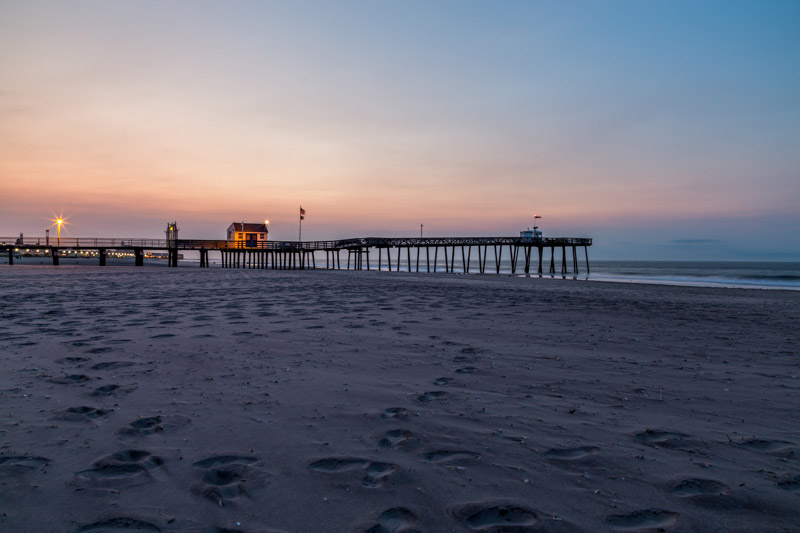
Sunrise without much color
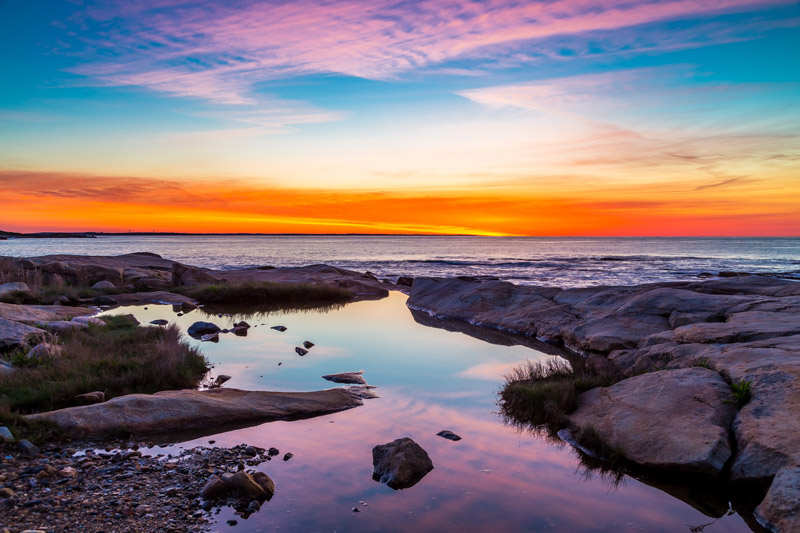
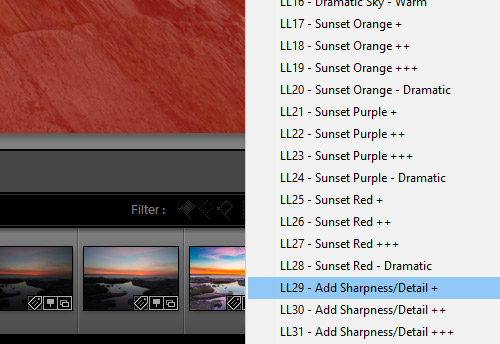
I’m going to use the graduated filter to work with the sky. In this case I’m going to use one of the graduated filter presets from Landscape Legend, but you can also apply the grad filter and adjust the sliders manually if you are not using the presets. The sky had a small amount of purple in it, so I chose a preset called “Sunset Purple – Dramatic”.

Boosted sunrise colors
Landscape Legend includes graduated filter presets for red, orange, and purple sunset/sunrise enhancements. There are 4 different strengths of each of those colors. Just pick the color that best matches the colors of your photo and then select the strength that looks best to you (and line up the grad filter with the horizon, if needed).
I also like to use the autumn color boost presets in the Landscape Legend workflow presets to enhance sunrise and sunset photos. The reds, oranges, and yellows that are boosted for autumn photos are also effective (usually) when boosted for sunrise and sunset photos.
10. Use Split Toning
The Split Toning settings in Lightroom allow you to add different tones to the highlights and shadows of a photo. For example, you could warm up the highlights and cool down the shadows.
While the Temperature and Tint sliders in the Basic panel are great for adjusting the white balance, a lot of times I prefer to use split toning to warm up or cool down a photo. The reason is, you can give more warmth to the highlights than the shadows, or vice versa. You have really precise control with split toning.
Let’s take a look at an example. I’m going to use split toning to add some warmth to this photo. The before version is below.
Before
For adding warmth with split toning, I typically use a hue setting of somewhere between 40 and 50. And then adjust the saturation to set the strength of the look. For this photo I want a little more warmth in the highlights than the shadows, so I’ll use 40 for the hue of each, and 30 for the saturation of the highlights, and 10 for the saturation of the shadows. And the after version is below.
After split toning
The Landscape Legend workflow presets include 11 different presets for applying split toning. There are 3 different strengths for warming, 3 different strengths for cooling, and 5 effects using multiple tones.
11. Create a High Contrast Black & White
Converting your color photos to black & white is one approach to drastically impact your photos in Lightroom. While there are a lot of different adjustments that you can make with black & whites, creating a high contrast look often works well with landscape, and the process is pretty simple. You can click on B&W next the HSL, push the contrast slider to the right, and then adjust the other sliders as needed.
I started with this sample image.
Before B&W conversion
I decided to use the workflow presets in Landscape Legend to get a customized black & white effect that I liked.
After B&W conversion
Landscape Legend also includes many one-click presets for instant black & white effects, including some high contrast black & white conversions.
12. Replicate the Effect of a Graduated Neutral Density Filter
Graduated Neutral Density Filters can be used on your lens to even out the exposure of your photos. You might want to use a Grad ND in situations with a really bright sky and dark foreground. Fortunately, Lightroom’s graduated filter tool will allow you to replicate the same effect.
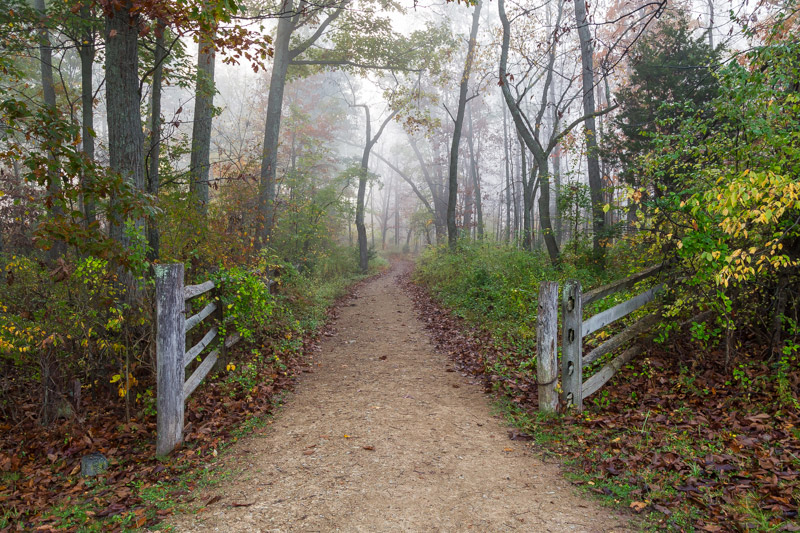
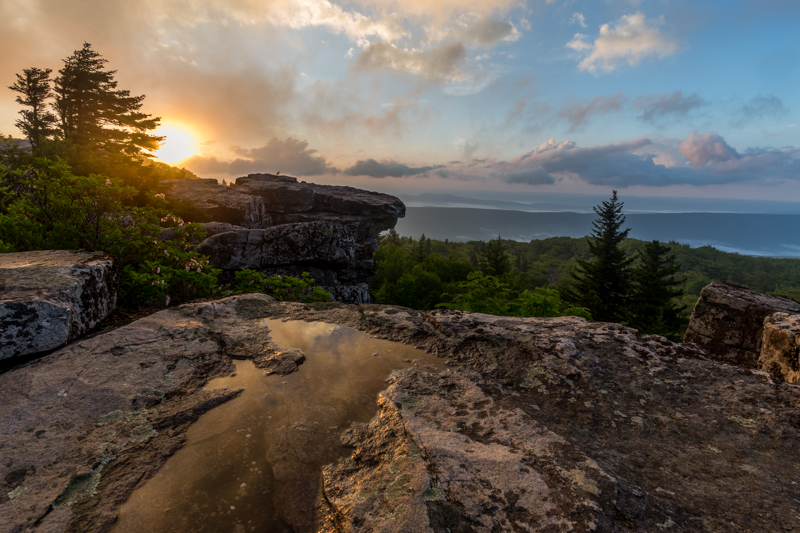
Now for the example. Here is the before version of the photo, with a sky that is too bright.
Before graduated filter
What you can do is select the graduated filter tool and drag down on the photo to apply the graduated filter. Line it up with the horizon. Then decrease the Exposure setting so it will darken the sky.
Adding the grad filter
You may need to erase out part of the graduated filter if you have an object protruding into the sky. With this photo I erased over the monument so that it was not darkened.
Erasing part of the grad filter
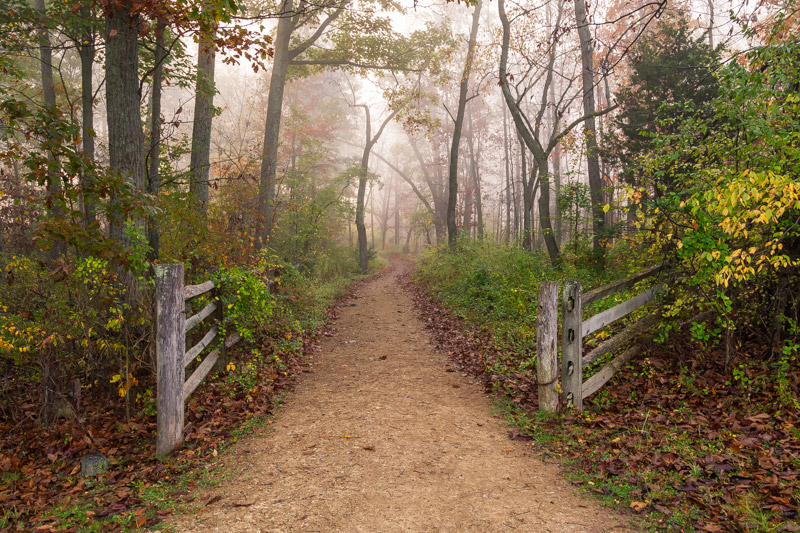
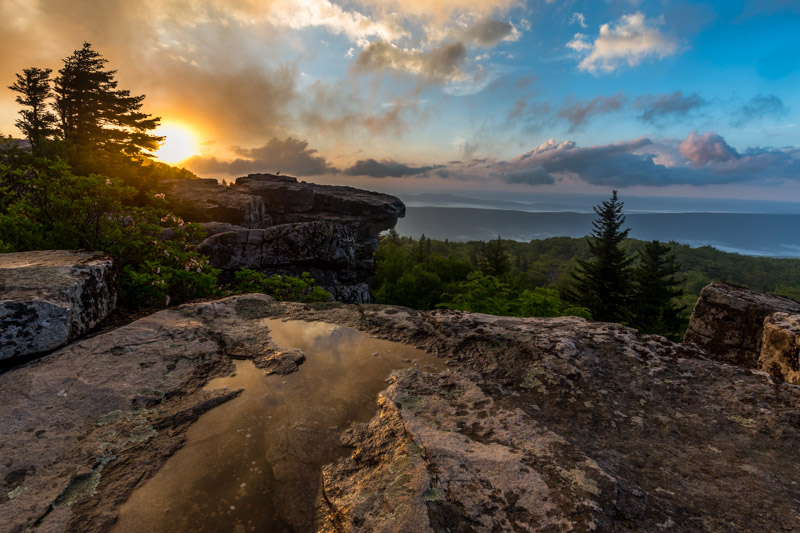
Here is the end result after using the graduated filter to darken the sky.
After graduated filter
Landscape Legend include several presets that replicate the effect of a graduated neutral density filter. There are hard and soft transitions of varying strengths, so you can find one that works well for your photo. Just click on the preset, line it up to the horizon, and brush/erase out anything as needed.
13. Create Drama in the Sky
You can also use the graduated filter to create a more dramatic sky. Add the graduated filter and line it up to the horizon, then boost the Contrast slider and a cloudy sky will become much more impactful in your photo.
Here is a before version of a sample photo.
Before the drama
For this example I used one of the Landscape Legend grad filter presets called “Dramatic Sky”. It adds a lot of contrast, plus small boosts to clarity and saturation. If you don’t have the presets you can do the same thing manually.
Here is the after version of the photo.
After the adjustment
(Bonus Tip) Dodge & Burn
Dodging and burning allows you to lighten or darken specific parts of a photo. To be honest, Photoshop is probably a better tool than Lightroom for this, but if you only need small adjustments it’s often easier just to stay in Lightroom. All you need to do is use the adjustment brush and set the exposure up or down to dodge or burn.
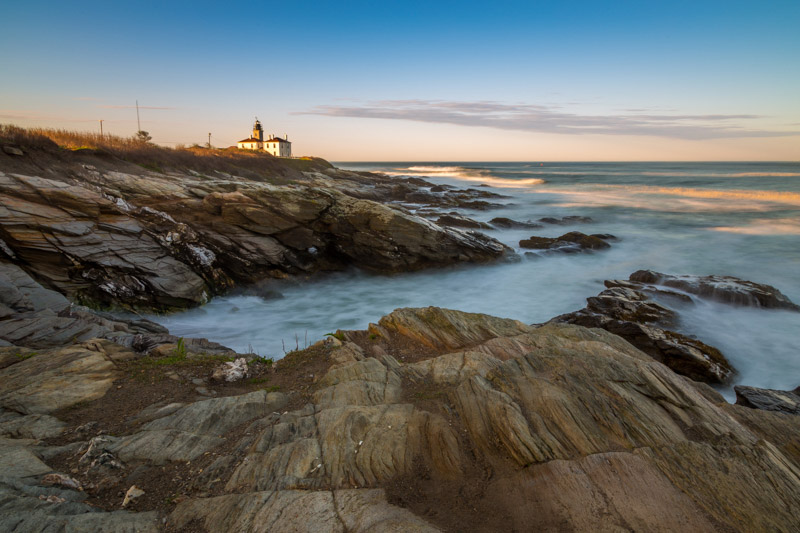
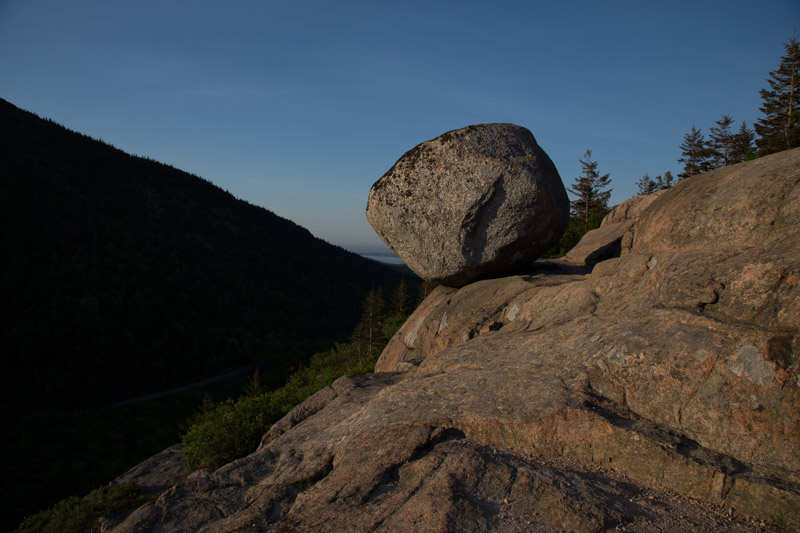
For this sample photo I simply want to darken some of the rocks so they are not so distracting. Here is the before version.
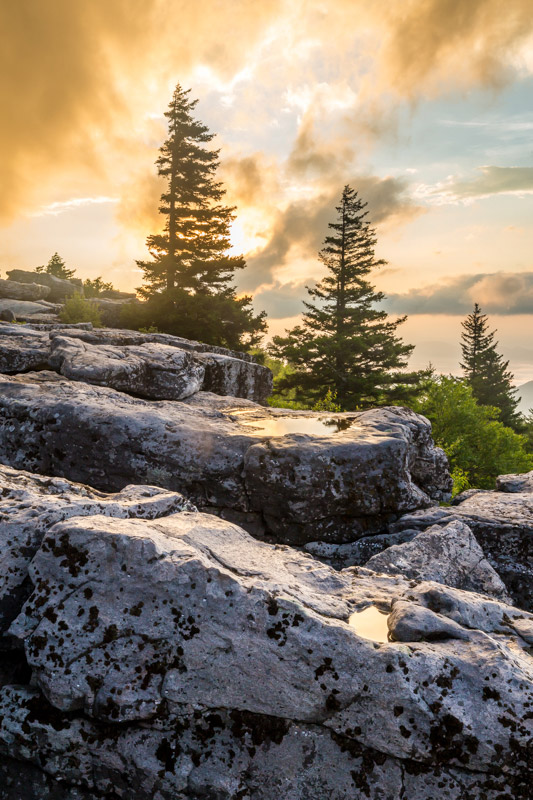
Before burning
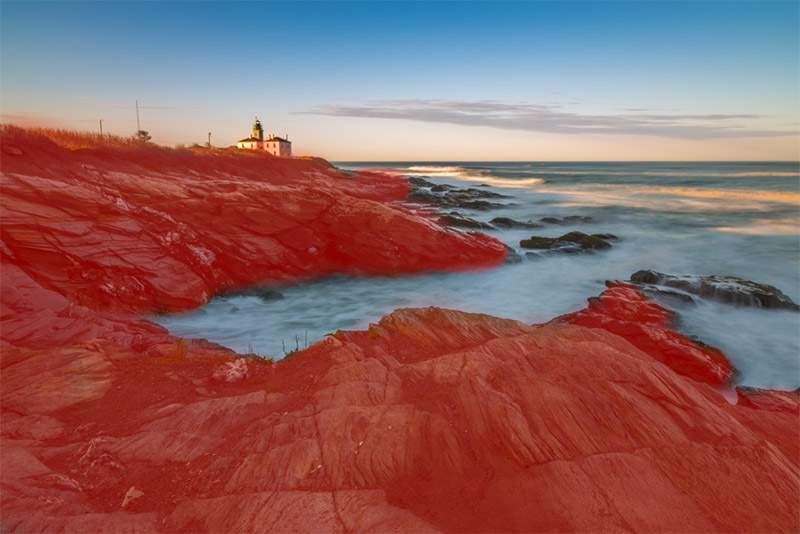
Here you can see the mask that shows where I brushed.
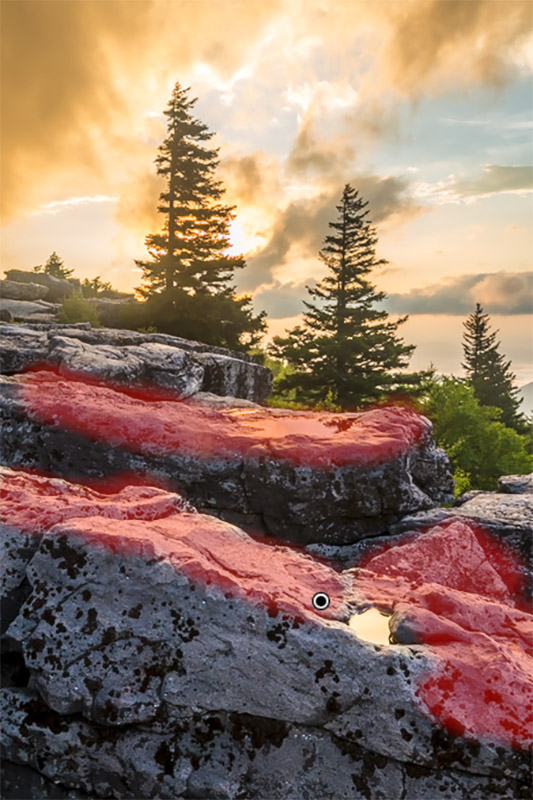
Burning
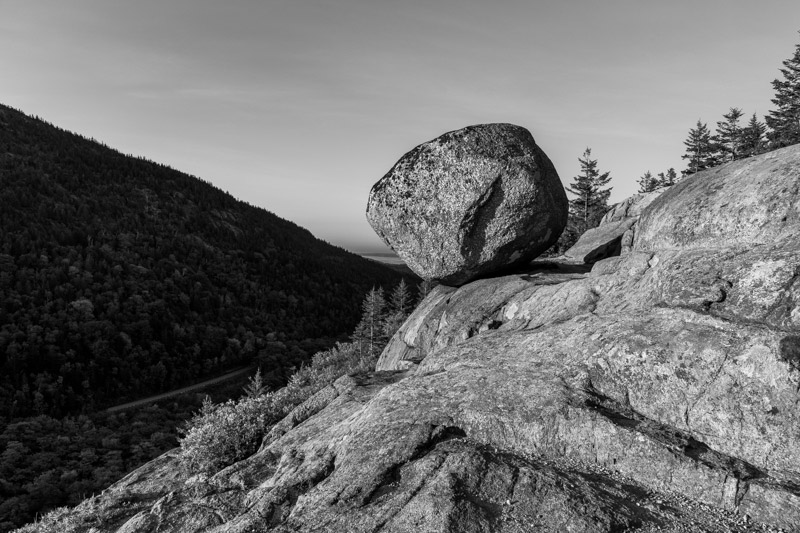
For this photo I used the one of the burning brush presets (-0.50) from the Landscape Legend brush presets. If you don’t have the presets, just change the exposure setting manually. And here is the after version (it’s a very subtle difference).
After burning
Wrapping It Up
So now that we’ve looked at many different things you can do with your landscape and nature photos in Lightroom, be sure to try them out with your own photos. If you’d like to save some time and make your post processing a little easier, please check out our Landscape Legend Lightroom Presets.