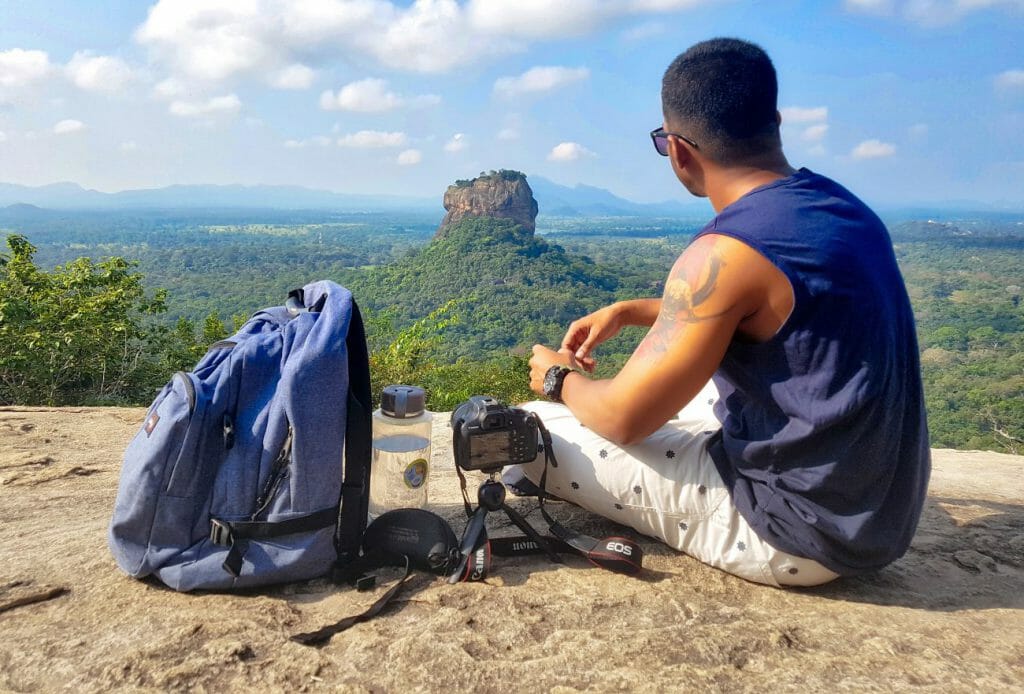
Capturing great travel photography can be tricky; you
Whether you’re documenting a weekend city break or a month-long journey across continents, taking photos make your fading memories stand the test of time.
Capturing images that are realistic, powerful, and original will enrich your adventure, but how to do you do that?
There are an endless amount of travel photography tips available, but f you are just starting out, it can be confusing.
Never fear–join us as we list 20 easy travel photography tips to help take your images to the next level.
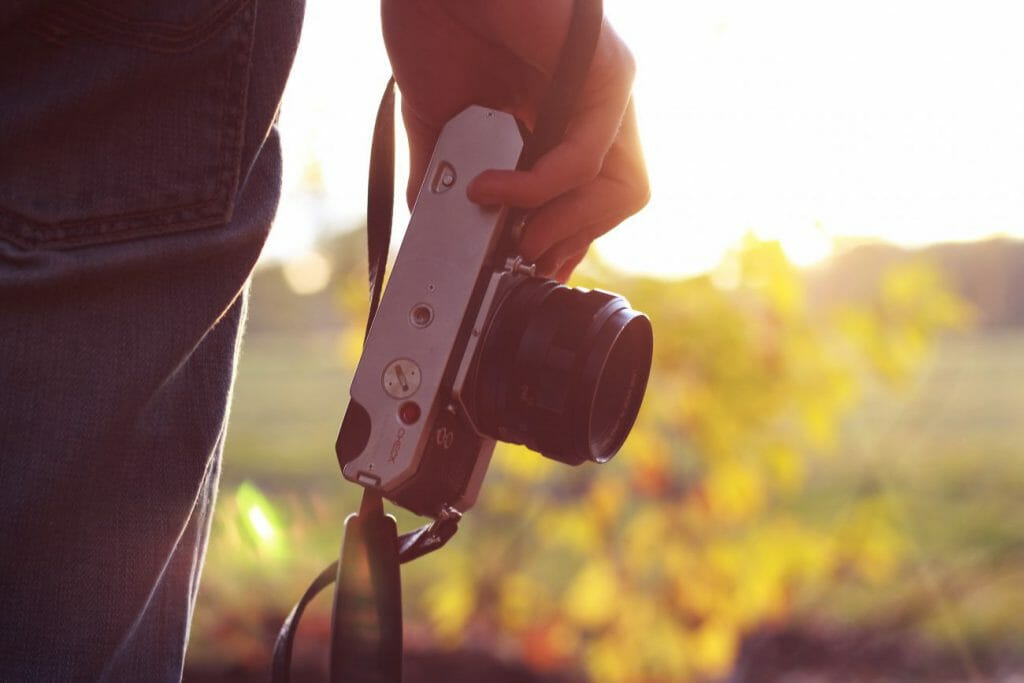
1. Always Carry Y our Camera
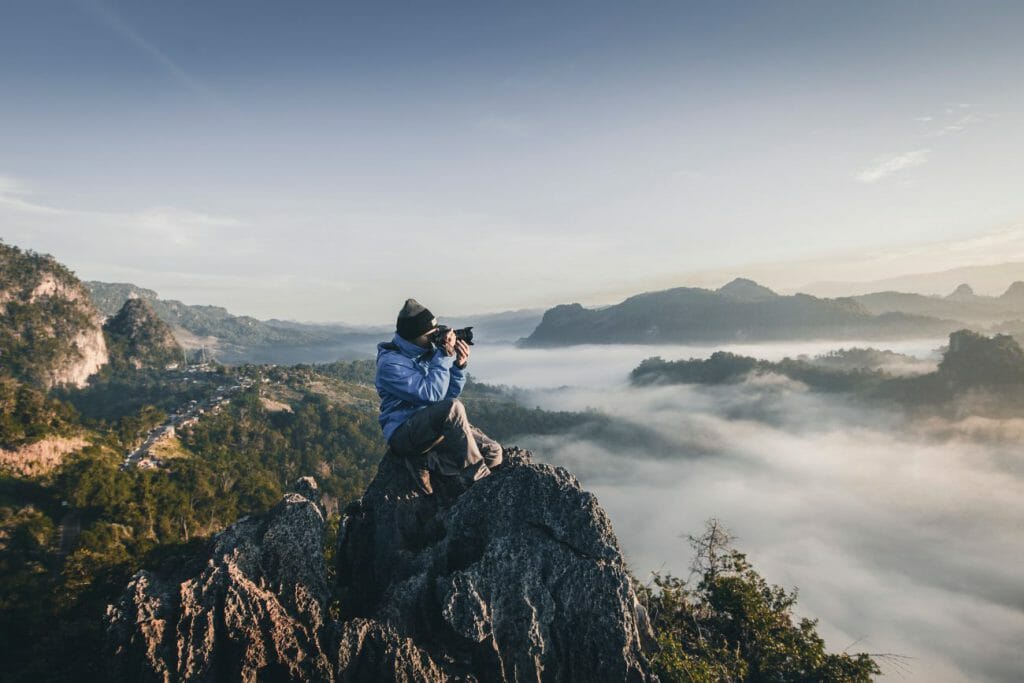
There are two essential steps to improving your travel photography: learn how to use your camera, and carry it with you at all times.
The good news is you don’t need the latest camera to capture majestic landscapes or cityscapes. You can achieve impressive results with a point and shoot camera or a smartphone–if you know what you are doing.
Learning the relationship between ISO, shutter speed, and aperture can take time and practice, but it will be worth the effort.
You’ll find good subjects where you least expect them,
2. Do Your Research Before You Go
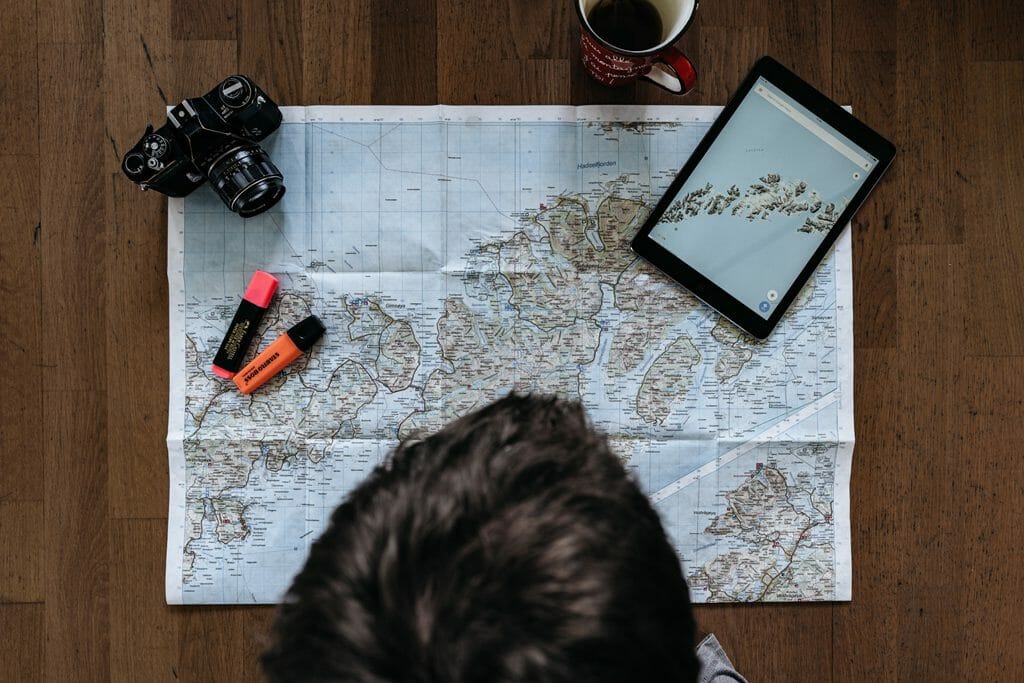
Location scouting before you go will save you a huge amount of time–don’t leave finding the best spots to chance.
Thanks to the internet, this can now be done from the comfort of your own home. Finding the best photography spots in a city can be as simple as scrolling through Instagram or Flickr, filtering through hashtags or geotags
There are even Facebook groups dedicated to specific regions of the world or photographic subjects.
A common practice among freelance photographers is where they use stock photography websites such as Shutterstock or Alamy, to get an understanding of what type of images sell the most. Stock photographs usually have detailed descriptions of the location, plus, they can show you how to make an image stand out.
Related Article: Best Sites to Sell Photos Online
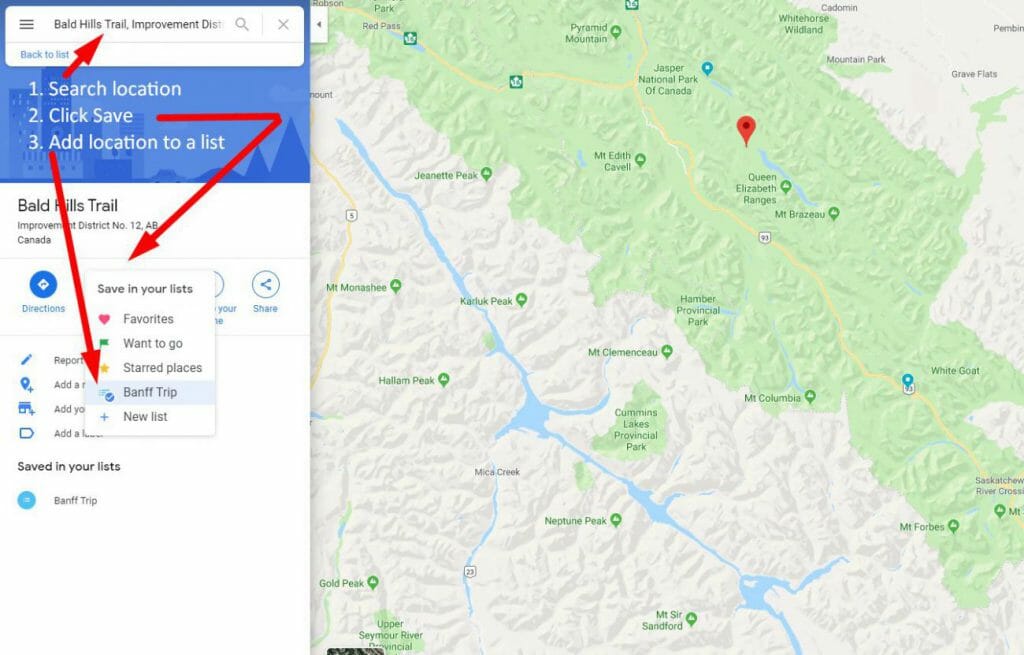
3. Make an Itinerary
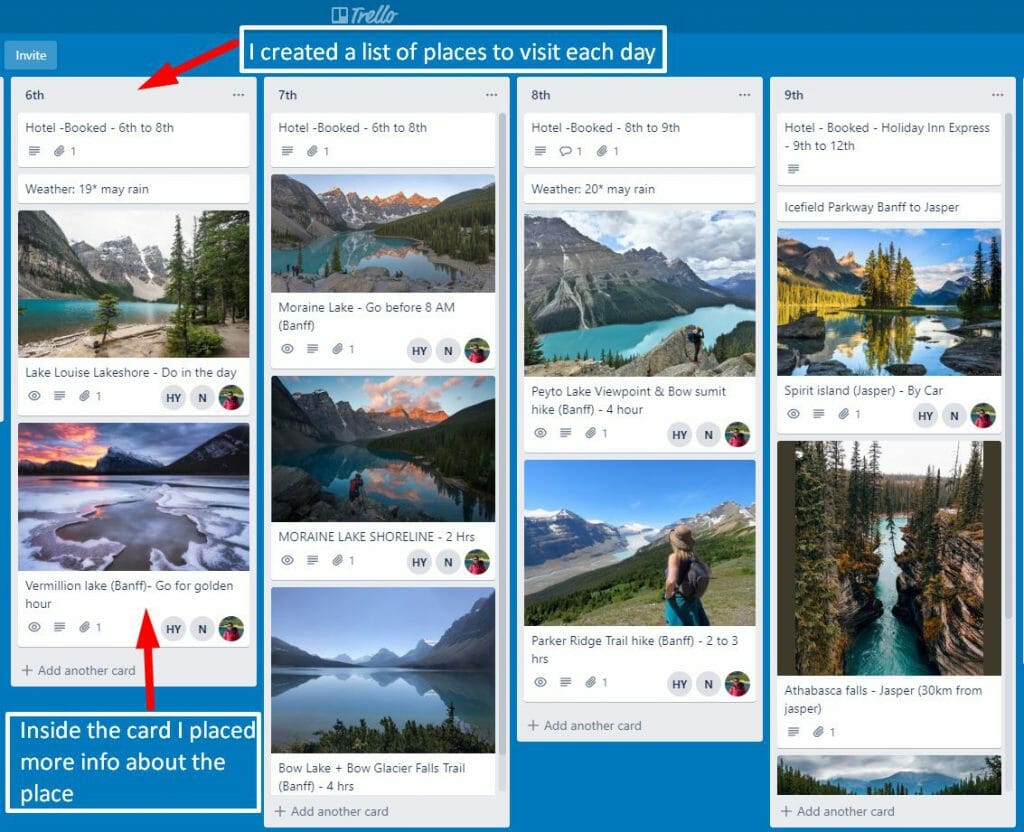
Once you’ve researched your location, save the spots you want to shoot Google Maps or OneNote.
Your directions will now be loaded to your smartphone. However, if you are traveling to a remote destination or are not able to access the internet, a better alternative to Google Maps is Maps Me. This allows you to download country-specific maps for offline use.
Windy Maps is another great tool if your goal is to conquer peaks and capture off-the-beaten-track landscapes. This application is targeted mainly at hikers and provides detailed information on walking trails and altitude profiles, all offline.
Researching in advance can help you decide not only where to go, but also when to go. Traveling to a far-flung destination will only be worth the effort if you are there at the right time.
Again, there are a number of tools to assist you. SunCalc can be employed as a reference to know the position of the sun in any part of the world. More sophisticated applications such as Sun Surveyor, The Photographer’s Ephemeris, and PhotoPills can show how the sun, moon, and stars move in the sky, to help you plan your perfect shot.
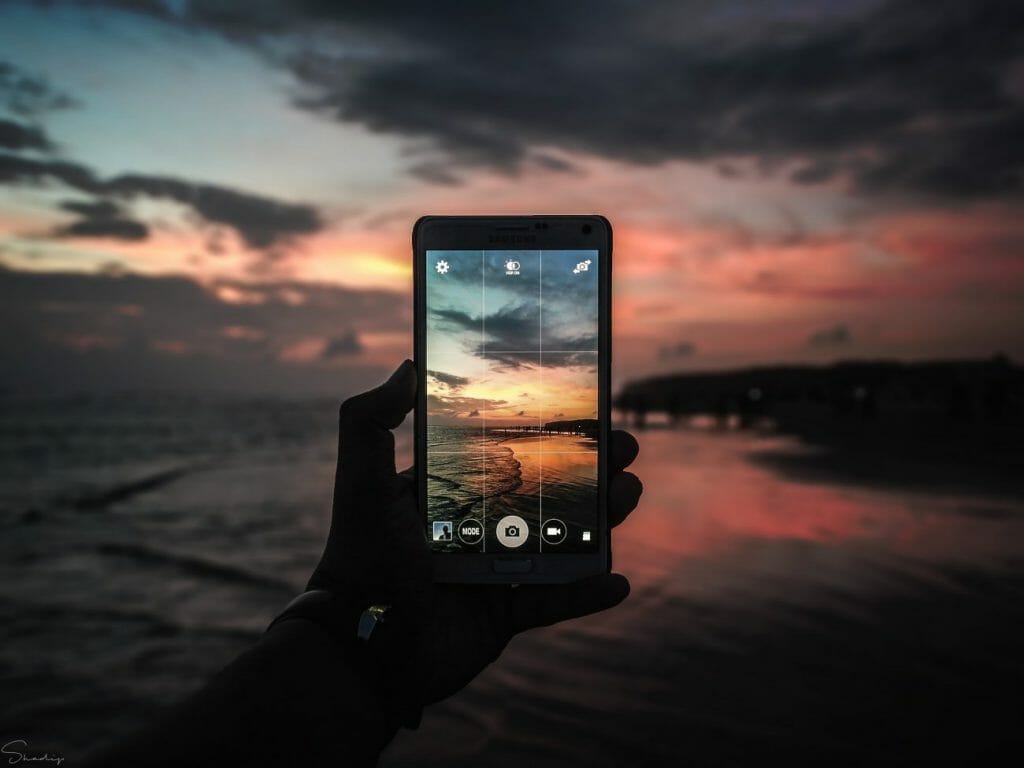
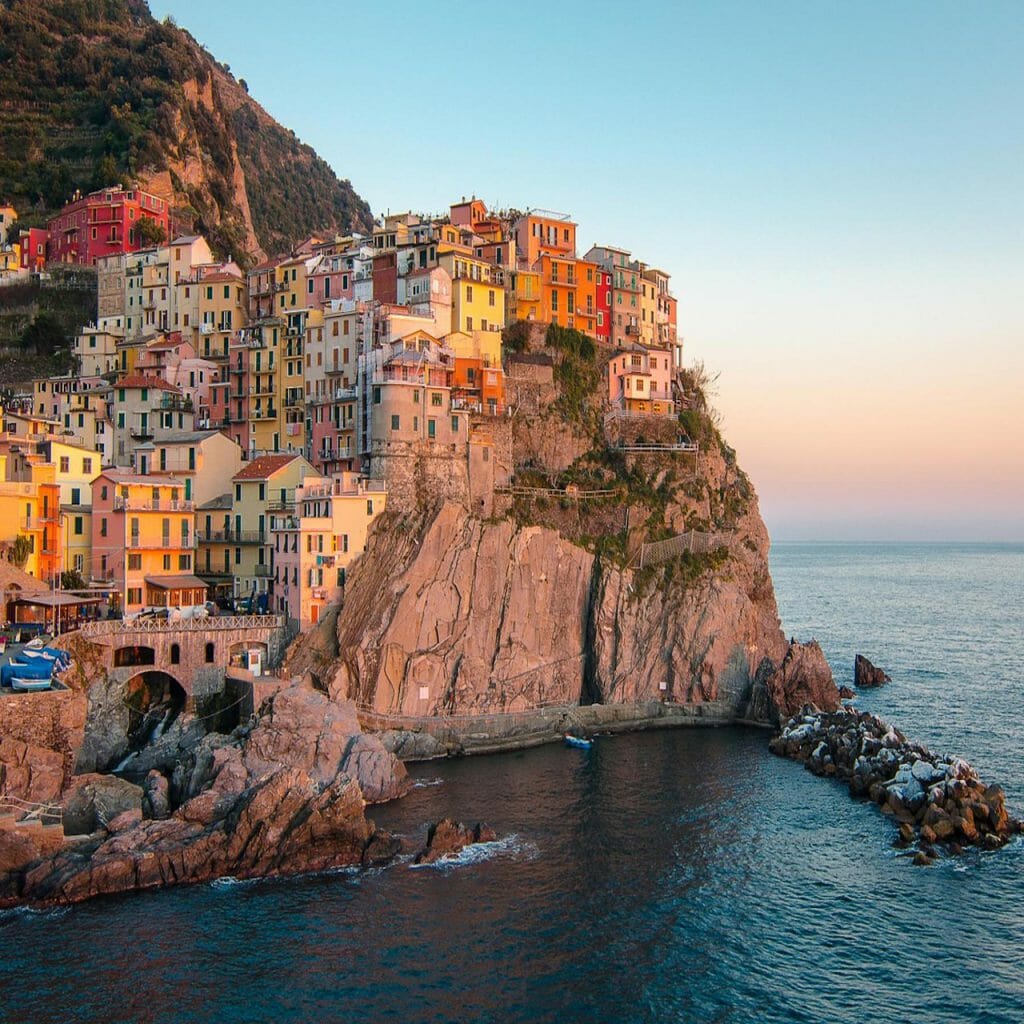
4. Get Up Early
There is one piece of advice that never gets old: wake up early and stay out late.
The one ingredient that will truly make a difference to your images is light, and the best light is found in the early hours of the morning, just before sunset during the golden hour.
The soft light projected by the low sun will minimize contrast and give your images a warm glow.
Another plus of shooting early is that you’ll avoid crowds; this is important if you are visiting well-known tourist sites.
Shooting late is just as important as rising early. The opportunity to capture a sunset or night cityscape can be just as rewarding. Carry a tripod to capture long exposures and light trails.
5. Learn the Rules of Composition (and break them)
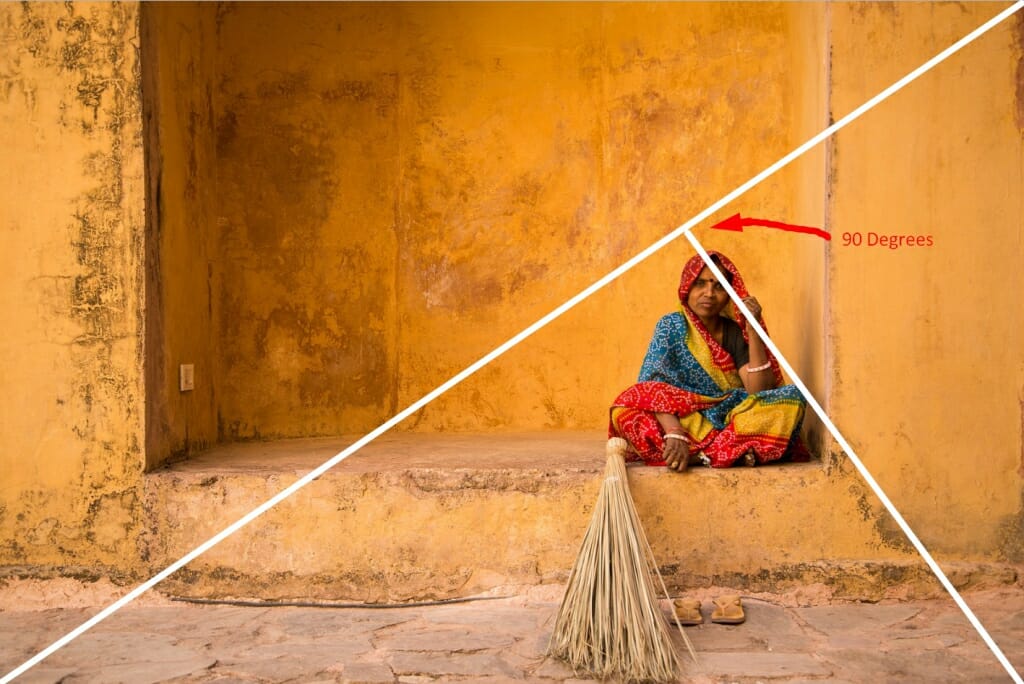
While knowing your camera settings is important, the composition also plays a key role in improving your shots.
There are a number of rules photographers follow to create images that are balanced and powerful. The most common one is the rule of the thirds.
Simply divide your frame into 9 parts by intersecting 2 horizontal lines and 2 vertical lines. Then place the main subject of your photograph where the lines cross each other.
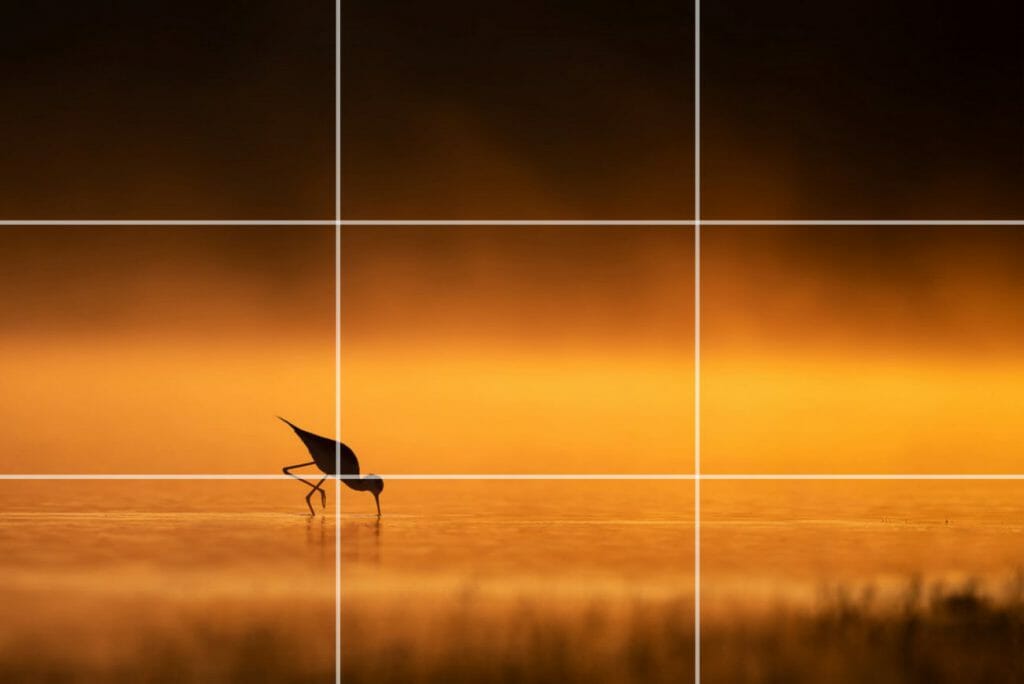
There is usually a helpful ‘grid feature’ on your camera or phone which you can activate to help you follow the rule. Once you’ve practiced enough, however, it will become second nature.
Other composition tips include filling the frame, being careful about what is in the background, and working with colors that complement each other.
Obviously, composition rules are meant as rough guidelines and shouldn’t always be followed strictly–don’t let rules get in the way of creativity. Consciously breaking the rules can help reinforce your style or better communicate your message. There is no such thing as a ‘bad’ picture, as long as you know what you are doing.
6. Find a Fixer
A fixer is a person with a deep knowledge of your destination who can assist you in accessing hard-to-reach locations.
Hiring a fixer will help you find local contacts and hidden gem locations.
Professional fixers help photojournalists move around remote or conflict-torn areas, but a local photography enthusiast will suffice if your goal is simply to collect unique images.
If you have time, look for a fixer once you reach your destination. Otherwise, search local Facebook groups or look for fellow photographers in the area via Instagram.
Hiring a fixer is clearly an investment, but worth it if you are looking to tell a particular story from a specific angle. In most cases, it is better to avoid travel agencies, as these tend to focus on major attractions that have been photographed thousands of times.
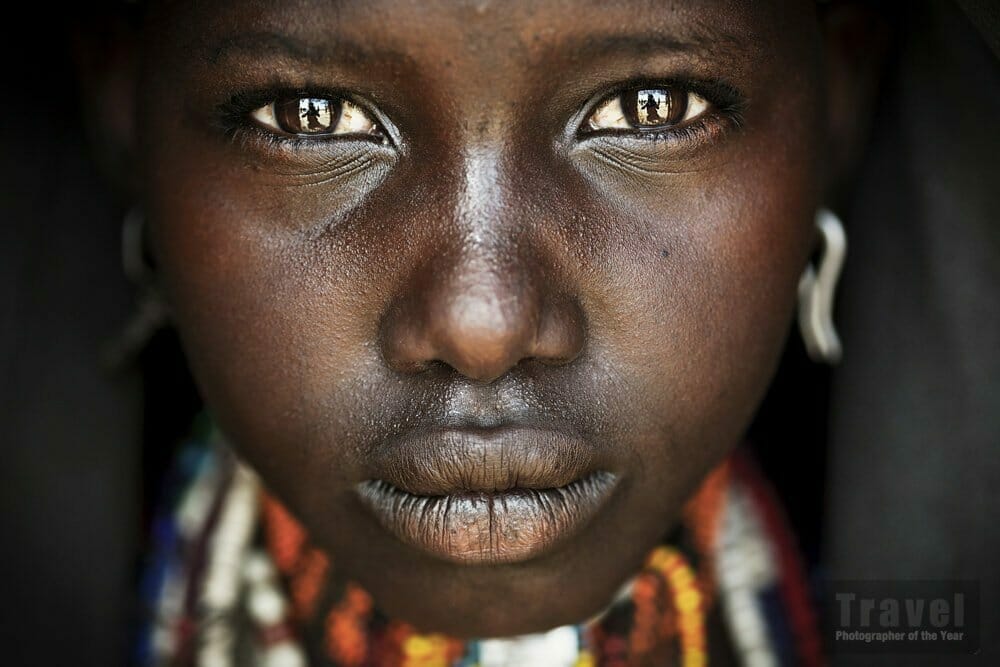
7. Learn the Language and Customs
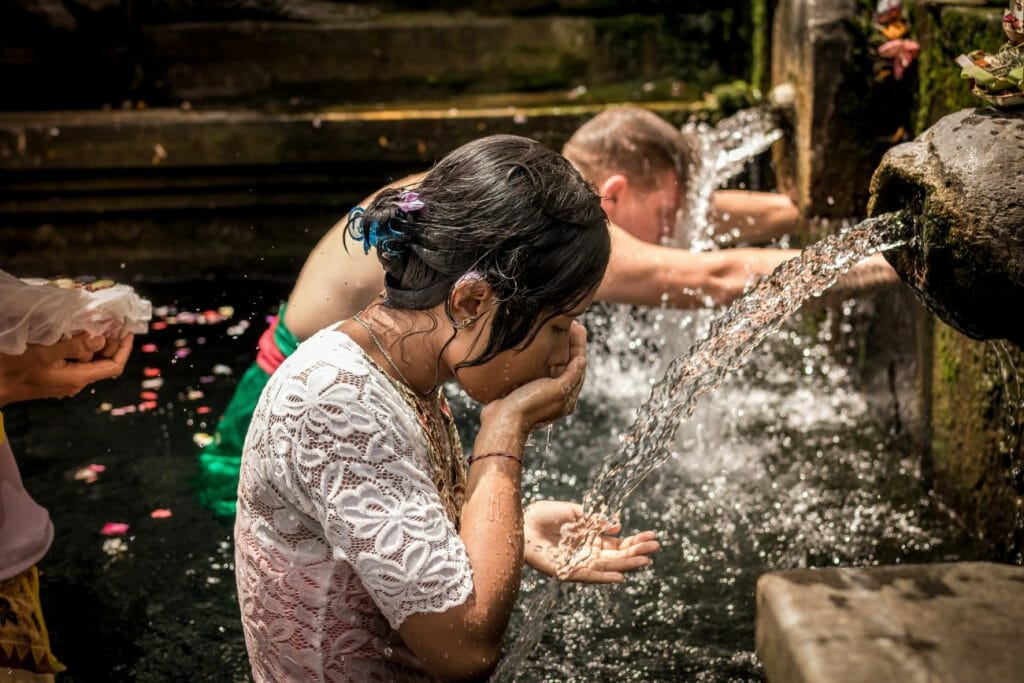
If hiring a fixer is out of your budget, try to learn a few useful phrases in the language of your destination.
Simply knowing how to introduce yourself can help you start a conversation that can lead to meaningful discoveries. If you take portrait photography, knowing how to ask for permission to take a shot is essential.
Paying people to let you take their picture is an ethical grey area and you should consider the implications before you decide to do so. Asking for permission, on the other hand, should always be done, even more so if you are planning to publish your pictures online.
Be mindful of local customs and make sure your actions are not offensive to local people. Customs themselves may be great opportunities for interesting shots, such as photographing local rituals or festivals.
8. Use Leading Lines
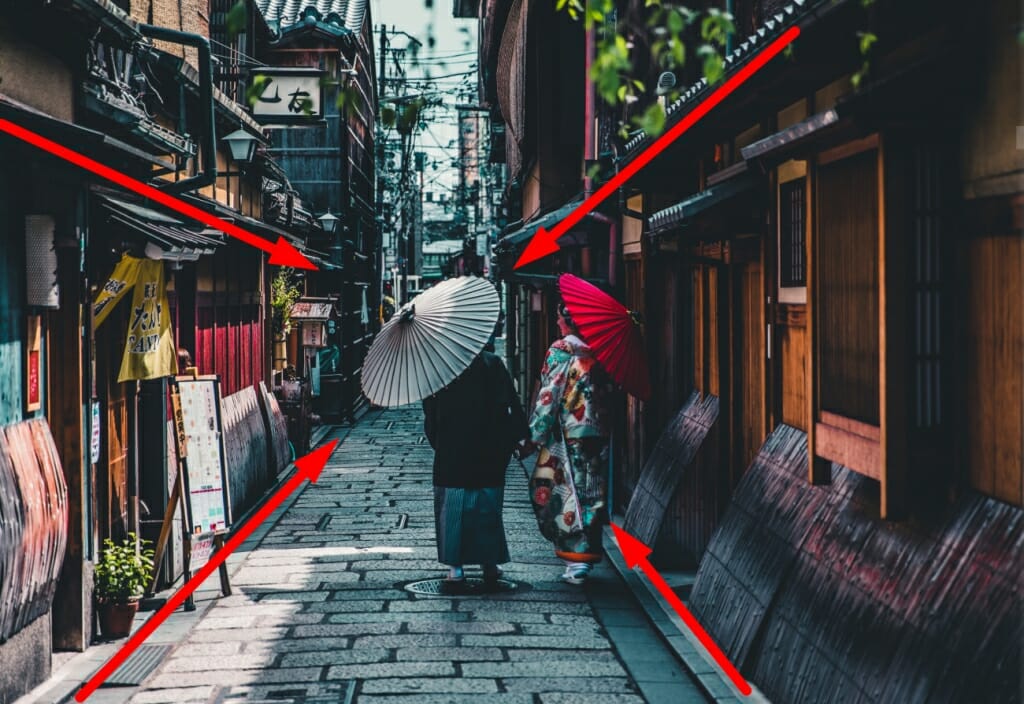
Guide your viewer into your image by using leading lines found in your frame; such as landscapes, buildings or streets. Choose the perspective you shoot from carefully and try to leverage the natural elements to direct the viewer’s attention.
Natural lines can be also used to frame an image, pulling your viewer into your scene. Be sure to consider all the elements in your frame; the background and foreground are often more important than the subject itself.
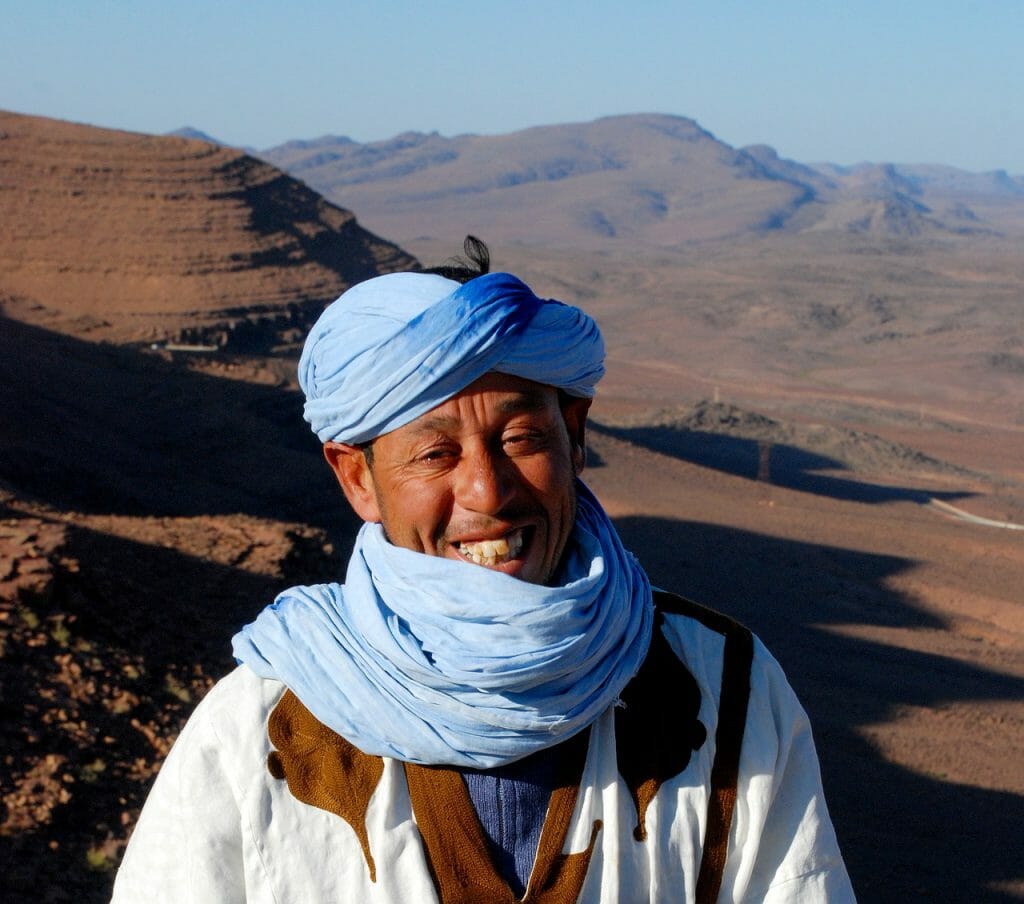
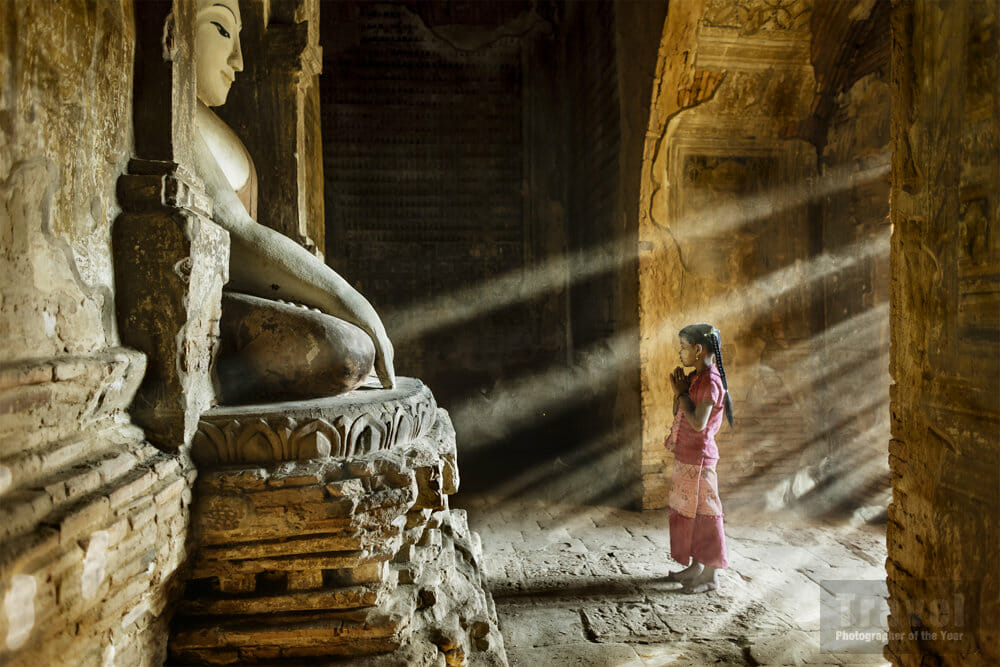
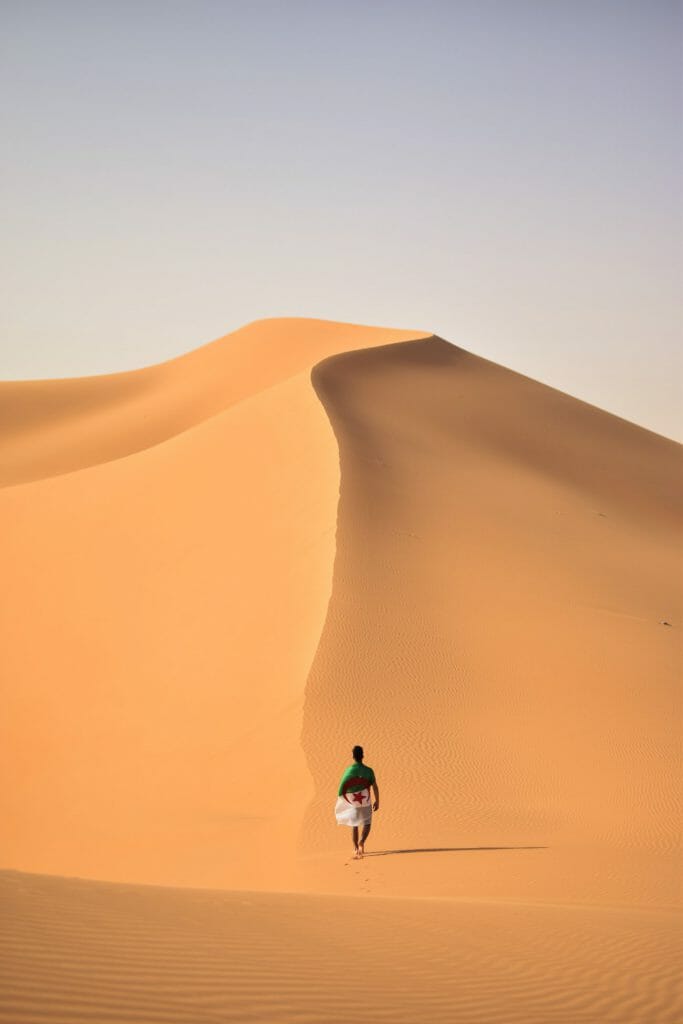
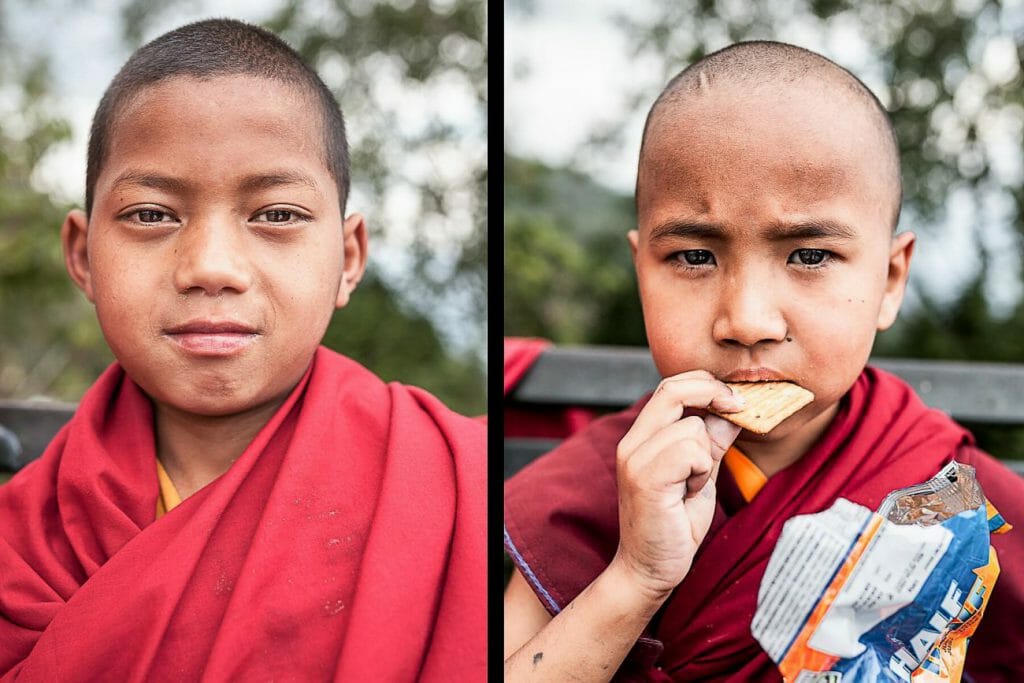
9. Add a Human Element
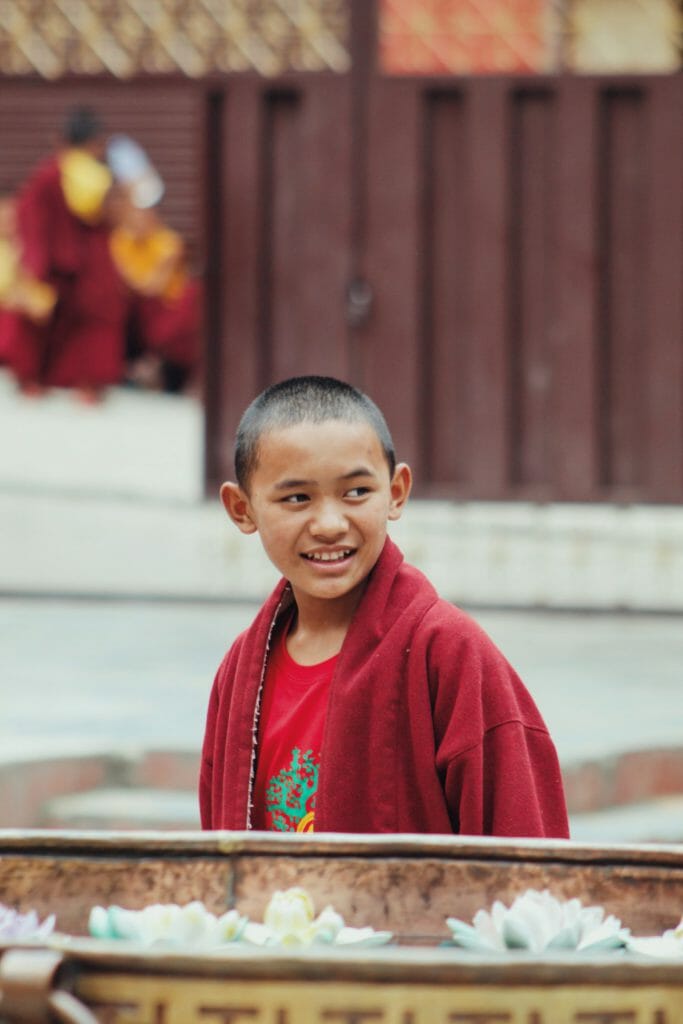
Landscapes or cityscapes make great photos, but including people in your frame will enrich your images
Showing a human in your shot, whether it is a model or a passer-by, will help your viewer identify with the scene and give a sense of proportion to the surroundings.
Shooting small people in vast spaces is particularly effective if you want to show the contrast between man and nature; it can and add an ‘epic’ feel to your landscapes.
10. Shoot in Manual Mode
Learning how to shoot in manual mode is a leap forward in your journey towards great travel photography.
Understanding the relationship between shutter speed, aperture, and ISO will require some patience. But once you get the hang of it, it will improve your photography leaps and bounds.
When we talk about ISO we refer to the image sensor’s sensitivity to light. As a rule of thumb, this setting should be kept at its lowest possible level (100) to avoid the appearance of grain in the picture.
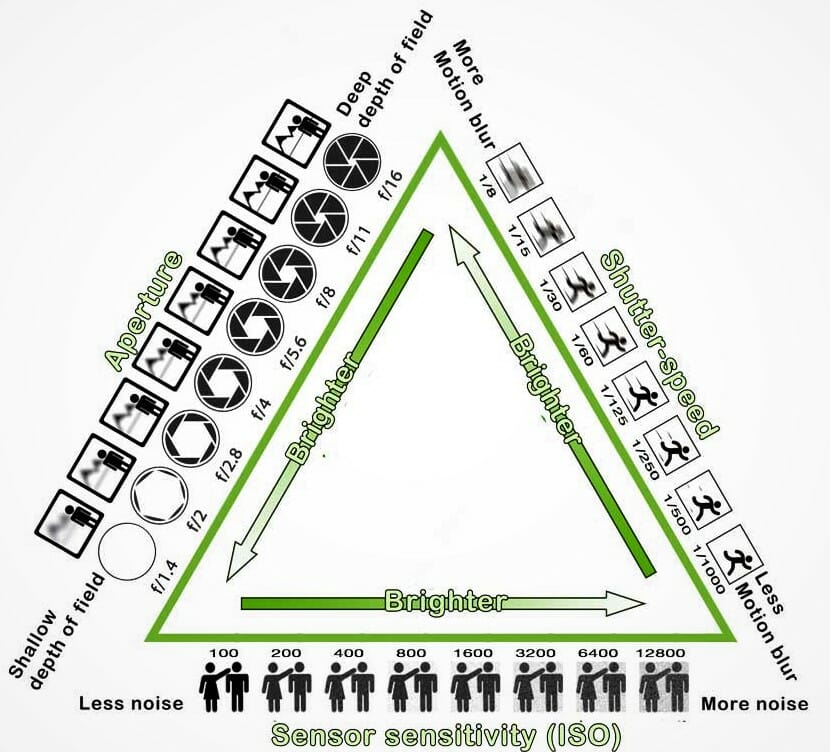
Using the exposure triangle, above, is a great way to learn how to control your camera in manual mode.
Adjusting shutter speed and aperture can be a little tricky; selecting the correct settings will depend on what you are shooting. If you are photographing events or fast-moving wildlife, you should prioritize shutter speed, while for portraiture and still life adjusting aperture will help you see more or less depth of field.
11. Be Inspir ed
The photographs you view online or in books, influence the photographs you take.
It’s a great idea to seek inspiration from masters in the craft of travel photography. Whether in books, magazines, photography websites or social media, spend some time attempting to understand how professionals build their style and reputation.
Photojournalists and fine art photographers often work in different ways, but there is knowledge to be gained by looking at the production of both. It’s not about imitating a style or reproducing an image, but rather studying the details that turn a picture from good to great.
Visit websites such as National Geographic or the winners’ galleries of the international Travel Photographer of the Year competition for
Who knows, follow the tips on this page and you could see your own images in the TPOTY winner’ galleries one year!
12. Develop a Style
Most photographers specialize in a niche; focusing on a specific subject or type of photography will help you find your voice.
This will also make you more selective about the equipment you buy. Why travel with a backpack full of lenses, if you only need to carry lenses suitable for your niche, such as landscapes, architectural, people or animals.
This, in turn, will result in better images and help you build a portfolio in a well-defined field.
13. Use a Tripod
It’s important to pack as light as possible when traveling. However, it’s important to add a tripod to your gear if you plan to capture motion blur photography,
Tripods come in all shapes and sizes. Unless you carry a heavy telephoto lens, most mid-range models will do. Travel tripods compact down small and won’t put too much pressure on your shoulders.
Using a tripod will make travel photography less spontaneous, but stabilizing the camera will reduce the risk of blur. Plus, you’ll also be able to experiment with long exposures.
14. Use CPL and ND Filters

Attaching a filter to the front of your lens will not only protect it from scratches or stains, but it will also improve the quality of your images.
There are 2 main filters you should consider using in travel photography; a circular polarizing (CPL) filter and a neutral density (ND) filter.
A CPL filter gives you more control over the amount of reflected light that hits your lens. It screws onto your lens and helps you avoid glare, plus it reduces visible reflection on surfaces such as water or glass.
A side effect of CPL filters is that they tend to saturate colors and darken skies. This can be an advantage in landscape photography, however, there is also a loss of brightness (usually about one-stop).
An ND filter reduce the amount of light that enters the camera through the lens. ND filters allow you to experiment with long exposures even in the middle of the day.
For example, you can slow down the water in a waterfall by using a long exposure without the risk of overexposing the picture. It is also possible to remove people walking on a busy street by keeping the shutter open. However, a tripod is essential for this.
15. Prioritize Quality Over Quantity
Patience plays a big part in good travel photography. Taking the time to wait for an opportunity, shoot and evaluate your work will, without a doubt, result in better pictures.
Be critical about your photographs and try to think of what could be improved every time you compose an image.
Give yourself extra days to get back to locations if the weather is not what you want. Look at the details of your image after you’ve shot it. Are there unwanted elements in the background? Are there signs of glare? Is it distorted? Check for minor mistakes and shoot again if necessary.
16. Blend in With The Locals
If you want to shoot people or scenes discreetly, you are more likely to attract attention to yourself if you carry a large camera. Reduce the risk of unwanted attention by carrying a more compact model.
When you reach your destination, spend a few hours trying to blend in and getting to know the people around you. Try to make people comfortable about your presence before you ask to take pictures of them.
17. Pack Spare Batteries and Memory Cards
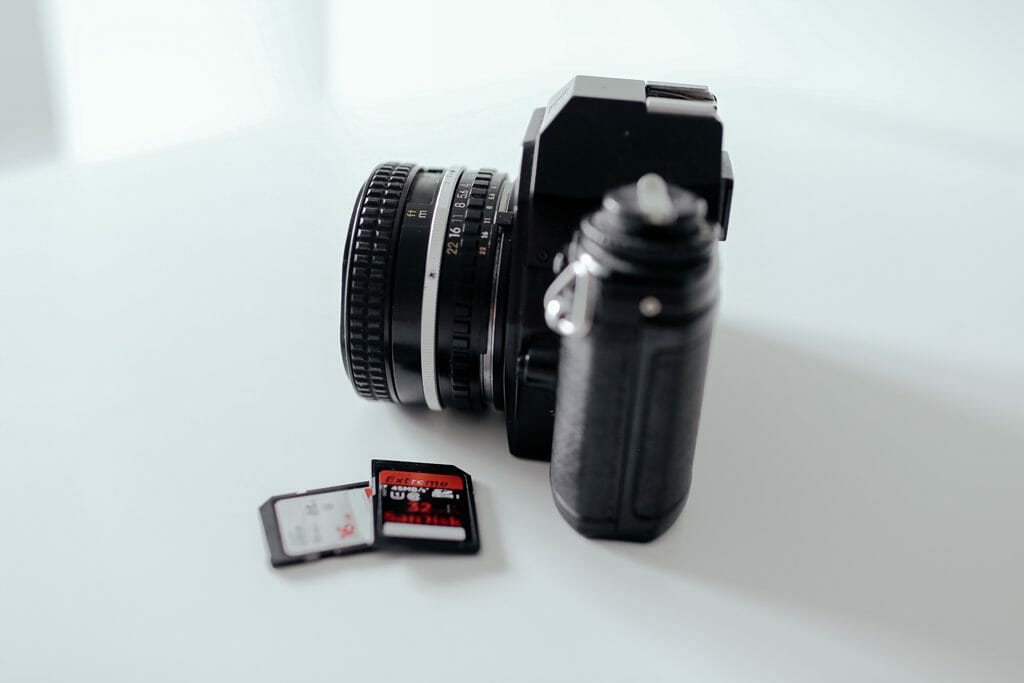
Always pack extra batteries; you never know when you’ll find yourself in a remote location without electricity.
You may encounter a subject you didn’t expect to fall in love with and take more images than originally planned, or decide to shoot video. Whatever the circumstances, having extra batteries will allow you to keep shooting.
Additional batteries are especially useful if you are traveling to cold destinations. Low temperatures cause batteries to run out faster. Bear this in mind if you are hiking at altitude or shooting snowy landscapes.
The same goes for memory cards; you don’t want to waste precious time trying to decide which images to delete if you run out of space. Always carry extra cards with you, and if you forget, go and buy some on the first day of your trip–they are available in most cities.
18. Get Close to Your Subject
If you can choose between using a telephoto lens at a distance from your
Being closer increases the quality of your image, plus adds a more personal feel to the shot.
The difference between a ‘stolen’ picture and an image you have thought through is clearly visible.
Analyzing angles and perspectives, looking at the details and filling the frame will give you better photographs. Plus, carrying smaller lenses means traveling with less weight.
19. Back-up Your Photos Frequently
Unfortunately, accidents such as loss or theft do happen, and while gear can be bought back, photographs are lost forever.
Many new digital cameras come with an integrated Wi-Fi function, which makes it easy to transfer or store photos to online photo storage services.
Google Photos now allows for unlimited storage of images, albeit with a limit of 16-megapixel resolution per image. Dropbox, however, allows you to store all your photos at their highest resolution for a small fee (or get 2GB for free).
20. Learn How to Edit Photos
Editing should be thought of as part of the process of creating a picture. Processing already occurs in-camera when light is converted into pixels, but adjusting colors, and exposure in post-production is essential to improving your travel photography.
Lightroom takes time to master, but basic post-processing adjustments will still make a huge difference and can be applied in a matter of seconds. If you are using lightroom presets, these edits can be done with a click or two
- Start by cropping and straightening your image to perfect the composition
- Then move on to white balance adjustments, shadows, and highlights
- Always apply to sharpening and improve your color tones using the HLS panel or tone curves,
Avoid being too heavy-handed with the editing, as overdoing it can diminish the quality of your image. Try to get as close as possible to reality as you remember it, and avoid falling prey to trends by using the same color palettes seen everywhere else.
Go Out and Get Lost
So we’ve shown you 20 easy ways to improve your travel photography, all that’s left is for you to venture out and get lost!
Yes, you should plan ahead and be mindful of what you are shooting. But remember that before surprising others with your talent, you should first allow yourself to be surprised.
Leave space for the unknown to present itself to you; seek untrodden paths for experiences worth remembering and sharing.
Now that you’ve learned these tips for stunning photos, you’re a better photographer.
Guaranteed.
But the fact is, the journey doesn’t stop there. There are more tips, tricks, and secrets–all of which will help you take gorgeous photos.
And if you want to learn all of these secrets, I recommend you sign up for the PhotoBlog newsletter. We send our subscribers all sorts of great stuff–including the tips, tricks, and secrets, straight from the experts. All to help you capture world-class photographs.
Did I mention that it’s all totally FREE?
(Oh, and we’ll send you a natural lighting cheat sheet–designed to help you use light in ways you’ve never considered.)
So to start taking stunning photos, enter your email:
This is a sponsored post for Dropbox. All opinions are my own. Dropbox is not affiliated with nor endorses any other products or services mentioned.