If you are like me, you constantly take photos with your cell phone. But have you ever wondered why your mobile phone photos don’t quite have that “WOW” factor you see on Instagram? In this article, I’ll give you some tips that apply to photography in general and cell phone cameras, in particular, to help you on your journey to better mobile phone photography.
Cell phone camera capabilities
Let’s start this discussion by going over a few strengths and weaknesses of the camera you carry in your pocket.
Advantages
- Compact size
- It’s always with you
- Strong daylight performance
- Easy to use
- Constantly improving
Limitations
- Limited zoom power (can’t change lenses)
- Limited or poor low light performance
Now let’s get to some ways you can improve your mobile phone photography. Here are 7 tips to help you take it up a notch.
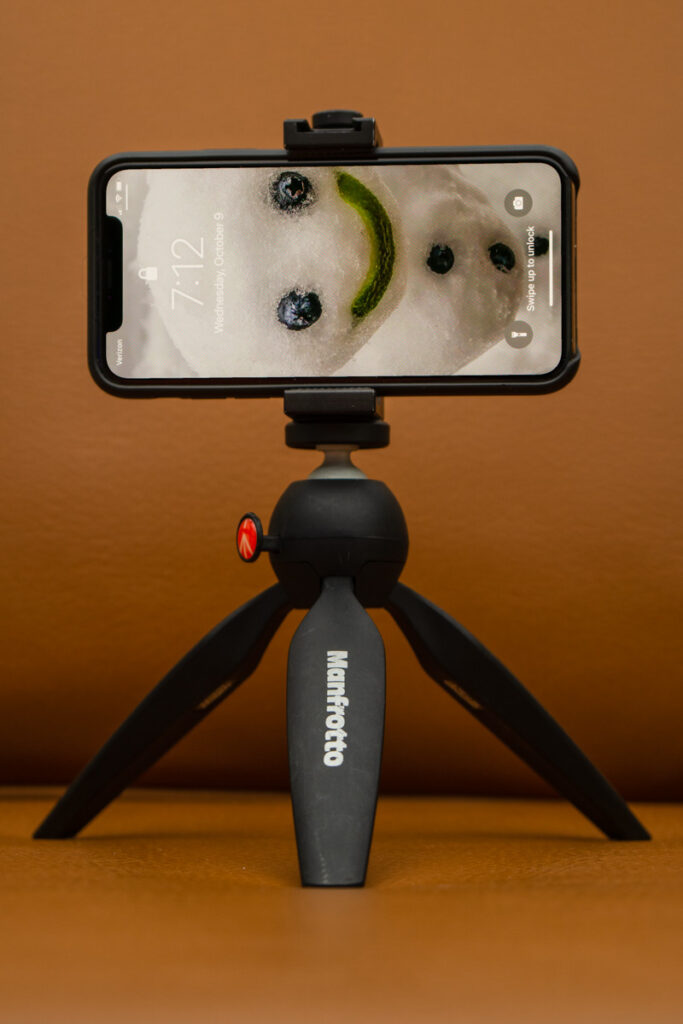
Tip #1 – Stability equals better photos
Because of the limited low light performance of your cell phone camera, keeping it steady is really important. Ensuring that the phone is stable will improve your image quality. Here’s how you can achieve this for yourself.
Shooting from a standing position
- Step 1 – Stand with your feet shoulder-width apart.
- Step 2 – When shooting from a standing position, hold your mobile phone camera with both hands and tuck your elbows into your body.
- Step 3 – Use the volume button to snap the shot. This will help minimize camera shake, which causes blurry images.
Other situations
If you are not shooting from a standing position, there are other ways to stabilize the phone.
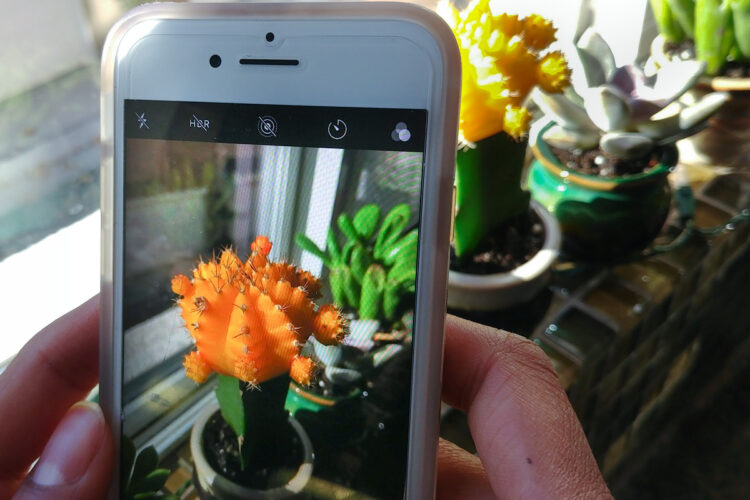
Tip 2: Setting exposure and focus

You don’t have to give control over to the camera all the time even shooting with your phone.
If you want to adjust the brightness of the photos you are taking, the process is pretty straight forward. Tap the screen in the area you want to be in focus and set the exposure for that area.
For iPhone, this will bring up a yellow box around the area you tapped and a slider. You can move the slider up to brighten the scene or down to darken. I’ve not used Android in a while, but the feature should be similar.
Tip 3: Improve your composition
One of the easiest and most important things you can do to take your mobile phone photography to the next level is to improve your composition. Here are a few tips to help you.
Rule of Thirds
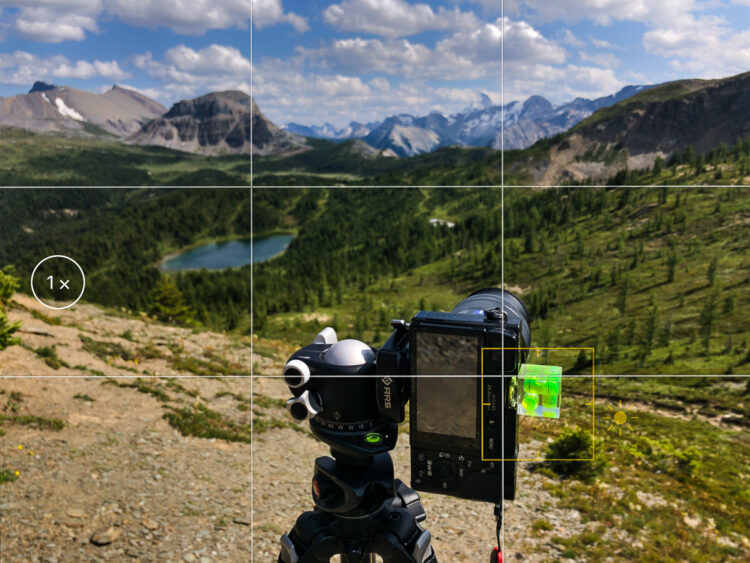
As you see in this example above, I have my scene divided into a three-by-three grid. This grid is used by both beginner and professional photographers to aid in the composition process.
In general, you will create a pleasing composition if you place the subject of your photo at the intersection of two of the lines (one horizontal and one vertical) on the grid.
In this particular image, I had set up my main camera to capture a panorama of the distant landscape. Then I remembered I was planning to write this article, so I pulled out the trusty iPhone for a quick shot of the setup. My aim was to have you focus on the camera/tripod, while still noticing the trees, lake, and mountains in the distance.
I set the focus on the camera because it is the subject. But I also wanted you to see the background because it gives the photo some context. I could have taken just a picture of the camera/tripod, but that wasn’t as interesting for the behind-the-scenes kind of image I was looking to create.

So consider subject placement within your frame, and work on putting the subject off-center. Basically, the simplest thing to remember is to get it out of the center of the shot and your image will instantly be better.
Leading Lines
Leading lines are any elements in a photograph that draw your eyes in a certain direction. They can be straight, like in a road heading to some distant point. Or, they can be meandering, like the stream in the photo below.
Use leading lines to direct the viewer’s attention to the subject. Leading lines without a subject at the end just take the eye out of the frame. So be aware of and avoid that situation in our images. Ask yourself, “Where do my leading lines point?” and make sure there is an answer.

In this particular photo, the brightest area is the mountain gleaming with the first light of the day. This is likely where your eyes were first drawn when you saw this composition.
However, look at the stream in the frame. Do you see how it tapers off into the distance? The reflection of the light hitting the mountain and clouds brightens the water as you move through the scene.
Including the grasses in the foreground is another compositional element that helps to add a bit of depth to the scene. As your eyes travel into the frame you are aware of the grass, then you travel down the stream to the gleaming mountain or vice versa.
Get closer
There’s an adage that I’ve heard more than a few times from photographer friends of mine.
“If the photo isn’t interesting enough, you’re not close enough.” – The quote is actually by famous war photographer Robert Capa.
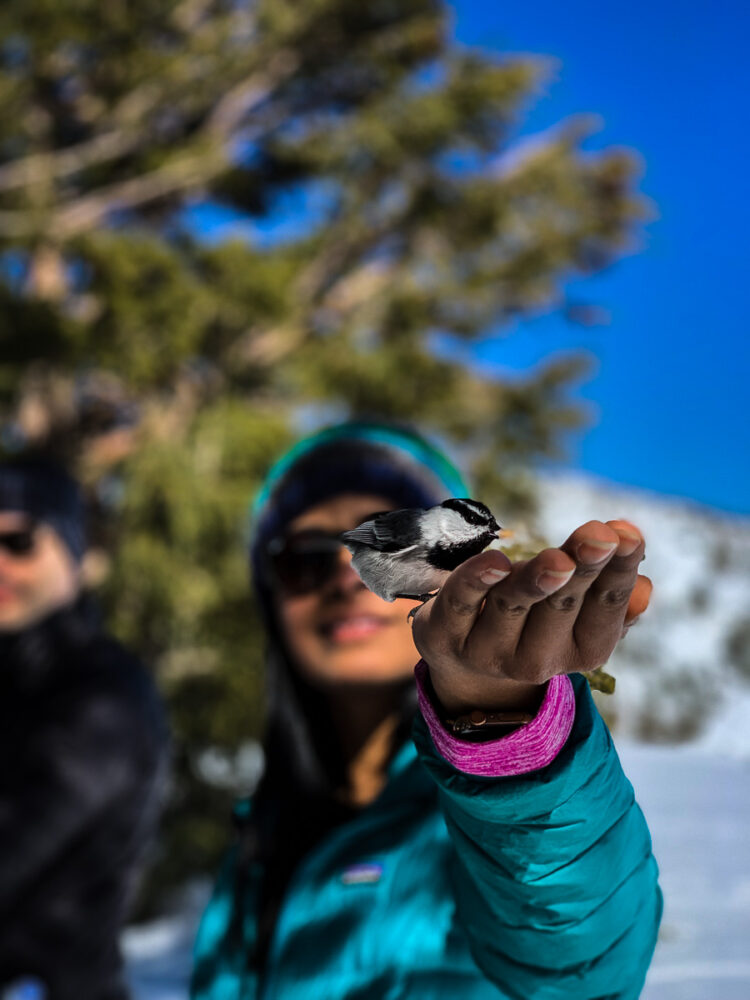
With that in mind, what do you think is the most important thing in this image? If you said the bird, then you would be right.
Now, imagine if I had taken this photo from 20 feet away. What would I have captured? You would probably be looking at a picture of four people, a couple of giant trees, and a snow-covered hillside, and maybe you would see the bird in her hand.
However, would you have known that the bird was the subject of the photo? Probably not.
The point of this series of questions is to get you to think about what you really want people to see as important in your images. Then, it is your job to cut out unnecessary parts of a scene to accomplish your goal.
Less is more!
Change your perspective
A habit that many photographers get into is always shooting from a standing position, with the camera held at eye level. For a large vista, that may not be a big deal. However, there are plenty of cases when changing the position of the camera relative to the subject can create a completely different result.
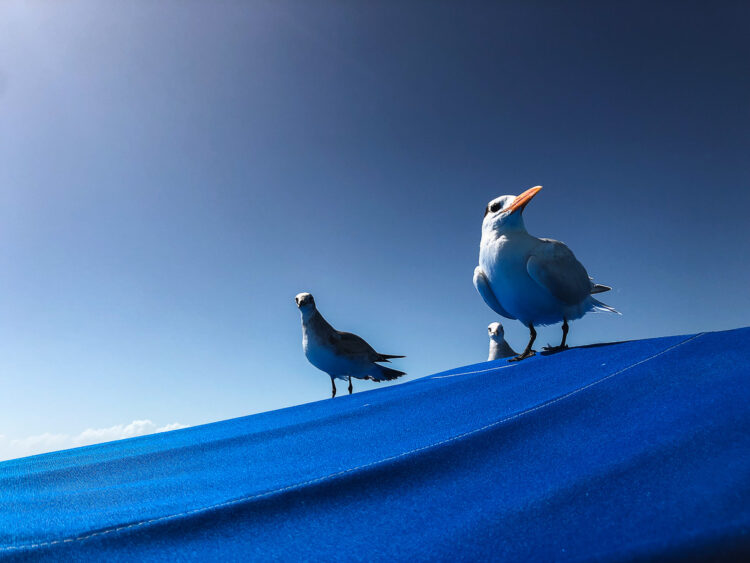
Does this photo of the birds remind you of some superhero movie poster? There is a reason that a low camera angle, shooting up at the subjet is called the “hero shot”. Looking up at a subject can make it appear larger and more powerful.
Similarly, shooting down on a subject from a high position creates a smaller, more diminutive result.
Because of the cell phone’s size and weight, changing your vantage point is quite easy. So try different angles for more variety and storytelling.
Repeating patterns
Repeating patterns are all around you. Sometimes you have to look harder to find them, but they are there, nonetheless. In cities, you can find repeating patterns in most buildings. In nature, you might overlook the patterns but they are there as well.
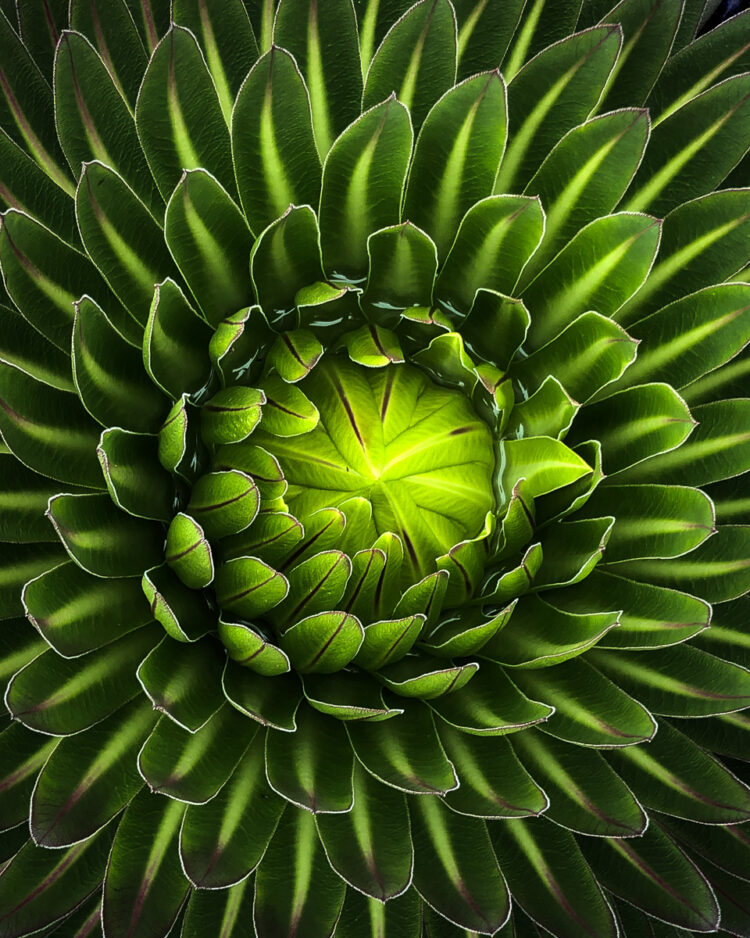
What is the pattern you notice in this photo from Africa?
The next time you walk through your local park challenge yourself to find an example of repeating patterns in nature.
Tip 4: Shoot HDR
High dynamic range (HDR) is a term that may need a bit of explaining.
For every scene, there is an area with the greatest brightness and also one that is the darkest. When you bring your phone out to take a picture the camera attempts to expose the scene so you can see detail from the brightest to darkest areas. Think of this exposure as somewhat of an average.
However, the sensor in the camera has a limit when capturing the difference between the two extremes. This is why parts of the scene might be completely black or white. The sensor is just not able to capture all the information in one picture.
How HDR works
HDR was introduced as a way to capture the details in a scene that has a large difference (dynamic range) between the brightest and darkest areas. When you select the HDR setting for your mobile phone camera, you are telling it to take a series of photos then combine them together to create the final image.
The phone will first take an exposure reading for the scene like normal. Then it will take one or two photos that are darker than the average, the average exposure, and one or two photos brighter than the average. Finally, the photos will be merged together to produce the final result.
HDR is best used in the morning and evening light to capture elements of the light and dark areas you are photographing. When you are photographing in mid-day light, your skies are likely to look artificial because there is a limit to the phone’s capability.
The problem is that the amount of light from the midday sun is considerably more than the light hitting any dark shadows in the scene.
Tip 5: Dealing with backlight
Backlight situations occur when your subject is positioned in front of a light source or a bright background. Think about any photo you have taken of a friend or loved one standing in front of a window, like the one below left.
If you expose for the person, the light from the window is usually just a white blob (above right). If you expose for the window, the person is usually just a silhouette (above left).
Potential solutions
To fix this situation you just need to reposition yourself and the subject, if possible. In the example of your subject standing in front of a window, have the person move so they are facing the window. Then photograph with the window at your back or on one side of you.
You could also try the HDR setting. Set the focal point on your subject. Take a shot and see if the background is better exposed at the same time.
Use an external light source to illuminate the subject. You can start with the light from another cell phone’s flashlight. If there still isn’t enough light, add a second, get a flashlight, etc. If none of this works, consider repositioning yourself and the subject.

Tip 6: Capture action shots with burst mode
Burst mode is a great feature included with most modern cell phones that allows you to shoot many photos in rapid succession. Just hold down the shutter button (either the button on the screen or the volume button on your phone), and the camera clicks away until you let go.
Burst mode is a versatile tool for many situations. From static portraits to freezing motion, burst mode can be your friend.
Here are a few suggestions for how to get the most out of your phone’s burst mode.

- Action shots – Start shooting before the action starts
- Consider starting with the camera zoomed as well to keep the action closer
- Portraits – use burst mode to capture the perfect moment (singles and groups)
Then simply select your favorite frames, edit the images and post to social media.
Tip 7: Post-processing to achieve your goal
This is where you get to put those final touches on photos. There are plenty of options and apps for editing your photos, my suggestion is to find one that works for you.
Lightroom mobile
The power of Adobe in the palm of your hand. There is a free version of Lightroom Mobile that has a large amount of functionality included. One thing that is omitted is selective edit capability that allows you to change the settings for only the portions of the photo that you choose.
This is my top suggestion because I have the most familiarity with the product on both my phone and computer.
Serge Ramelli has a great video showing you how to use it here:
Snapseed – Another powerful mobile editor is Snapseed. I’ve not much experience with it, but I know some pros who suggest it as an option.
Instagram – It has all the filters you know and love, plus additional, although limited, editing capability.
VSCO is an app I just learned about recently. It has powerful filters built in to add a little pop to the final photo.
Bonus stuff
Here are some extra notes and quick tips for you.
- The viewers’ eyes are drawn to the lightest part of the image. Work to make the subject either the brightest spot in the photo or highlighted by it in some way.
- Consider using the composition techniques outlined above to create interesting photos to start with.
Features I don’t typically use
Phone flash – don’t use it! In general, no matter how powerful the camera and its processing capability, the on-camera flash does not yield flattering results. Get that light off the camera. Use another cell phone flashlight or LED to light your subject’s face.
Zoom – don’t digital zoom! Beyond 2x, the photo will be grainy. This is not what you want for posting to your IG, Facebook, etc. Until there are improvements in the algorithms, I’d not suggest using digital zoom. Move your feet to get closer to the subject or consider buying an accessory zoom lens.
There are two types of zoom available to you on your phone, optical and digital. Optical zoom behaves like having a zoom lens on your phone. It results in image quality equal to no zoom on the camera.
Digital zoom, however, is a different story. Digital zoom crops into the scene, then it attempts to fill the image by spacing out pixels and tries to figure out what should be used to fill the gaps. The resulting images lack sharpness and are usually quite grainy.
Accessories for mobile phone photography
Tripod – definitely worth getting one.
Lenses – great if you want to only use your phone but want more flexibility
- Moment – they have a variety of lenses from wide, to fish-eye, and even one for macro. Advantages – high-quality lenses. Disadvantage – special phone cases required to use them.
Olloclip – great lens quality, Olloclip product offers lenses for both front and back cameras
Lights
- Led panel – good for vlogging or using as off-camera lighting of people.
- Consider purchasing a light with adjustable color temperature.
Click here to see a full list of fun cell phone camera accessories.
Conclusion
In the end, this is not an exhaustive list of tips, but it’s a good start.
Thank you for sharing your time with me. I hope you learned something that you can take with you wherever you find yourself. Feel free to ask questions in the comments area below. I’d be happy to help in any way I can.
If you have some favorite cell phone photos you’ve taken (or some handy accessories you use) please share them with us as well!