In the first installment of this 3-part 360 photography tutorial series, you learned all the essential tips, tricks, and information you need to begin shooting and creating 360 virtual tours. Now, in part two of the series, we will discuss 360 photography for interiors. We will cover the following topics:
- The key difference between interior and exterior 360 photos
- Important factors to keep in mind when shooting interior 360s
- How to edit a 360 photo and balance exposure
What is different about shooting a 360 for interiors?
The key difference between shooting an interior 360 versus an exterior 360 is exposure variation. When you are outside, the entire scene is generally lit by the sun, so it has a consistent exposure and white balance throughout. However, when shooting an interior, there are many more variables to deal with. The exposure can vary greatly if you are facing towards a window compared to away from a window, or you may have multiple light sources (e.g., window light mixed with incandescent interior lighting).
In this article, you’ll learn how to deal with these variables to create a balanced, natural-looking image.
What are important factors to keep in mind when shooting?
- Exposure
- White balance
- Lighting
- Camera location
- Tripod height
Exposure: If you are shooting in an interior space that has a window on only one side, the exposure is going to vary a lot (potentially as much as 2-3 stops) when the camera is facing towards the window as opposed to away from it. Having a 360 that is overexposed on one side and then plunges into darkness on the other is not ideal.
So, what do you do? Using the available lights in the interior can certainly help balance out the exposure a bit, but it likely won’t get you all the way to where you need to be. Introducing incandescent or fluorescent interior lights will also cause a clash of colors, since the white balance needs of the window light are different than the interior lights.
The ideal way to produce a perfectly balanced interior 360 is to shoot multiple exposures in each position as you rotate the VR head. These will be turned into an HDR (High Dynamic Range) image. The exposures will be blended together to create a perfectly balanced, natural-looking image that is comparable to what your eyes see in person.
White balance & lighting: Whether or not you choose to use the available interior light or only the window light will be a matter of preference and will depend on the room. Regardless of what the light sources are, determining the white balance is the same process. All camera settings need to be in manual mode when shooting 360s so that everything stays consistent from shot to shot as you rotate the camera. To get the most accurate white balance, and to set it manually, I suggest using the degrees Kelvin (K) setting on your camera. How to determine the WB will be discussed in the next section, The Shoot Process.
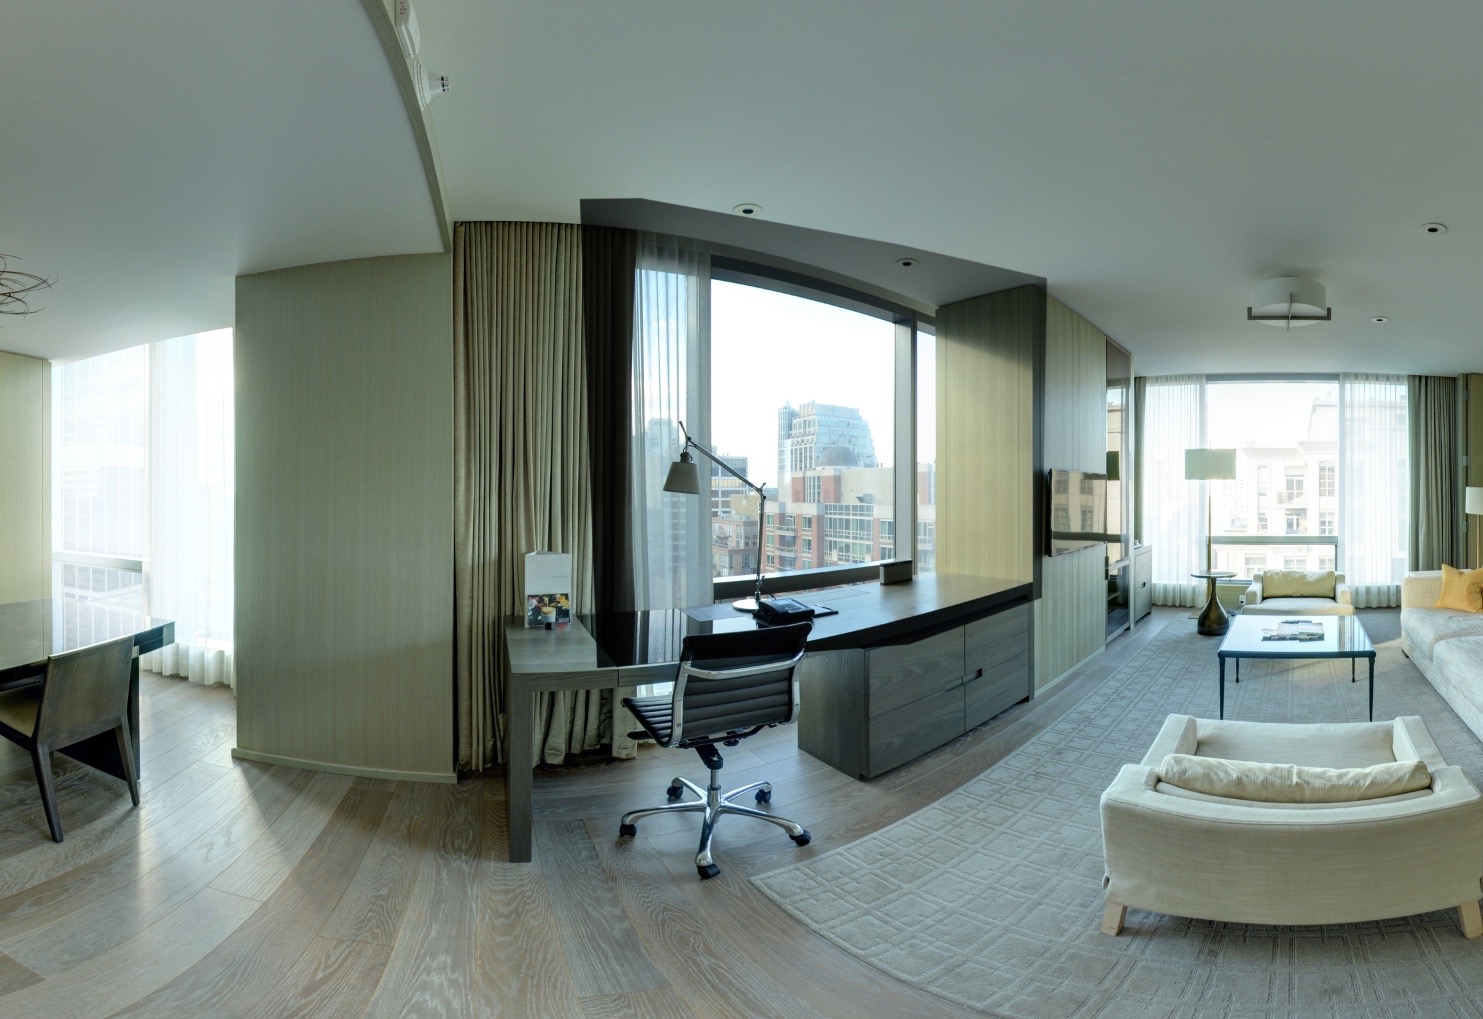
Camera location and tripod height: Composing a 360 photo is different than composing a still photo because you aren’t simply shooting one angle. A 360 will show everything surrounding you, so camera placement and tripod height are important considerations. To create the most interesting 360, place the camera in a position where there are important features on all sides.
Tripod height will depend on what the features are in the room, and the ceiling height. Generally, setting the tripod at about 5’ high provides the most natural viewing angle. The exception is if you are shooting an interior space with low ceilings. Then, you would want the camera height to be approximately equal distance between the floor and ceiling. Keep in mind also that objects tend to look farther away in a 360.
The Shoot Process
First, choose your camera location and tripod height, and level the tripod. With your camera gear setup, make sure all camera settings are on manual. The ISO should be as low as possible, aperture set to f/8, and white balance set to Kelvin (K) mode.
You need to find the average exposure for the room as well as the average white balance. With the VR head in the first position, adjust only the shutter speed, taking test shots until the exposure looks accurate. Then adjust the WB as required. If you have mixed light sources, you want to find a happy medium between the warm interior lights and the cooler window light.
Next, rotate the VR head and take additional test shots in each position. You may find that the exposure and white balance are much different facing in one direction compared to the other. Your final exposure and WB settings should be an average between these extremes.
With the white balance and the average exposure set, you are ready to start shooting. Place the VR head in the first position and take 5 exposures, bracketing by 1-stop increments (+2, +1, 0, -1, -2) above and below the middle exposure you set. Rotate the VR head and repeat this exposure bracketing in each of the 4 head positions (every 90°).
With the 360 photo now shot, let’s discuss post-processing.
Post-processing
In part one of this 360 tutorial series, I described the 360 stitching and virtual tour process, but didn’t get into details about editing the images. The editing phase comes after stitching and before generating the final virtual tour. Edits are made to the stitched panoramic JPEG image.
Step 1: Blend HDR
In order to balance the exposure of interior 360’s, I recommend blending the 5 exposures you took in each position into HDR images. The software I use for this is Photomatix Pro by HDRSoft. You can blend HDR images in Photoshop as well, but I find that Photomatix gives the most control over settings to create a natural-looking HDR photo, and you can blend images in batches.
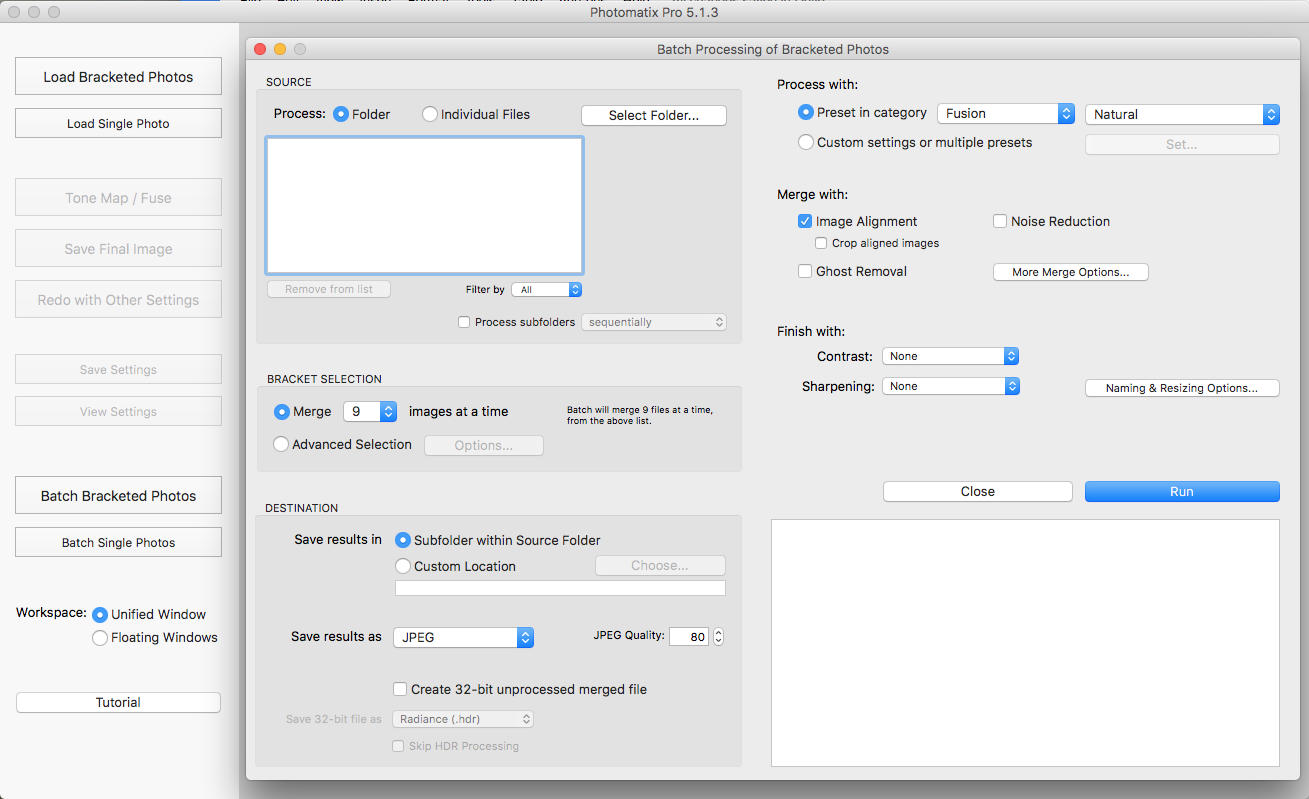
Go to “Batch Bracketed Photos” and select your image folder.
Choose “Merge: 5 Images at a time”.
Choose “Save Results in: Subfolder within Source Folder” and “Save Results as: JPEG.”
Under “Process with:” try “Preset in category:” “Fusion” “Natural”
Note: Feel free to experiment with different presets and custom settings to get the best look, and see if having “Merge with: Image Alignment” on or off works better for stitching your images.
Step 2: Stitch images
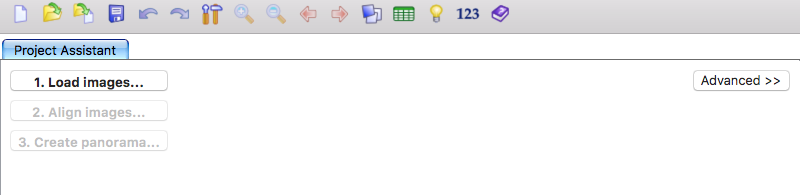
After blending the photos in Photomatix, you now have 4 HDR images that need to be stitched together into a panoramic image. This is done using specialized software, such as PTGui. PTGui is an easy-to-use program that does an exceptional job of stitching 360 photos. You simply click “1. Load images…” and import your 4 photos. Then click “2. Align images…” and the software will automatically stitch and align your photos. Then click “3. Create panorama…” to export the JPEG file.
I also suggest stitching the 4 middle exposure photos and the 4 darker exposures that show the window exposure properly into panoramic images. These will be used in the editing process.
Step 3: Edit
I’ll be discussing the editing process using Adobe Photoshop CC, but of course there is no need to go into detail about every little edit that might be done to a photo, as that will be specific to your image and your preferences. Instead, I will touch on a few of the important differences about editing a 360 and balancing the exposure.
Local adjustments: Editing a 360 photo is similar to editing a regular still photo, however there is one big difference—you must avoid the image edges. Global adjustments can be made to the entire image without any issues. However, if you want to make changes just to certain parts of the image using a layer mask, you must make sure you don’t paint beyond the edges of the image on the left or right sides. Remember that the left and right edges of the panorama need to join together in order to display a seamless 360. Therefore, if you make adjustments to one side of the image and not the other, you will see a seam in the 360 where the adjustments don’t match. To avoid this issue, you must use the Offset tool found under the Filter>Other menu.
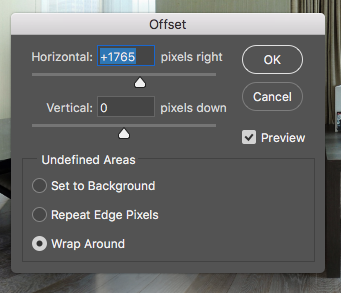
Move the “Horizontal” slider to the left or right (with “Wrap Around” selected) and you will see that the image pans to a different section of the photo. This allows you to make adjustments to specific areas, while editing only in the middle part of the image and avoiding the edges. This is the safest way to make edits, such as brightening or darkening part of the image or correcting white balance, to avoid any visible seams. If one part of the 360 is darker than the other, pan the dark section to the middle of the image and then use an Adjustment Layer to brighten the area. Just paint the adjustment into the area that you want to affect, using the layer mask and Brush tool.
HDR TIP: If the HDR version of the image looks a little too, well… “HDR” for you, you can drop the “middle exposure” version of the pano on top of the HDR version, and then gradually paint in some of the middle exposure using a layer mask. This will make the photo look more natural and give you more control over how strong the HDR effect is. Just make sure both layers are properly aligned by zooming in and lowering the opacity of the top layer to 50%.
How to correct window exposure: Now, I will explain how to replace the window area of a 360 in order to correct the exposure, if needed. With the HDR version open in Photoshop, open the panorama you made with the dark exposures (with the properly exposed windows). Since you will be editing the window area, use the Offset tool to pan the window area to the middle of the image so that it isn’t cut off at the edges, as explained earlier.
On the dark window layer, make a rough selection using the Polygonal Lasso tool around the correctly exposed windows, leaving extra content around the windows within the selection. Use the Move tool to drag and drop this selected area into the HDR file, which will add it as a new layer on top.
Change the Opacity of this new layer to 50%, and then use the Move tool to drag the windows into place and carefully align them with the underlying layer. Zoom in and use the arrow keys to make this as precise as possible, looking at overlapping features. If for some reason the images aren’t matching exactly right, you can use the Transform tool to try to match them up better.
Now that the windows are aligned in both layers, you can revert the layer opacity to 100%, and then create a layer mask and fill it with black to hide the top layer. With a brush set to 50% hardness and 100% opacity, paint within the window area to reveal the properly exposed windows.
You can now lower the opacity of the new window layer if needed until it reaches a realistic brightness and look. Then use a large brush at 0% hardness and 30% opacity to soften the edges around the window and blend it to look natural.
Step 4: Generate virtual tour
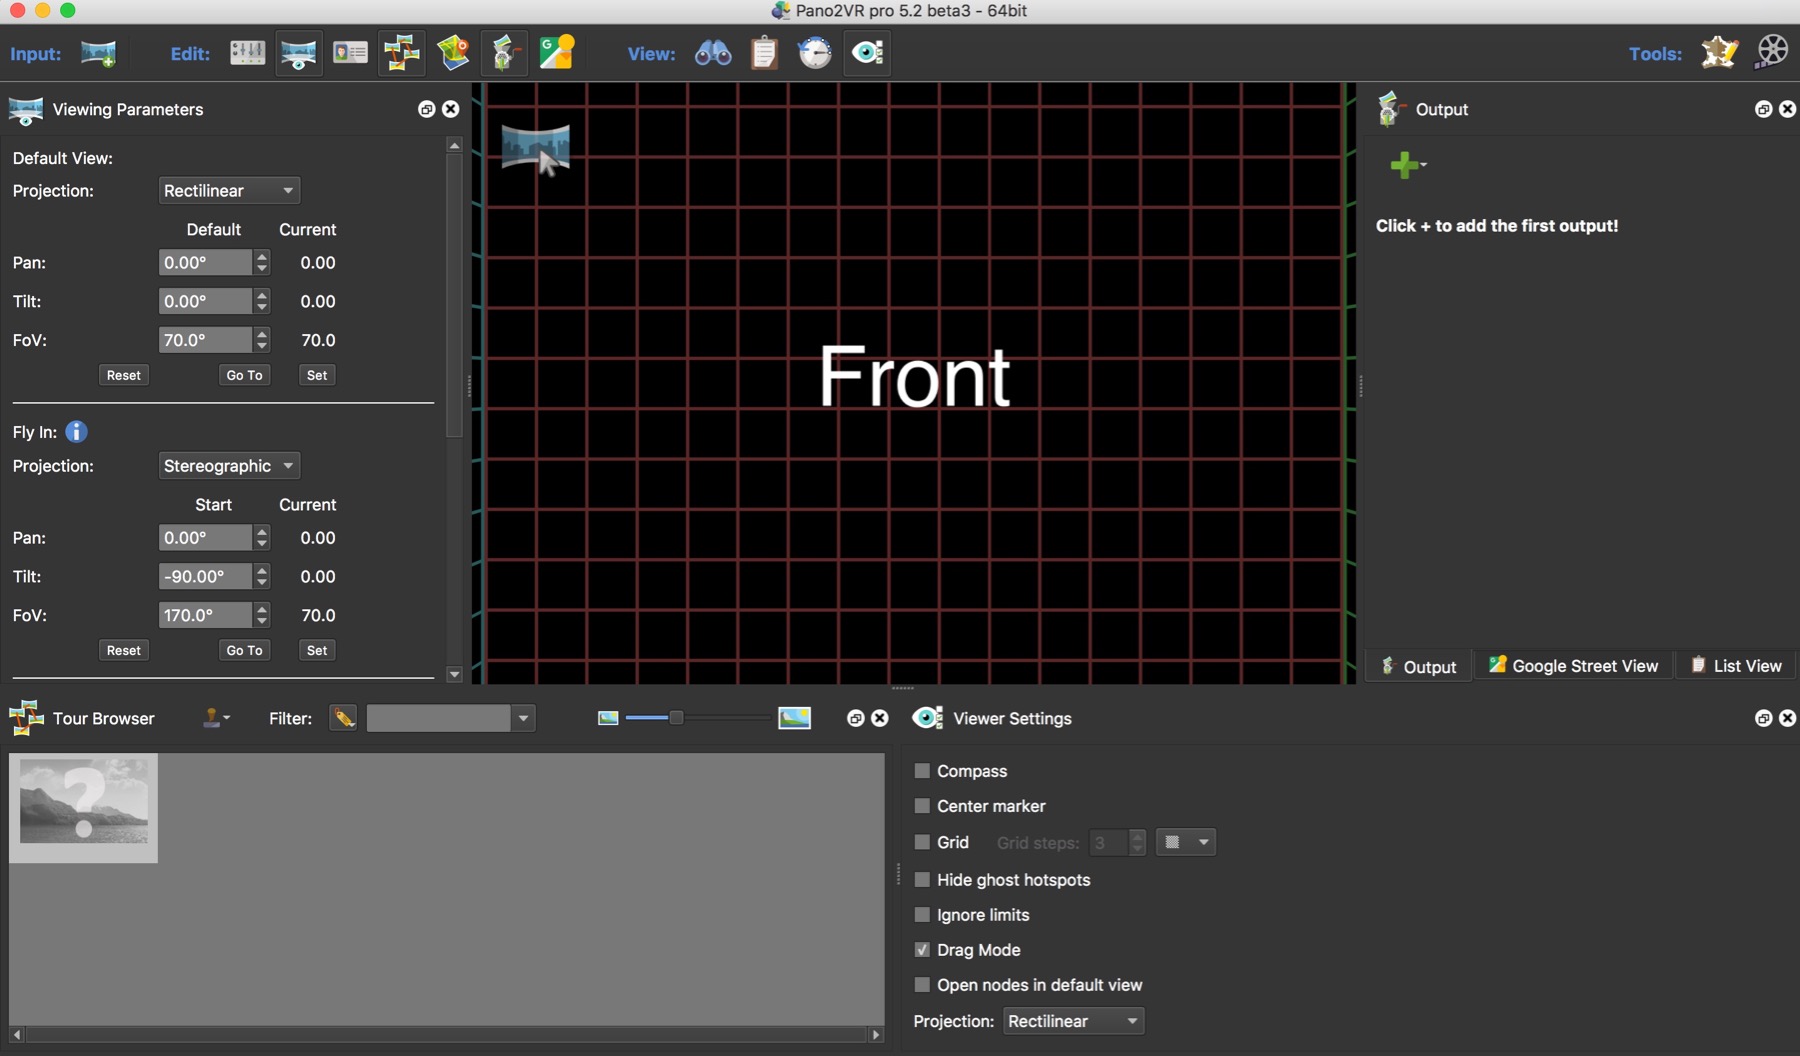
Now that you have finished making the required edits to the stitched panoramic JPEG image, the next step is to turn it into a 360° virtual tour. The program I recommend for this is Pano2VR by Garden Gnome Software. Pano2VR allows you to export your 360 file in different formats, such as HTML5 (for mobile/tablet gyroscopic support), Flash, and QuickTimeVR depending on your needs. Pano2VR offers video tutorials for a more detailed explanation of how to use the software.
Summary
We have now discussed the key differences between shooting interior and exterior 360 photos, important factors to keep in mind when shooting interior 360s, and how to edit an interior 360 photo and balance the exposure. With a little attention to detail and some editing know-how, you can create visually stunning interior 360s that really make the viewer feel like they are standing in the room.
If you have any questions for Dave about 360 photography, leave them in the comments section below.
Dave Fitzsimmons is the Senior Photo Editor at 500px, and owner of hotel photography company, Photoworks National.
Links
500px: 500px.com/davefitzsimmons1
Instagram: @fitzsimmons_dave
Website: www.photoworksnational.ca