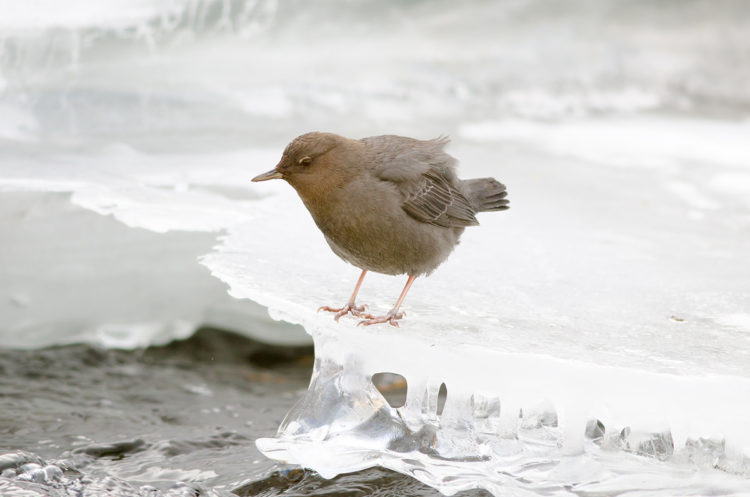
If you enjoy nature and want to try your hand at photographing birds, this article will give you some pointers to get started. Follow these beginner bird photography tips and they will help you go home with better photos and more keepers.
Bird Photography Tips
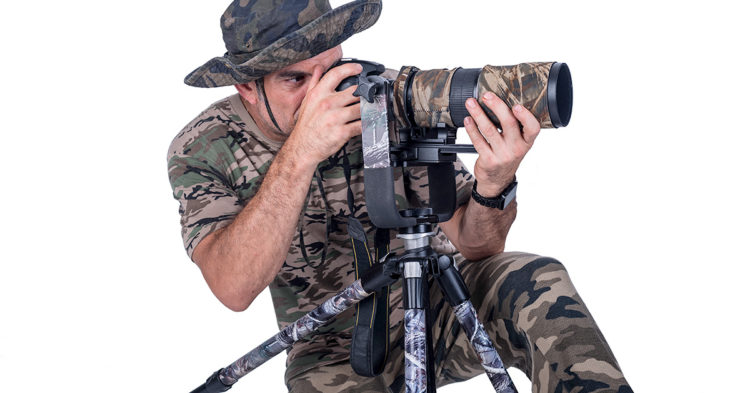
#1 The clothing you wear matters
Hunters that go for game birds dress up in camouflage for a reason.
Doing the same for photography will increase your odds of getting closer to your subject.
Birds are very social and active animals.
They are almost always aware of your presence and you are not going to sneak up on them unnoticed.
But you can gain a small advantage of not spooking them by dressing in clothing that blends in with your surroundings.
Go as far as your passion and wallet can afford.
Camouflage everything including hats, pants, long sleeve shirts, gloves, your lens, and wrap camo tape around your tripod if you’re using one.
Do you NEED camouflage gear to photograph birds?
If you don’t have full-blown camouflage gear when trying to photograph birds, just try and stay away from bright colors.
Choosing the right clothing isn’t going to completely prevent you from getting great bird photos, but it may give you better opportunities to get closer.
#2 Move slowly
If you’re walking a trail, road, or wherever, you want to be moving at a slow pace.
If you spot a bird that you want to photograph, take an initial shot just to get the picture.
It may be a rare bird. At least you got that one shot even if it’s not good.
If the bird is stationary, such as on a fence, or tree branch, start to make small steps towards the bird after you take that first image.
Take one step, then shoot.
Take one ore step more and take another shot.
Then wait 5-10 seconds before you attempt to move any closer to the bird.
By doing this you are showing the bird that you are not an immediate threat. Keep in mind though, that depending on the bird, eventually, you will get too close and spook it.
For birds that are at ground level, I will usually get on my stomach and shoot from the same eye level as the bird.
Slowly crawl forward, waiting 10 seconds or so before I inch any closer.
You don’t want to appear tall and big to birds that are hanging out on the ground.
If they are up high in the trees, and there’s a certain bird you are trying to photograph, you obviously do not want to be on your stomach. But you still want to move slowly.

Patience is so important when getting good photographs of birds.
This is especially true with rarer birds that are within your proximity and view.
#3 Learn some bird calls and songs
If you are trying to build a list of different bird species photographed, you need to learn the common songs of the birds that are in your area.
But, if you just want to photograph any bird, then this tip really isn’t that important.
What do I do if there is a rare bird sighting in my area?
If there happens to be a rare bird sighting in your area, you have two options.
- You can either use sheer luck to try and find and photograph it, which is not likely.
- Or you can listen to pre-recorded calls of the bird.
Once you hear the song out in the field, you can determine if that’s the bird you want to pursue and photograph.
#4 Always keep your lens cap off
I’ve missed many opportunities to get some epic wildlife photos because I had my lens cap on. So now I take it off when leaving home and set my camera on the passenger seat.

So when you are about to go out on your hike to find birds, your lens cap needs to be off.
If you are worried about the front lens element getting damaged, either get a high-quality UV filter or attach a lens hood.
With that being said, make sure your camera is set up for bird photography.
#5 Optimal camera settings for bird photography
If you do a lot of landscapes or portraits your camera may be set to ISO 100 with a shutter speed of 1/160th of a second.
In most cases, that is not going to work well when photographing birds, especially if you are using a long lens.
So let’s look at some optimal camera settings for birds:
Shutter speed
Your shutter speed should be at least twice that of your focal length or more.
For example, if you have a 420mm lens, you should be shooting at a shutter speed of 1/800th of a second, preferably 1/1000th.

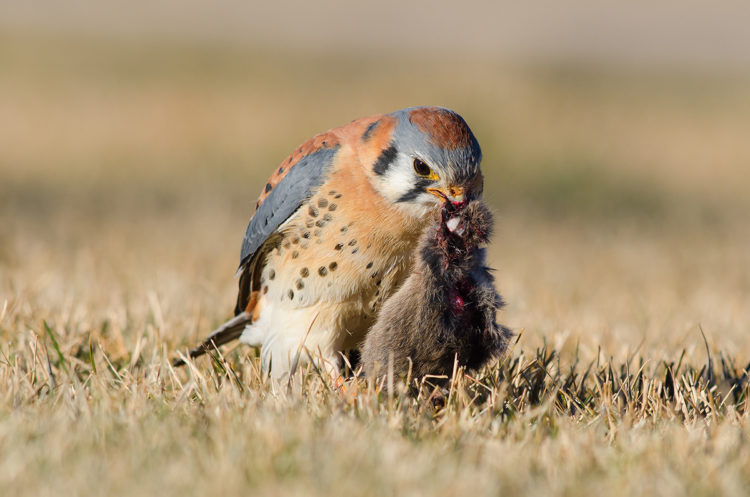
I know that some owls stay stationary when perched on tree branches. Kestrels stay fairly still when hunting and eating sometimes, but most birds are on the move especially small songbirds.
So keep that shutter speed fast to get more keepers.
ISO and Aperture
Set your ISO to auto with a maximum between 1600 and 3200, depending on your camera body and the amount of available light.
Next shoot with your aperture wide open. This will allow you to jack up the shutter speed.
Drive and Autofocus
Set your camera’s drive mode to continuous or burst mode.
There are situations when you may want to set this to quiet (W or silent) burst mode though.
Set the autofocus to Continuous mode, single point.
There are instances where back button focus works, such as photographing birds in flight, but this takes a lot of practice and I wouldn’t recommend it for beginners.
Start with those settings failed in before you head out to photograph birds in the wild.
When the bird you want to photograph is in your view, it only takes half a second of fumbling around with your camera settings to cause you to miss the shot. Or you might get a blurry shot because your camera wasn’t set up properly.
#6 Buy the longest lens you can afford
In most types of photography, the technique used can overcome gear. For bird photography, however, the length of your lens is the most important thing.
What are some good beginner lenses for bird photography?
There are two types of beginner lenses that come to mind that both Nikon and Canon make.
- The 70-300mm f/5.6 is a good starting point.
- The 300mm f/4 is even better.
But if you plan on doing a lot of bird photography, you will not regret getting that lens despite the fact it is way more expensive.
You also have the option of adding a teleconverter to these prime lenses which can increase the focal length from 1.4x up to 2.0x.
The only drawback is you will lose a stop of light with the 1.4 converter, and 3 stops with the 2.0.
When and where to practice your bird photography?
#7 The best time to photograph birds
Birds are most active right before sunrise, and continue to be active for a few hours after the sun rises.
Early bird gets the worm, and the early photographer gets the bird.
This is when most activity happens because birds are actively feeding in the morning. There is also better light which is a plus.
#8 Where to practice photographing birds
Bird feeders are great places to get practice photographing birds.
This is going to give you ample opportunities to get your techniques down pat.
If you live near the ocean, the beaches are also hot spots for birds, especially in the morning. There can literally be thousands of birds in one area feeding on baitfish right at the shore.
Lakes are also money for high-volume bird activity.
Think about bird food.
Wherever there is food there are going to be birds.
Big lakes are usually swimming with fish. Fish are bird food, so . . .
So look for fishing spots around docks and bridges near the ocean.
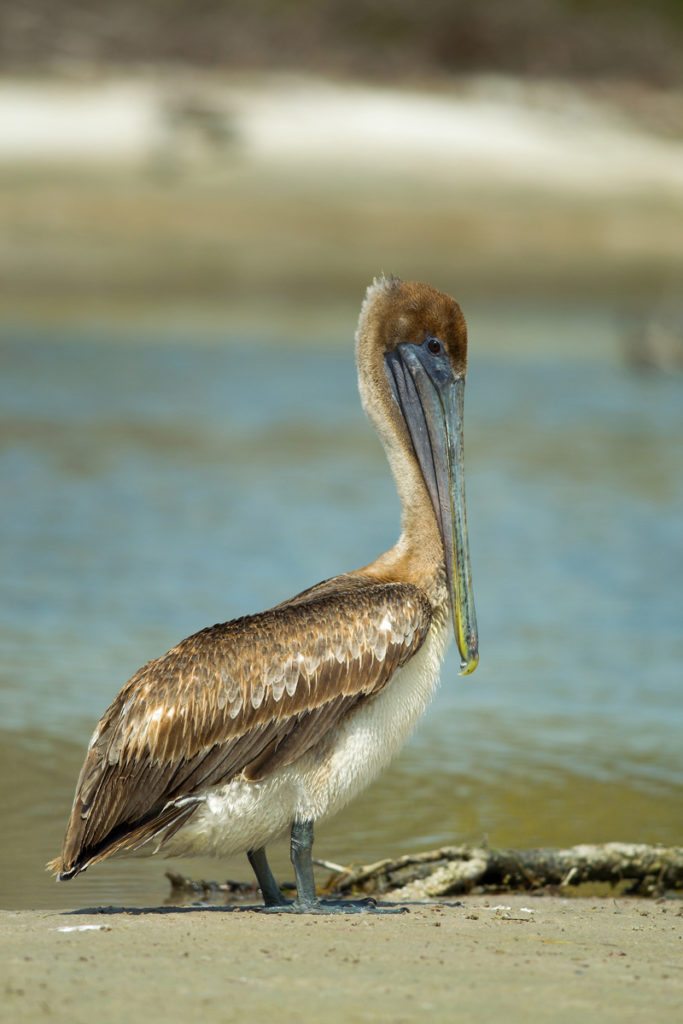
The easiest types of birds to photograph are pelicans.
They usually don’t mind you getting too close. They don’t move really fast, and when they do fly, the do so in straight lines and move pretty slowly.
So they are great birds to practice honing your bird photography skills.
If you are near the ocean, find a dock where people are fishing. You will be greeted with photographic opportunities of many pelicans, herons, gulls, and other birds that won’t mind being photographed.
Conclusion
Now that you have these 8 bird photography tips, you’re ready to go out and give it a try.
If you aren’t ready to commit to buying a big lens just yet, try renting or borrowing one from a friend to see if you enjoy this kind of first.
Remember to get out there and practice as often as possible, Please share some of your bird photos in the comment area below and if you have any questions, please ask.