So you want to get your flash off camera? If you want to improve your flash lit portraits you need to get your flash off the camera. A great way to start is to use Nikon’s own CLS (Creative Lighting System). Since a lot of people will own one of the Nikon Speedlights, getting it off camera and triggered remotely is a very straightforward and relatively inexpensive task. In this article, we will explore the basics of Nikon’s Creative Lighting System and set things up to photograph an image like this:

Lit with just one Nikon SB-600 mounted on a shoot-through umbrella above and to the right of the model.
To get started, you will need the following kit:
Putting It Together
Put it all together is super simple – set up the light stand, mount the umbrella bracket on the light stand, then mount your Speedlight on the bracket like this: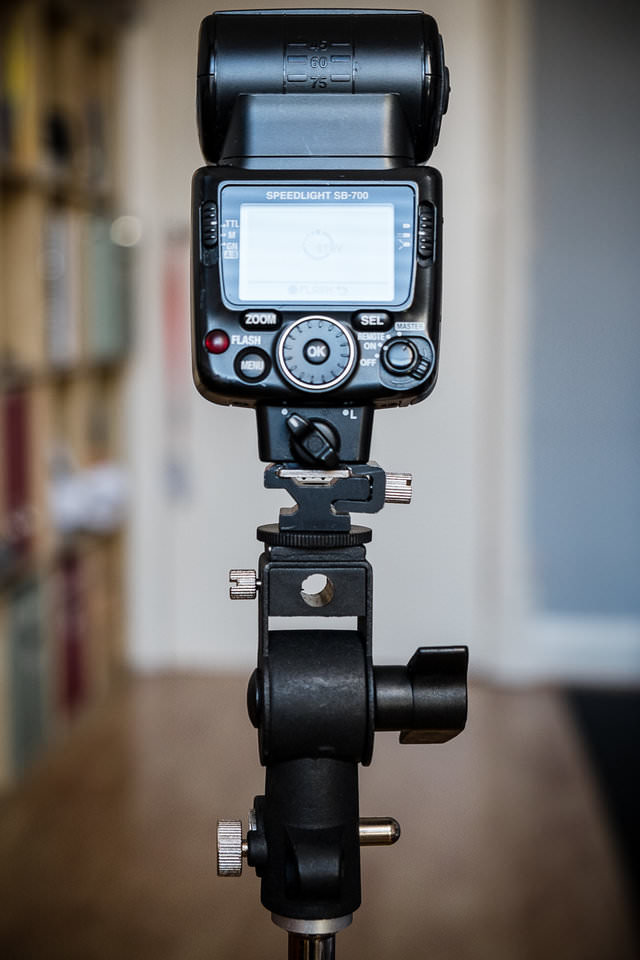
Next, put the shoot-through umbrella into the designated hole and secure it. The end result is something like this: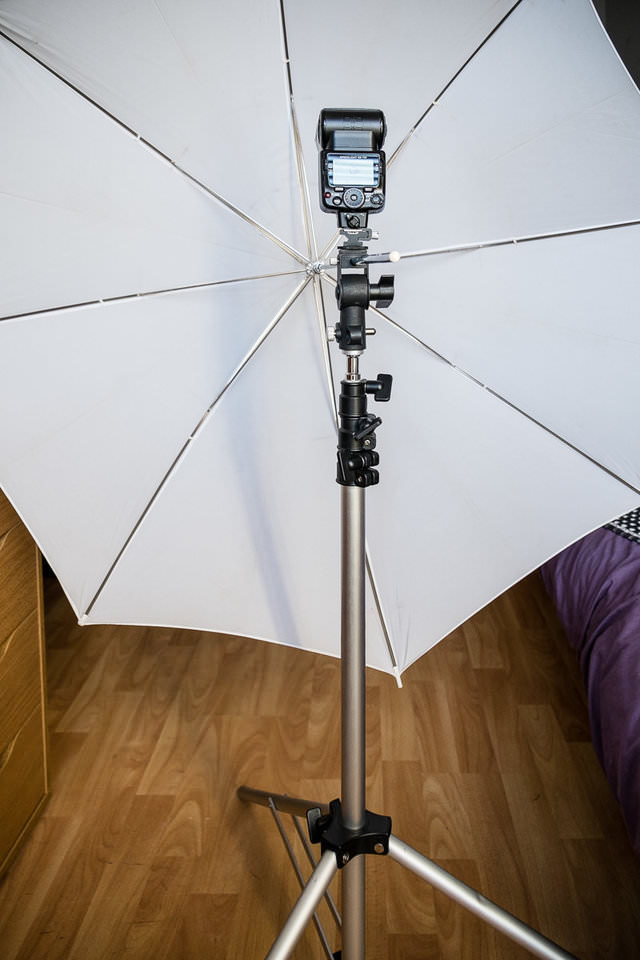
Why The Nikon CLS System is Great for Beginners
The main feature of the Nikon CLS system is the ability to use TTL metering with the remote flash. This is called i-TTL balanced fill flash. The Speedlight sends out pre-flashes before the main flash, which are then picked up by the flash units TTL flash sensor. This information coupled with the matrix metering system in your camera and lens enables the flash to choose the best output for the flash to balance the foreground/background.
Its like you have a lighting technician working with you holding your hand!
Below is the list of Nikon Cameras that have the ability of using the pop-up flash as a remote commander to Nikon’s range of Speedlights. The custom setting where you will find the “flash cntrl for built in flash” is to the right.
Camera Custom Setting:
Nikon D800(E) / D810: e3
Nikon D700: e3
Nikon D600/D610: e3
Nikon D300(S): e3
Nikon D200: e3
Nikon D7000 / D7100: e3
Nikon D90: e2
Nikon D80: e3
Setting Up Your Camera
The images show the menu system of the Nikon D700, although other Nikon cameras will be very similar:
We can control the power of the built in flash and I prefer to have no output other than the trigger signal coming from the pop-up flash, so cycle the mode until it shows to dotted lines like this “- -“. This means the pop up flash is not firing other than to trigger your off camera Speedlight. Although in practice there is a little power still coming from the pop-up flash.
Underneath the built-in flash are two groups “A” and “B”, so we only need to adjust group A until it reads TTL.
To the right is the exposure compensation of the flash, which can be adjusted from -3 to +3 stops of compensation. We will keep it at 0 for now:
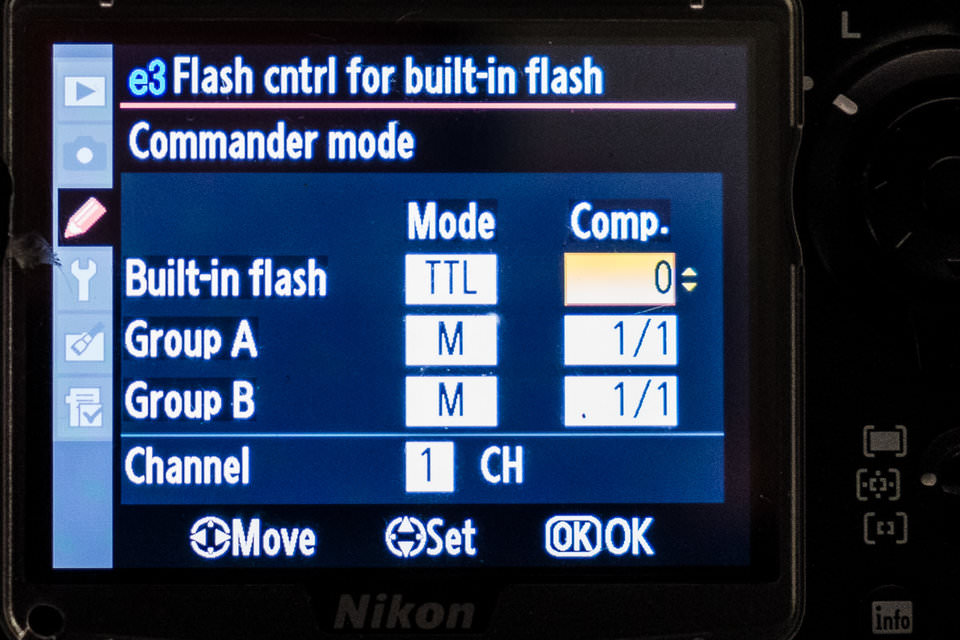
Underneath Group B should be “CHANNEL” it should already be in channel 1, if not, set it to channel 1. Once you are in TTL you are set to go with the camera.
Setting up your Speedlight
The images shown are from an SB-700, although the menu system in the SB-900 and SB-910 are almost identical.
You need to set your Speedlight to “REMOTE”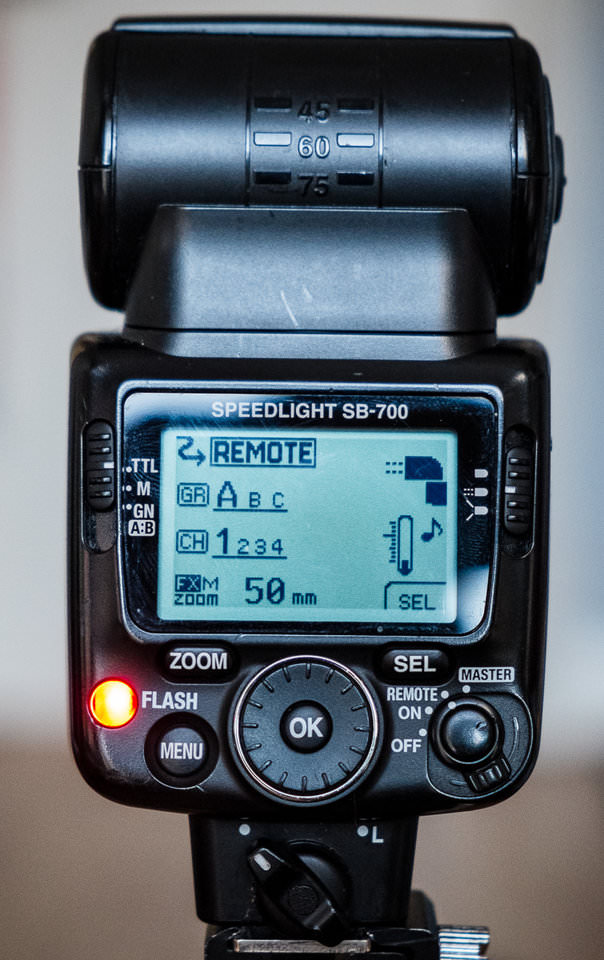
- Set the group to A
- Make sure the Channel is 1
- Keep the flash in TTL mode
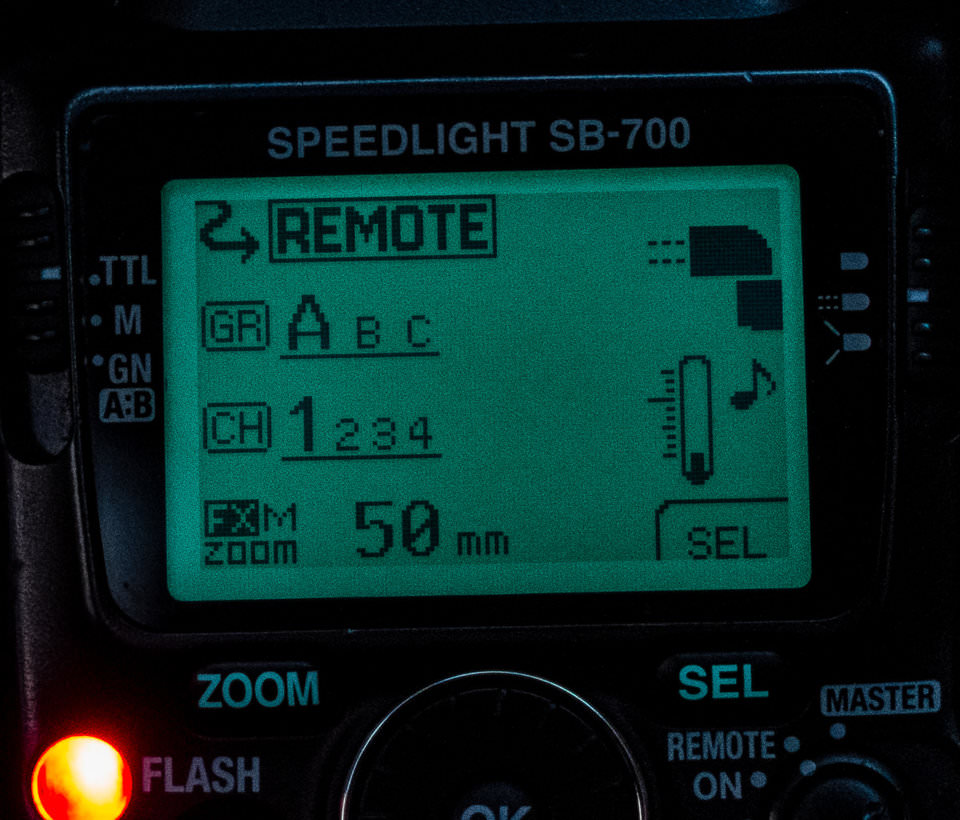
Now all you have to do is position your flash and take your picture. If you need to adjust the power of the flash you can set it to +3 or -3 stops of flash power in the camera. This is more than enough to give you pretty good control over the subject/background illumination. The only downside is, since it is an automated process, there can be variance in exposure levels, because sometimes machines do get it wrong!
As a “no-brainer” way to start exploring proper lighting, the Nikon system is great. As long as you get it right in camera, the flash will do the rest for you. If needed, you can adjust the flash compensation in camera.
The biggest downside to the CLS system, is it is a ‘line of sight’ infrared system, and as such you might need to make sure the flash IR receiver is visible to the pop-up flash. The IR receiver is the small circle at the top right of the flash body: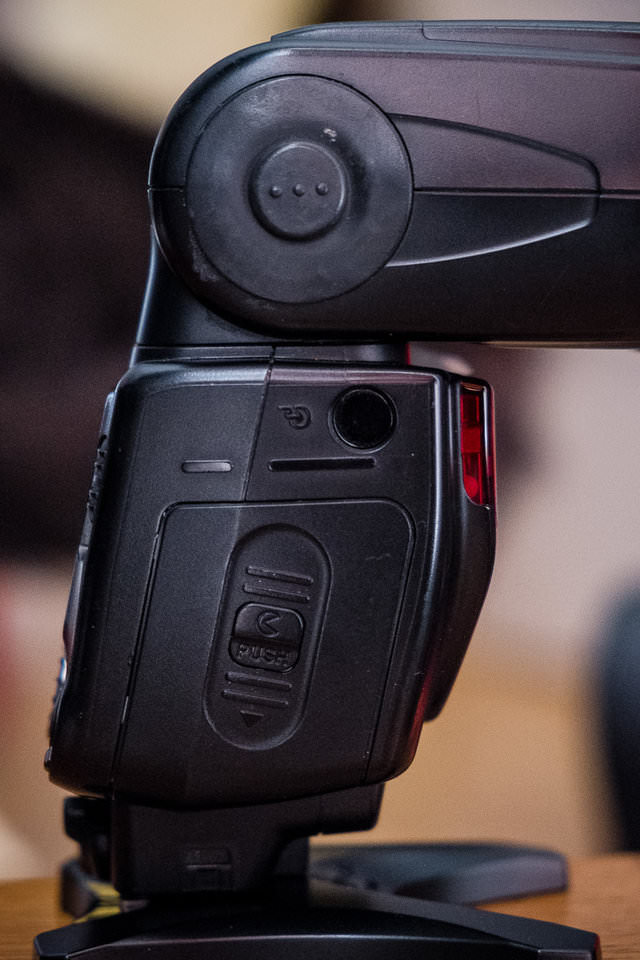
You can forget about hiding the flash behind walls – it won’t work. It can also struggle a on a very bright day. I used this system for a couple of years as a wedding photographer and it works great 99% of the time. As a beginner system, you can’t beat the ease of use with the CLS system in TTL mode. So get out there and have fun!
This article has been submitted by David Walters, a wedding photographer from Liverpool, England. You can explore his photography via his website.