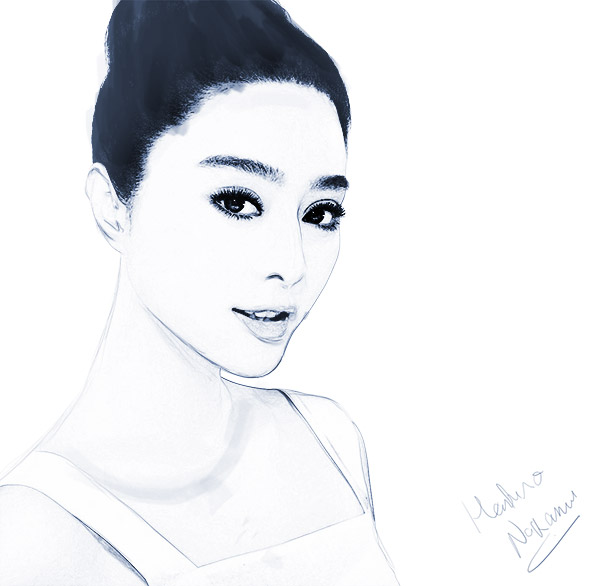
In this Photoshop tutorial you will learn how to create a black and white drawing effect using a photo.
Final Image
As always, this is the final image that we’ll be creating:

Tutorial Details
- Program: Adobe Photoshop CS3
- Estimated Completion Time: 25 minutes
- Difficulty: Beginner-Intermediate
Resources
Step 1
Open the image “Girl”. The first step in converting a photo into a drawing is to desaturate it. Choose Image > Adjustments > Desaturate and you will see that the photo converts into a black and white version.

Step 2
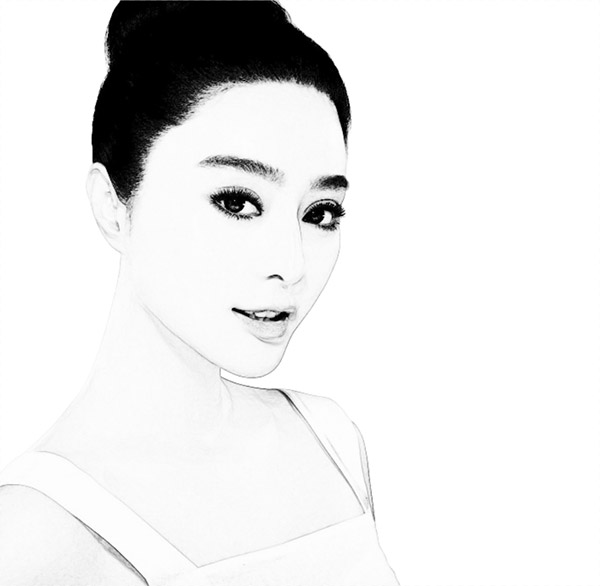
Duplicate the background layer by pressing Ctrl + J. Now apply a Find Edges Filter ( Filter > Stylize > Find Edges). As you can see the filter discarded most of the pixel information and noise and kept the lines – exactly what we need for our drawing effect.
Step 3
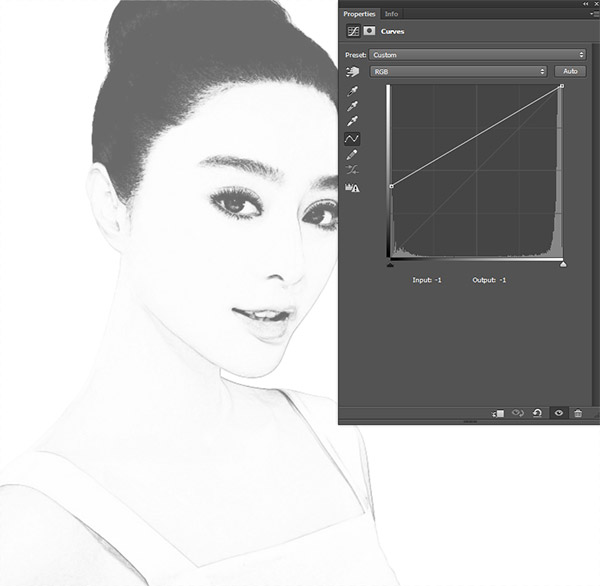
The hair is a little too black for our purposes so let’s lighten it up a bit. Create a Curves Adjustment Layer ( Layer > New Adjustment Layer > Curves ). Drag the curve up as shown below in order to lighten our image.
Adjustment Layers are a non-destructive way of performing changes and applying effects to your pictures so you should use them frequently. Aside from that you should also convert any layer that you intend to resize frequently into a Smart Object (right click on a layer and from the drop down menu choose “Convert to a Smart Object”) in order to preserve the pixel information of that layer.
Step 4
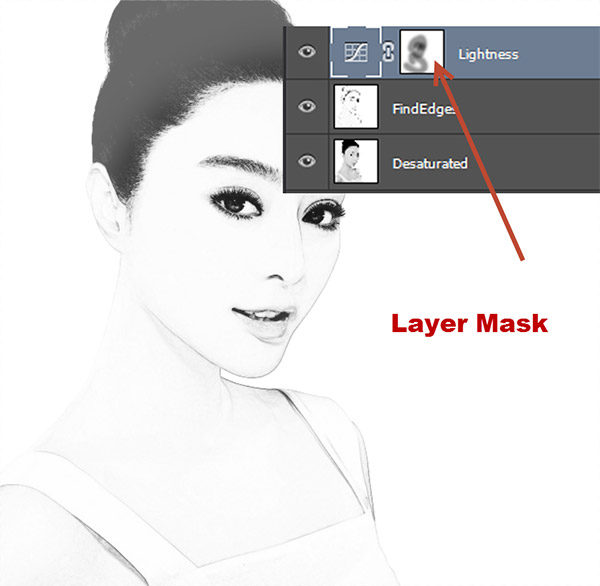
As you can see the Curves Adjustment Layer has a layer mask attached to it by default. Click on the layer mask and use a round soft black brush at 50% opacity to paint over the face in the layer mask. This will reduce the lighten effect in the face area.
Layer masks allow us to partially or totally hide portions of the layer. Black hides and white reveals in a layer mask. Adjustment Layers usually come already equipped with layer masks but if you want to add a layer mask to your layer go to Layer > Layer Mask > Reveal All.
Step 5
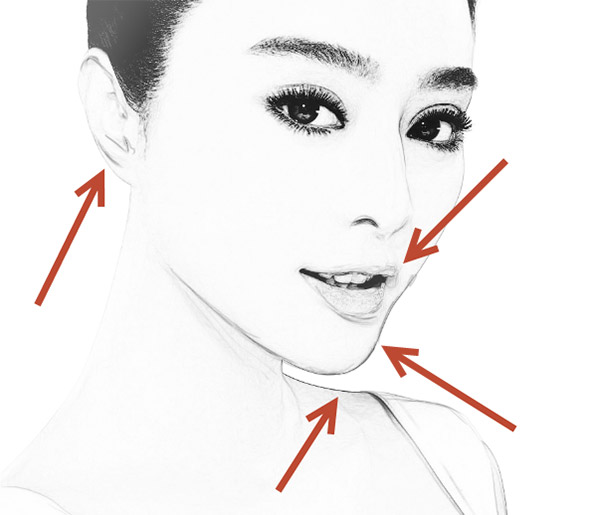
The results are pretty decent but let’s further improve the drawing effect. This step is easier if you have a drawing tablet (Wacom, Genius, etc) but it’s perfectly doable with a mouse.
Select the chalk brush and lower the size to 2px. Change the opacity to 30% and choose black as foreground color. Create a new layer (Ctrl + Shift + Alt + N) and draw over the existing lines (chin, ears, lips and maybe shoulder). This will add some realism to the drawing effect and create some random lines and forms.
Step 6
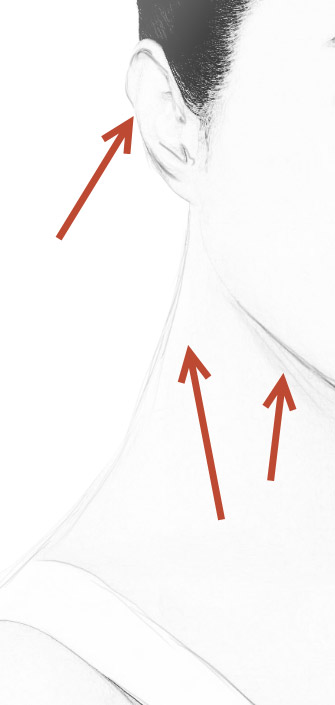
Let’s repeat step 5 – create a new layer and use the same chalk brush but at 10% Opacity and paint some loose lines over the neck and the ear. You can also paint some loose lines in other areas if you think that the existing lines are too subtle.
Step 7
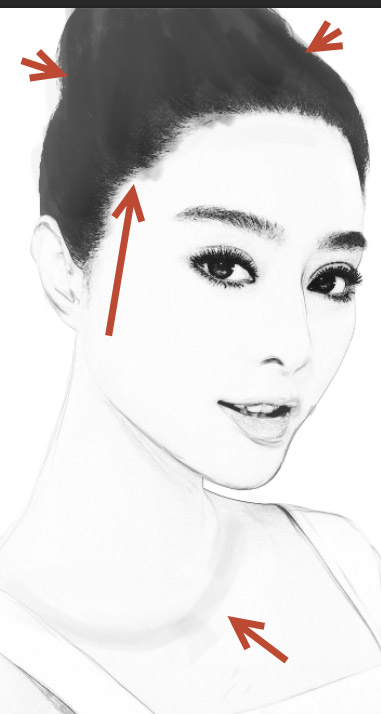
Increase the size of the chalk brush to 20px and change the opacity to 20%. Create a new layer (Ctrl + Shift + Alt + N) and paint some loose thick lines over the hair. I also painted something resembling a cloth or a medallion below the neck. Feel free to experiment on your own on this step and paint wherever you feel it will improve the final effect.
Step 8
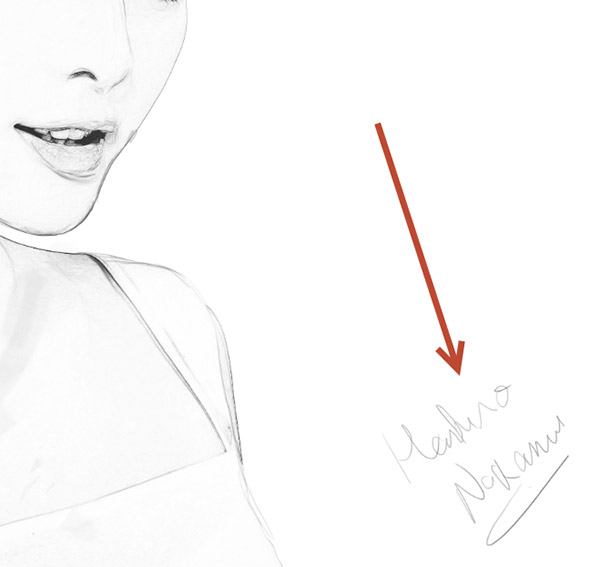
What would a painting be without the famous painter signature? Probably incomplete! So let’s add a signature.
Create a new layer (Ctrl + Shift + Alt + N). Lower the size of the chalk brush to 1 or 2 pixels and change the opacity to 80%.
Since the drawing depicts an Asian girl I thought to sign myself as Hashiro Nakamura (I have no idea if this name exists or not but it sounds appropriate for this drawing). You can sign with your real name or whatever else you like (Picasso, Rembrandt, etc).
Step 9
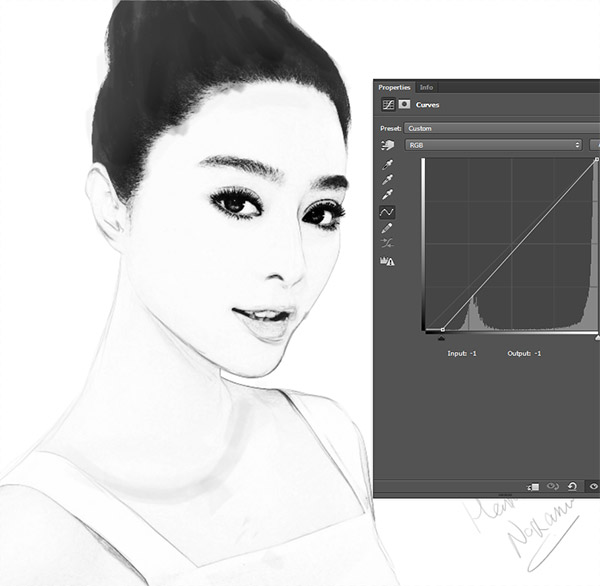
Let’s boost the contrast of our photo a little bit. We could use Brightness and Contrast Adjustment Layer but I think we should stick with Curves Adjustment Layer for consistency.
Create a new Curves Adjustment Layer ( Layer > New Adjustment Layer > Curves) and drag the left slider to the right as shown below. This will boost the saturation of the overall image.
Step 10
Finally let’s add some color to our drawing. I think that a dark indigo color would be the best. You can colorize any image using the process shown in this step.
First create a new Hue/Saturation Adjustment Layer (Layer > New Adjustment Layer > Hue/Saturation). Drag the Saturation slider to 25 and the Hue slider to 218. Now simply check the Colorize checkbox and you will see that everything in our drawing gets that nice indigo color.
And We’re Done!
