In today’s tutorial I’m going to take you through the process of creating a blueprint effect in Adobe Photoshop. If you don’t fancy spending hours construcing a technical drawing from scratch, this is a great technique for faking it. We’ll use some built in Photoshop filters to produce the basic outlines from a source photograph, then mix in some grid patterns and textures to enhance the realism.
The realism of this blueprint effect tutorial all depends on the base images you have to work with. For best results, use pictures of your subject from the front, side and top, combined into one document. Authentic blueprints are drawn as exact plans, whereas a photograph will always include unwanted details, perspective, and reflections. Wireframe 3D renders or vector illustrations can be used directly without any Photoshop adjustments, but in this tutorial I’ll show you how to create this example based on a photograph of a house.

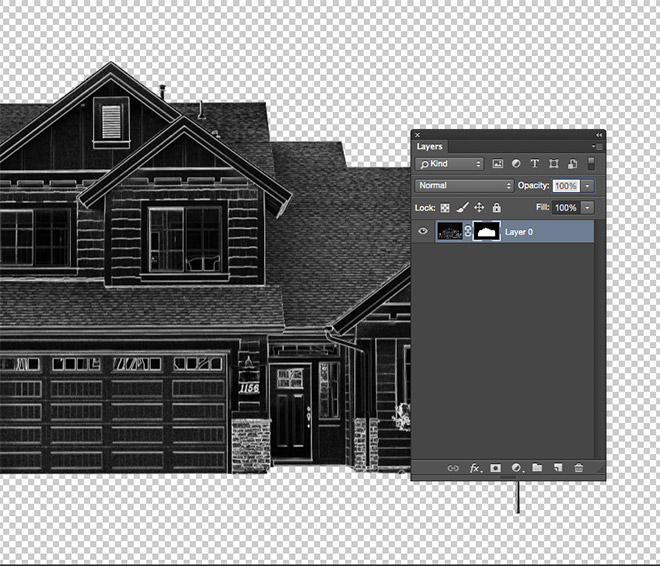
Open up your base image in Adobe Photoshop. This particular house photograph is a free image named House Lights Turned On.

Go to Image > Adjustments > Desaturate to remove the colour from the image, making it black and white.
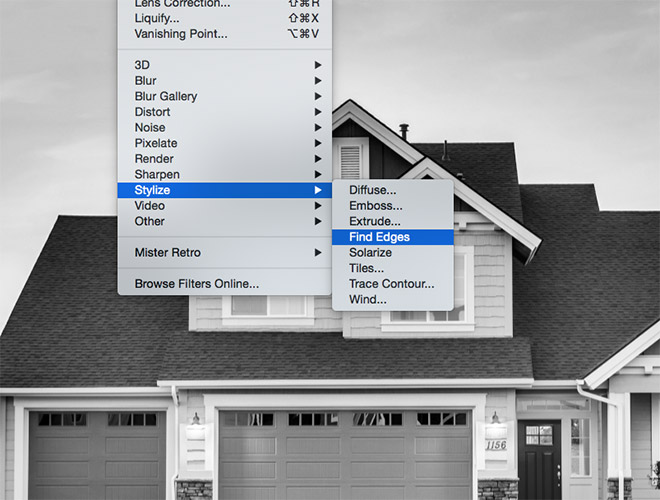
Then go to Filter > Stylize > Find Edges to generate the basic outlined look that forms the blueprint effect.
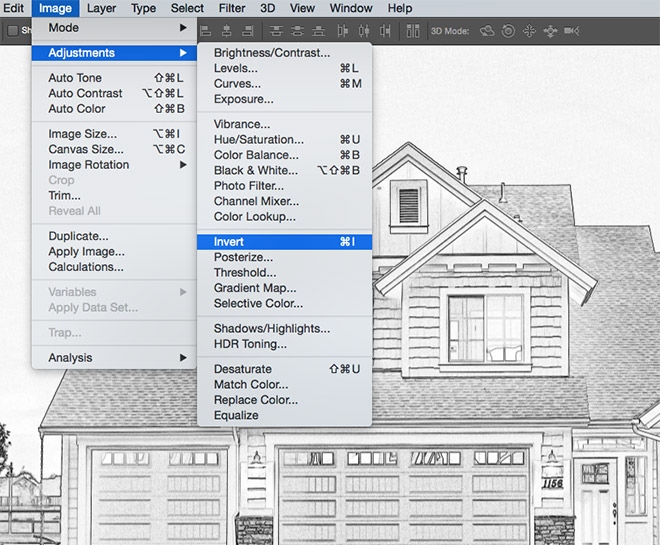
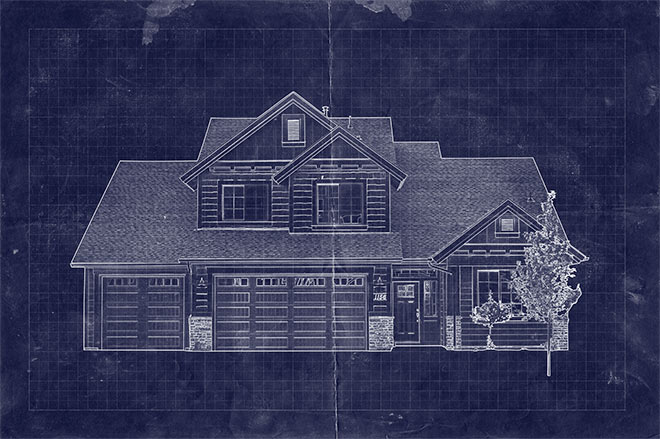
Blueprints are mostly recognised as a light coloured drawing against a dark blue background, so go to Image > Adjustments > Invert to switch the colours around.
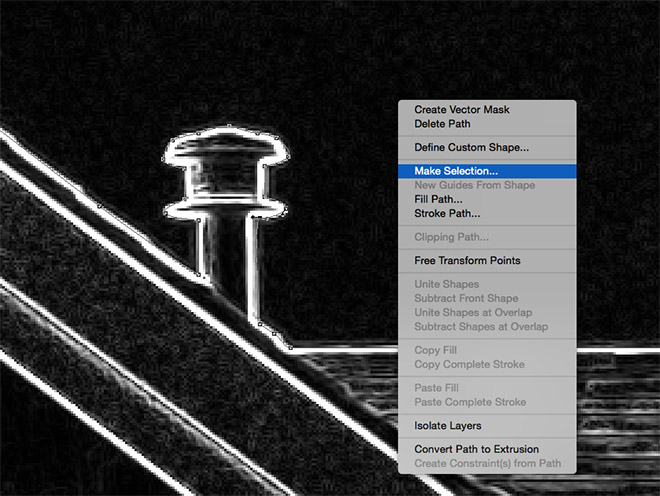
A photograph will include unwanted objects in the surrounding areas that we don’t want to be part of the blueprint drawing. Use the Pen tool to trace around the subject, then right click and select Make Selection.
With the selection active, click the Layer Mask icon at the bottom of the Layers panel to isolate the subject against a transparent background.
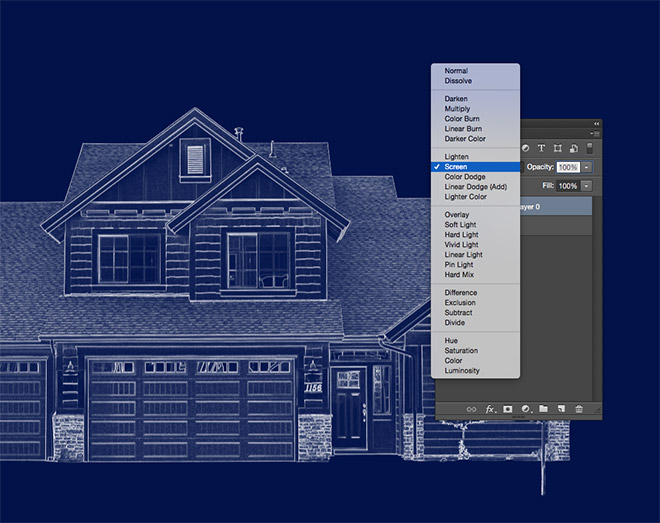
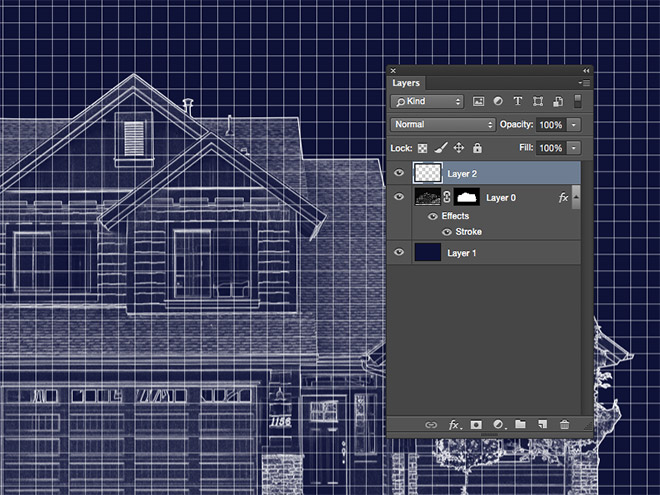
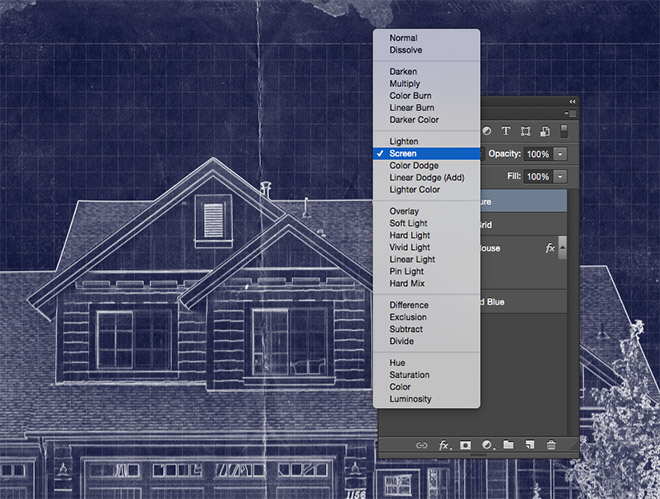
Create a new layer and drag it below the main image layer. Fill this layer with a dark blue, such as #051340. Change the blending mode of the image layer to Screen to render the black background transaprent, leaving just the white outline against the blue background.
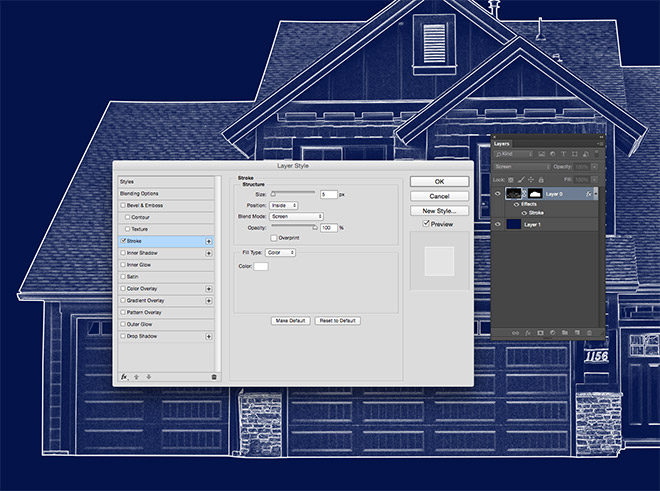
Double click the image layer and add a Stroke Layer Style. Change the settings to 5px, Inside, Screen and 100% opacity.
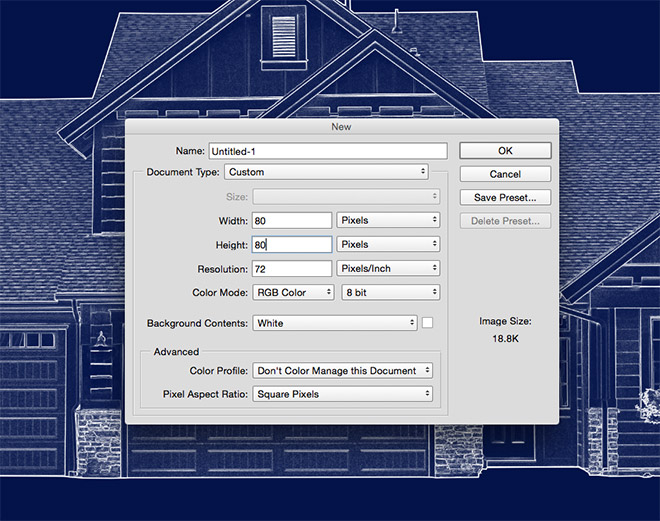
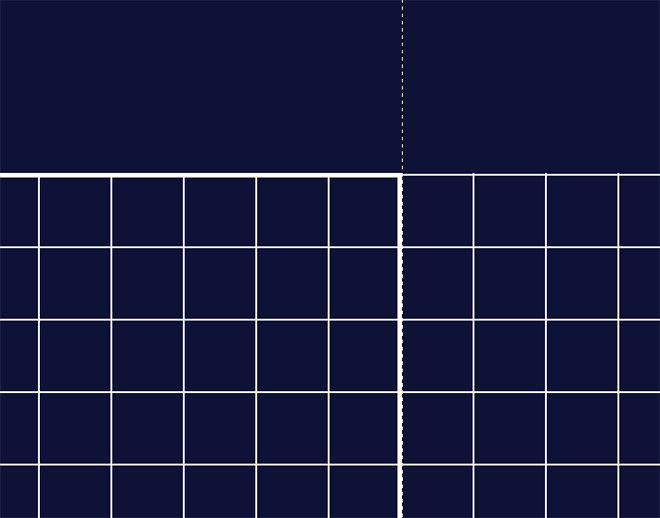
In order to add a grid to the blueprint, we first need to make a pattern swatch. Create a new document at around 80x80px in size. This size may vary depending on the scale of your document. Draw a quick marquee over your image to represent a grid square and note the size.
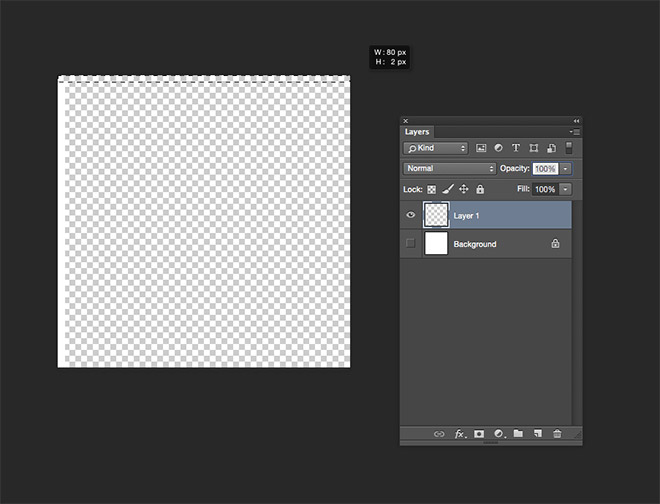
Add a new layer and turn off the visibility of the background in this new document. Use the marquee tool to draw a thin 2px strip along the left and top edges, then fill them with white.
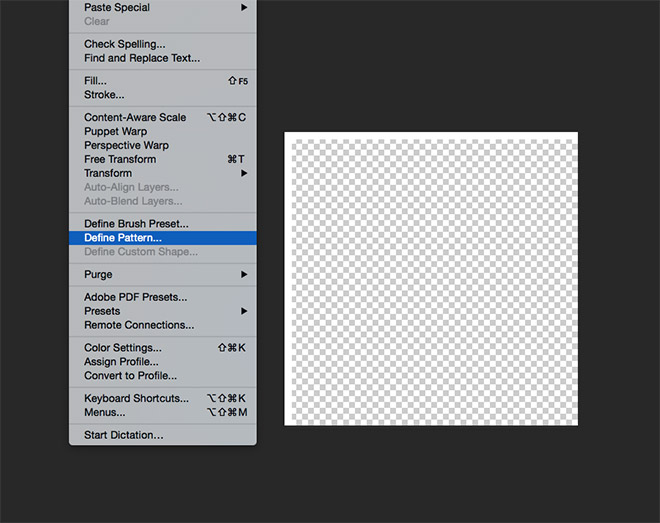
Press CMD+D to Deselect, then go to Edit > Define Pattern. Give it a descriptive name such as 80x80px Grid Pattern.
Close the document and return to the blueprint effect. Create a new layer and select the Fill tool. Change the dropdown menu in the header from Foreground to Pattern, then choose the newly created swatch. Click anywhere on the canvas to apply it to the layer.
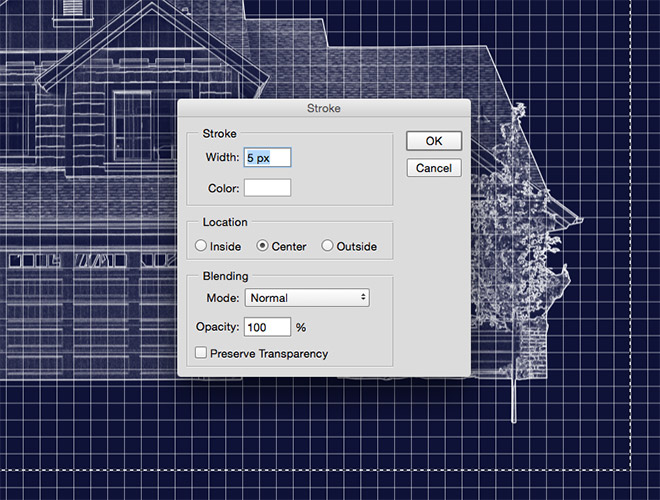
Use the marquee tool to draw a selection around the main image that lines up perfectly with the grid pattern. Right click and select Stroke, then enter 5px in the options, along with the colour white and Center.
Zoom in and draw selections with the marquee tool that capture the grid pattern around the edges up to this thicker stroke, then hit the delete key to remove them.
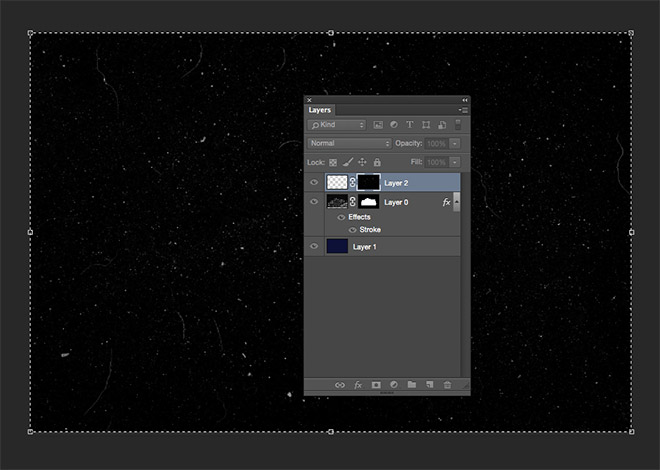
Add a layer mask to this grid pattern layer. Hold the ALT ley while clicking the mask to edit its contents. Download and open one of my Dust and Scratches Textures, then paste it directly into the mask. Scale and rotate it to fit.
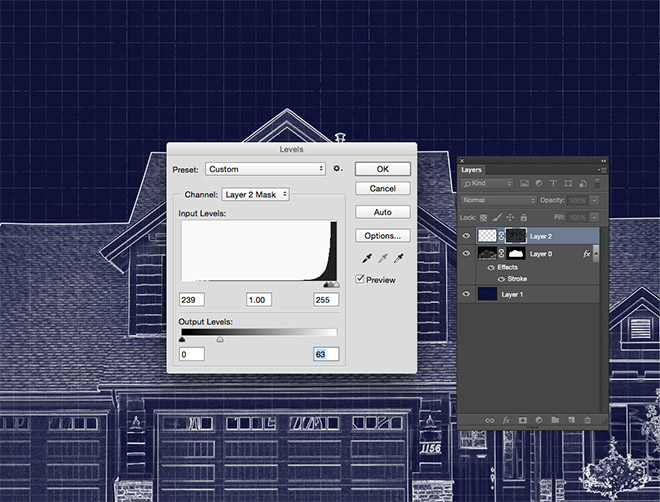
Click with the Selection tool to escape from the mask editing mode back to the main document, then with the mask still selected, press CMD+L to open the Levels. Move the sliders towards the right to boost the contrast to the extreme, then move the white Output Levels slider to the left to bring back the grid pattern until it appears subtly over the image.
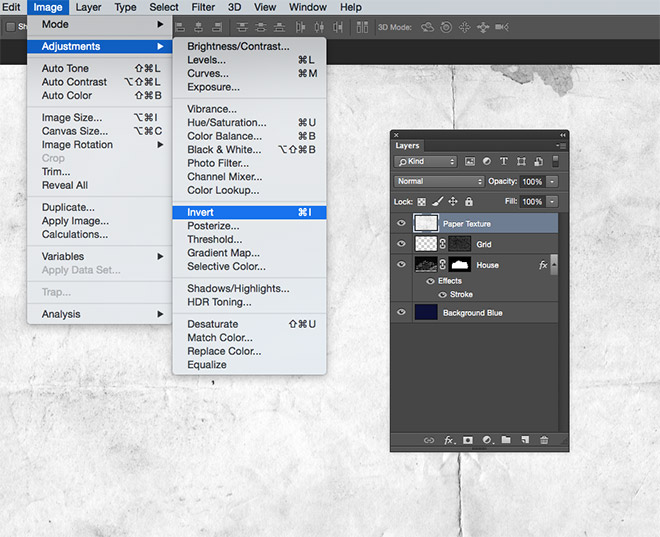
Finish the effect off with a dirty paper texture, like one of the royalty-free paper textures from Bashcorpo. Paste it into the document, rotate and resize, then desaturate and Invert the paper texture image.
Change the blending mode to Screen to allow the grungy paper texture to interact with the blue background to enhance the realism of the blueprint effect.
The final result is a great looking blueprint effect with a hand drawn appearance, along with a subtle grid pattern, creases, stains and folds that add to the realism.
Download this file