In this video and article, we’re going to show you how to spice up an ordinary portrait using off-camera flash to simulate window light photography.
We’ll use the CAMP framework (Composition, Ambient Exposure, Modify or Add Light, Pose & Photograph) to outline the steps we took to compose, light, and capture the final image.
Step 1. Compose Your Shot
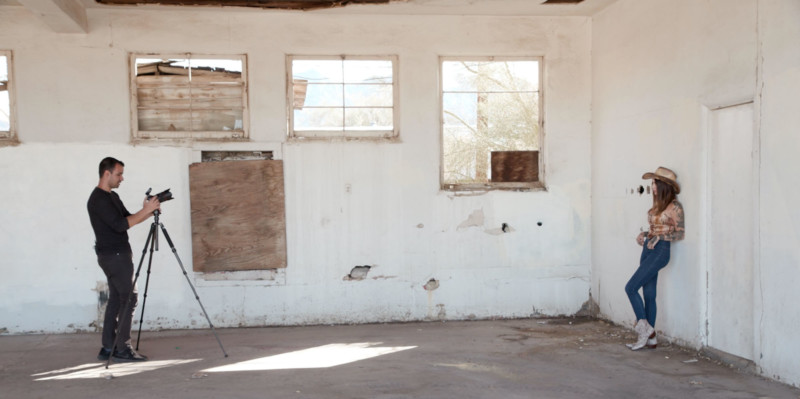

Our main goal here is to use the space next to the window so that we can later add an external flash and simulate window light photography for the purpose of adding visual interest to the portrait. We placed the subject to the right of the frame and far enough away from the window to create plenty of negative space. The background wall in this particular setup featured several holes and other distracting elements, but because it’s a big solid wall, removing the distractions in Photoshop will be easy.
Step 2. Dial in Your Ambient Exposure
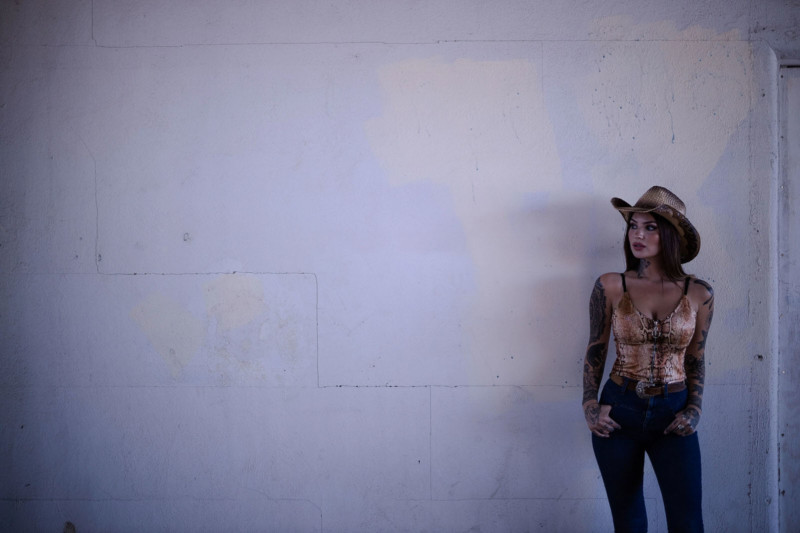
After composing our frame, we need to dial in our ambient exposure. In our baseline image (see above), we adjusted our exposure settings to maximize dynamic range for a dramatic portrait, leaning toward the left side of the histogram because we’re going to add off-camera flash.
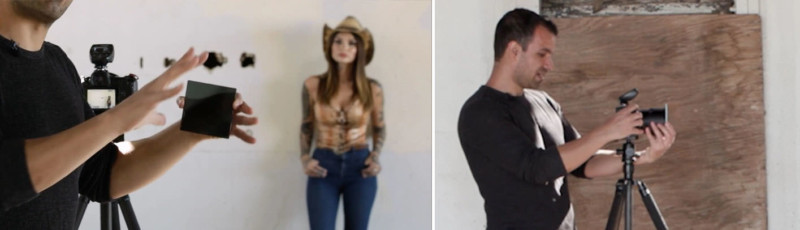
However, the high shutter speed (1/2000) requires the flash to use high-speed sync in order to fire, so we placed a 4-stop ND filter directly over the lens. This allowed us to slow the shutter speed to 1/200 and eliminate the need for high-speed sync.
Step 3. Add Off-Camera Flash to Simulate Window Light Photography

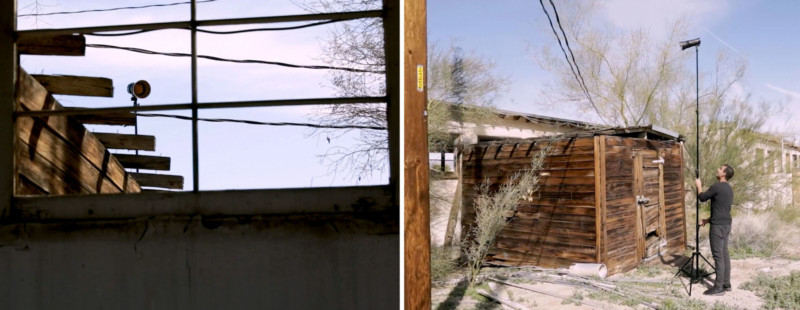
We placed a Profoto B10 (250 watt seconds of power) about 15 feet up into the air on a light stand and pointed it through the window toward our subject. We used a zoom dish on the flash to minimize light spill and we also added a CTO gel to the flash to add a natural warmth to the light coming through the window.
Step 4. Capture the Photo
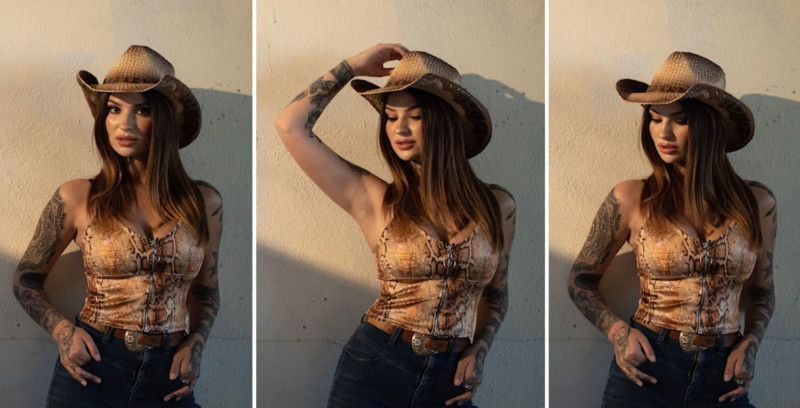

Whenever we’re shooting with hard light, we need to pose our subject for that light. Direct your subject into a pose that allows highlights and shadows to create ideal lighting patterns (such as Rembrandt, used here) and capture the shot. By making micro-adjustments to the pose (as we did in this series with hands in the pockets, playing with the hat, etc.), you can further maximize your efficiency and end up with several usable images from a single scene.
Before and After

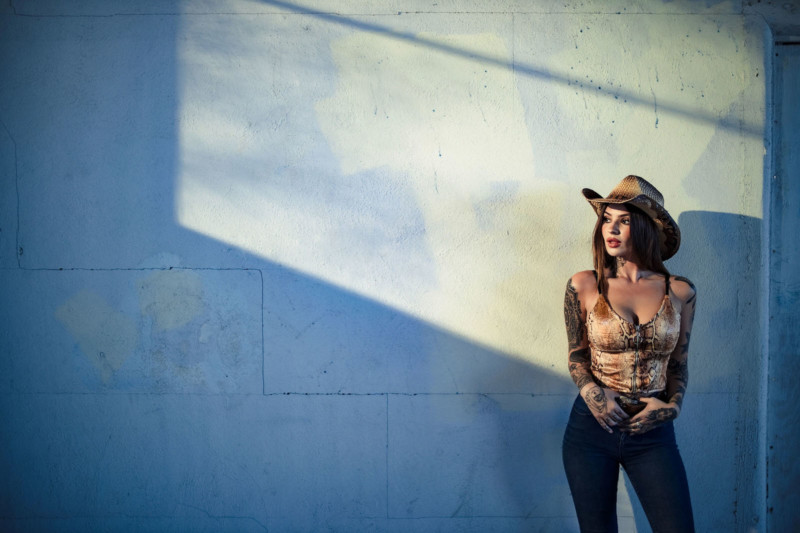
The photo without the simulated window light is fine, but the added light ups the visual interest and makes for a more compelling portrait. We edited the final image using the “Hard Light” preset from Visual Flow Presets‘ new Crush Pack.
We hope you enjoyed this video and lesson on how to simulate window light with off-camera flash.
P.S. This was an excerpt from SLR Lounge‘s Lighting 4 workshop). You can find more episodes of Mastering Your Craft on Adorama’s YouTube channel and in this playlist.
About the author: Pye Jirsa is a wedding photographer based in Southern California and the co-founder of SLR Lounge. The opinions expressed in this article are solely those of the author. You can find more of Jirsa’s work here. This article was also published here.