Alex Huff is a studio portrait photographer in San Francisco by night, a product photographer and copywriter at BorrowLenses by day, and a 500px enthusiast at heart. In this tutorial, she will share with you how to create your own version of Game of Thrones’ Season 3 portraits. These character shots make for a really fun weekend portrait project. Just gather your friends, set up the shots, and unleash your inner Westerosi.
How To Shoot
Game Of Thrones-Inspired
Portraits
by Alex Huff
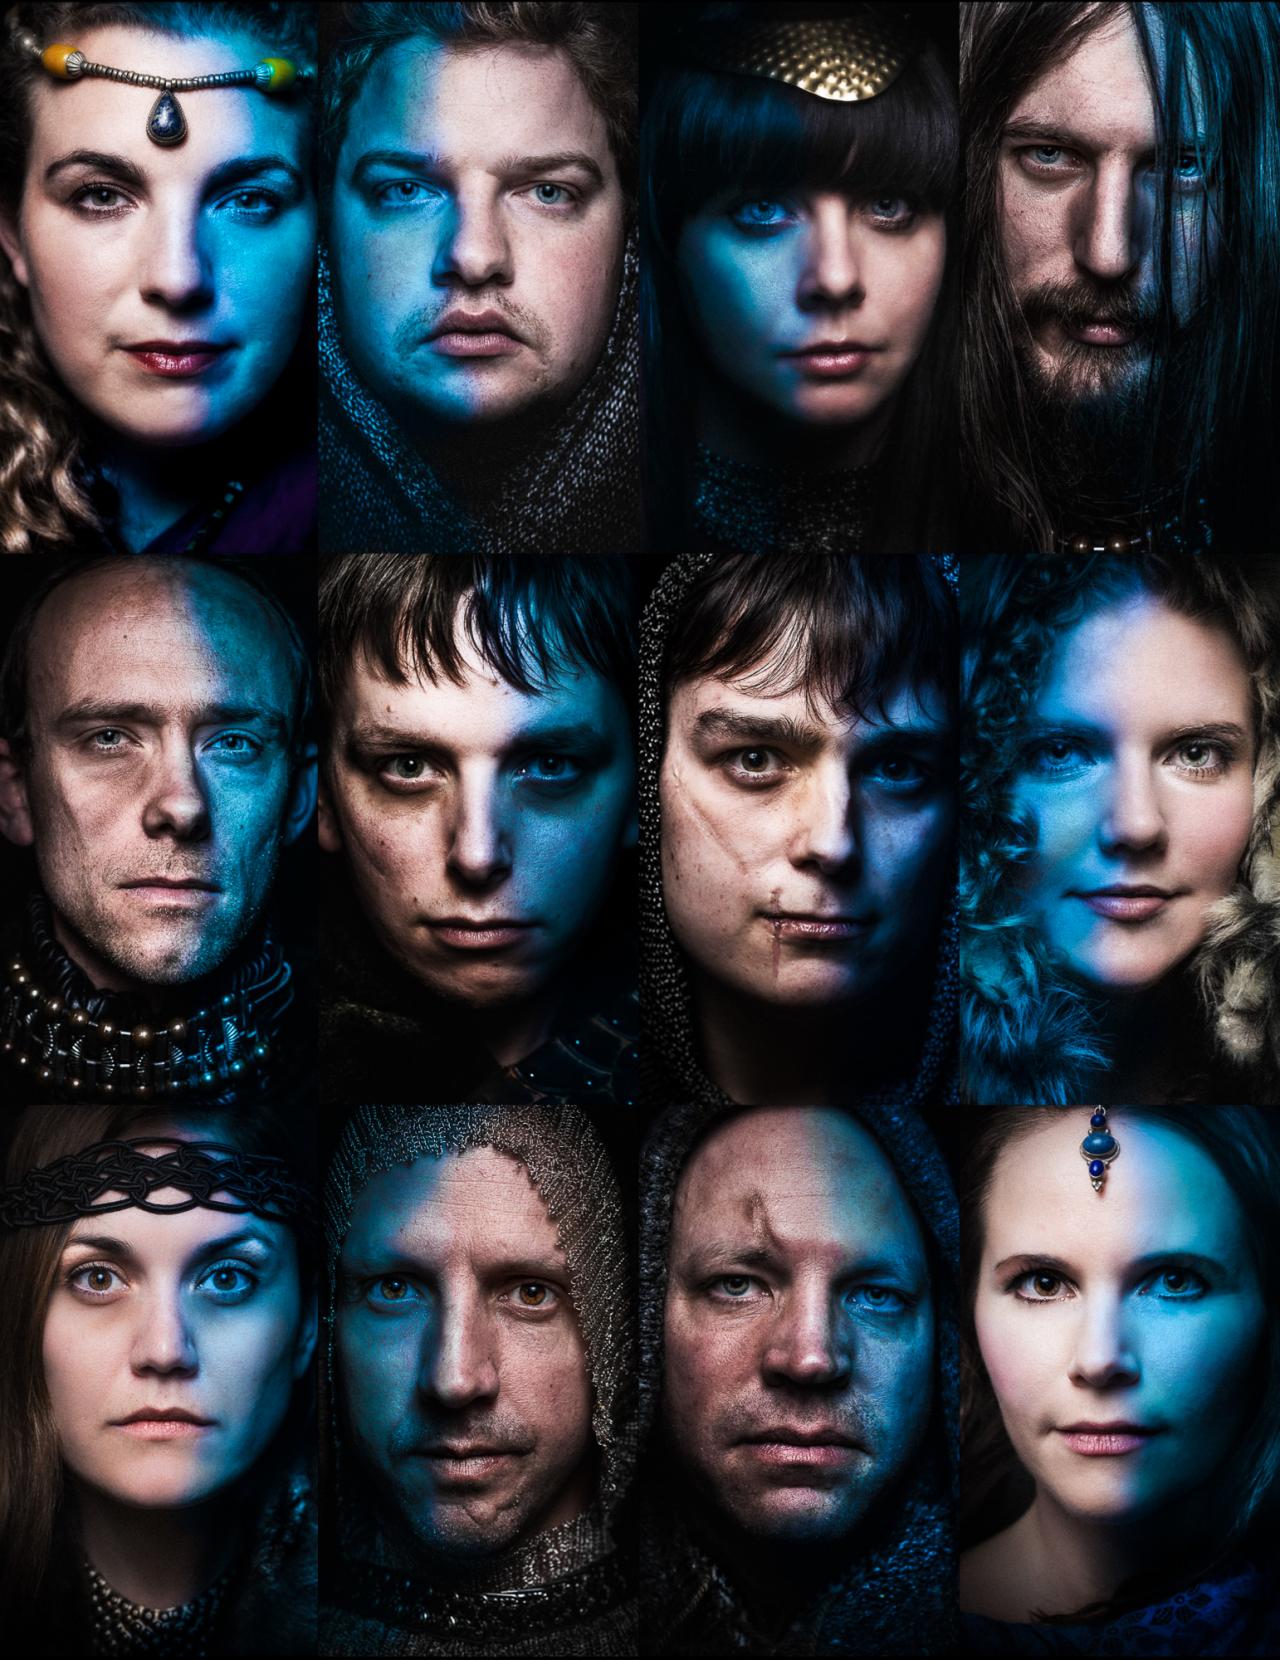
These Game of Thrones character posters for Season 3 are simple yet powerful. As fans of the show, my friends and I wanted to recreate the images using ourselves as models. The results were a success, and everyone had a lot of fun posing for these portraits. The lighting is an easy 1-light setup, the costume work is minimal due to the tight crop of the portrait, and the post-production work is low. Here’s how we created our spin-off…
Equipment
- Photoflex OctoDome Extra Small Kit with “Eggcrate” Soft Grid
Alternative: 17” Beauty Dish with grid or any smaller light modifier with grid - C-Stand with Boom Arm
- Nikon SB-910 Flash
- DSLR camera
I used a Nikon D800 - Portrait lens
I used a Nikon 85mm f/1.8G. Alternative: Any portrait lens ranging from 50mm-200mm. - Rigid Collodion Scarring Liquid
Get one at your local costume shop, drama, and theater shops. If you need help with makeup, find an artist in your area who would like to collaborate with you on this project. - Various neck-focused props, such as armor, fabrics, jewelry
I suggest DIY, or search vintage and thrift shops, dollar stores - Post processing software
Any editing program that allows masking or spot-controlled temperature control. I used Lightroom and Nik Software Color Efex Pro. You can use any filters, actions, or presets that you have available.
Step 1: Lighting and Camera Settings
Before firing any lights, make sure your ambient is registering as completely black in your test shot. I like to start with a black scene in the way a painter begins with a blank canvas. This is typically achieved for me at ISO 100, between 160th of a second—250th of a second.
My flash was set to manual at full power and placed inside a small octobox that is above and pointed downward on my subject. I chose a light modifier that is on the smaller side with a grid to minimize the amount of light spill and to keep light focused just on the face of the model. I started shooting at f/8 and adjusted my aperture up or down from there as needed. I did not touch my other settings.
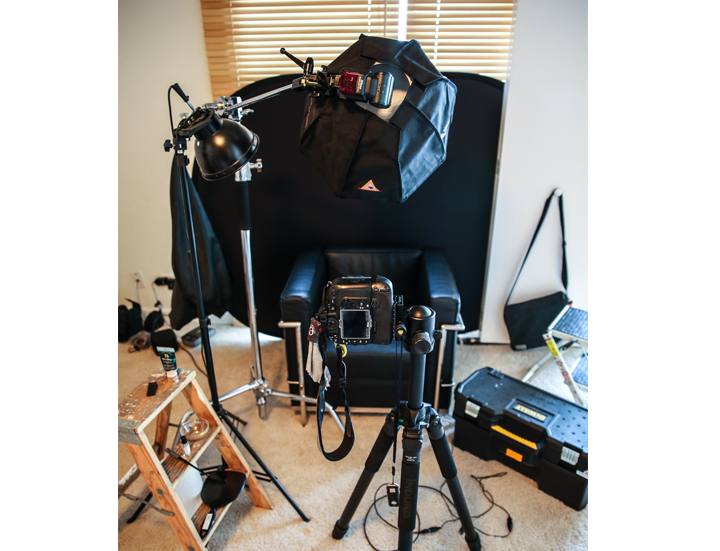
One light is placed above and pointed downward on my model. For this shoot I used a Nikon SB-910 flash inside a Photoflex OctoDome Extra Small Kit with “Eggcrate” Soft Grid.
Step 2: Mood and Model Direction
My models were against a black backdrop, seated in a chair where they could lean back comfortably. If your model is uncomfortable or tense, you can always see that in final photos. Once seated, I applied their neck and shoulder props, ranging from faux furs to studded straps to jewelry, their makeup, and optional scarring liquid.
Given the context of Game of Thrones, I asked my models to think of someone they dislike or who has betrayed them. Sometimes I’d ask them to fantasize about enacting their ultimate revenge. People will occasionally have a giggle fit—fire a shot just as they recover from it. It is often their best look. My guess for this is that there’s a special kind of watering of the eyes leftover from laughing.
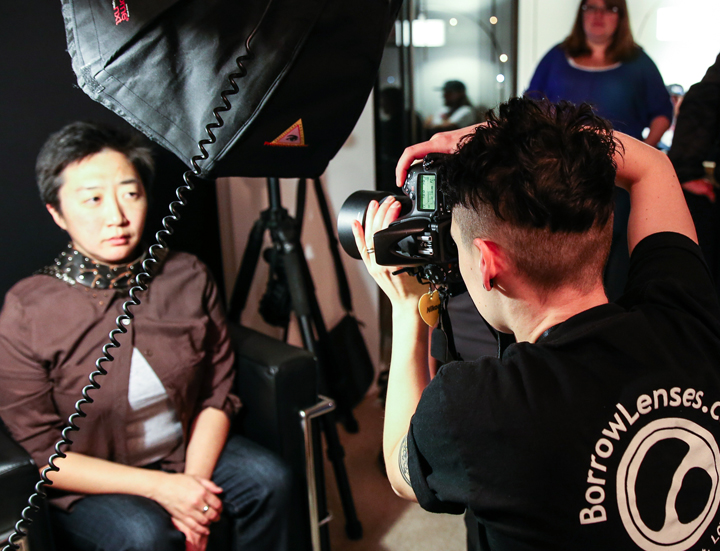
Darla playing the part from the shoulders up.
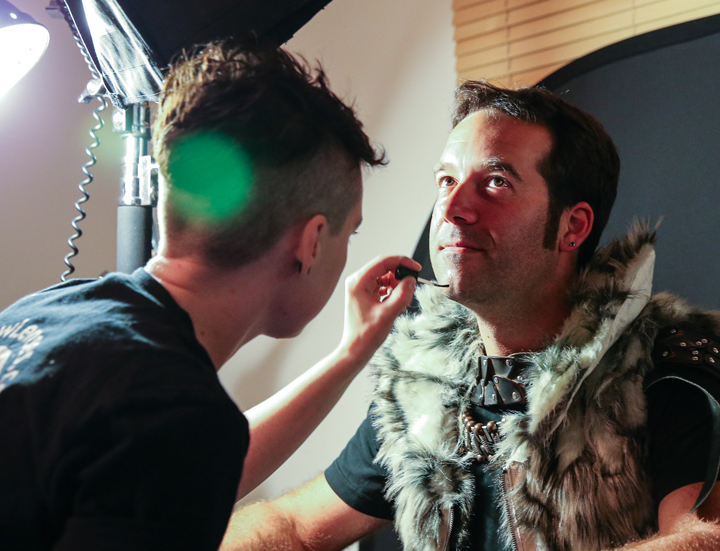
James receiving a “scar” from Rigid Collodion.
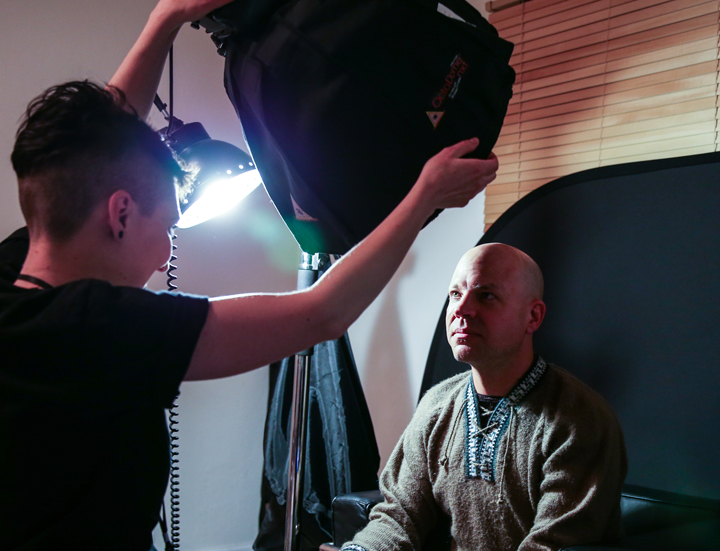
Topher receiving character direction while I adjust the light.
Step 3: Editing
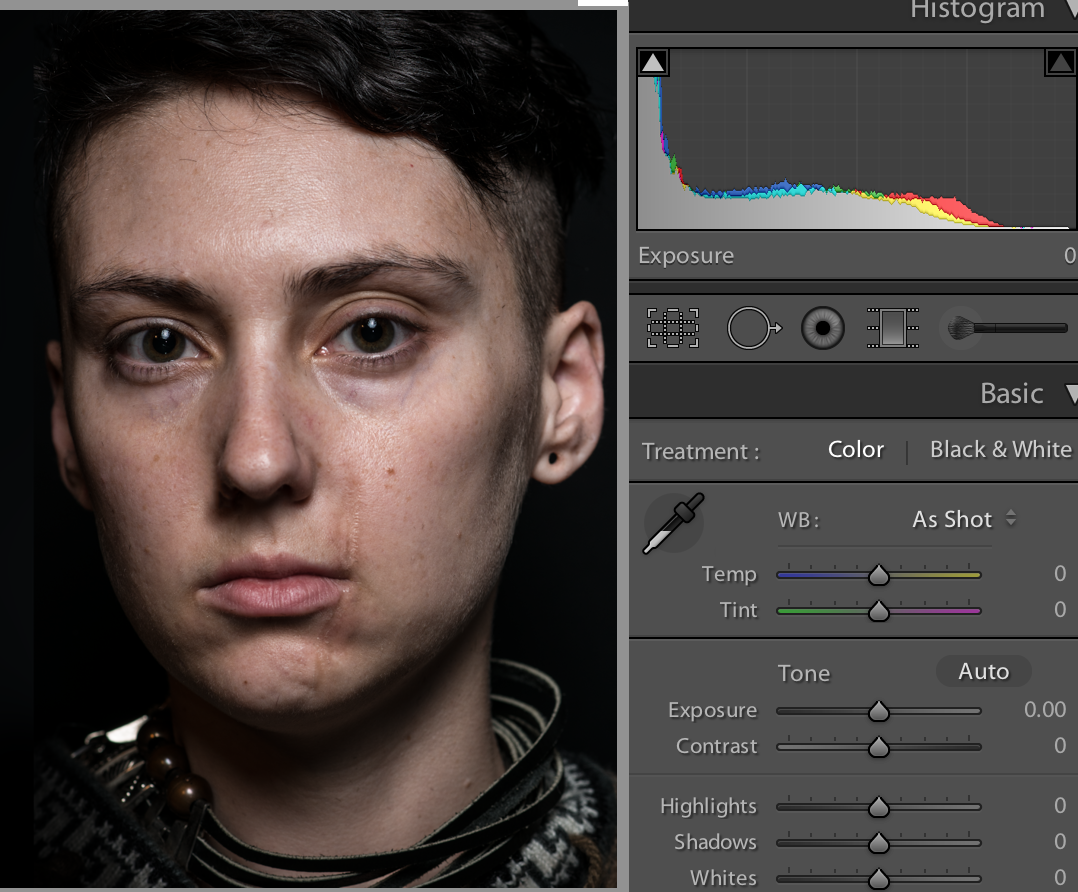
The RAW file in Lightroom with no edits.
1. Adobe Lightroom and Nik Software are the editing programs I use. I use Lightroom mainly for broad edits, such as exposure or clarity adjustments, or for blemishes. I use Nik Software to be creative. I enhanced the clarity in Lightroom. This increased the visibility of blemishes and also gave depth to the scar. If I was editing a woman with a more “princess-like” look, I would skip this part and spot heal any blemishes instead.
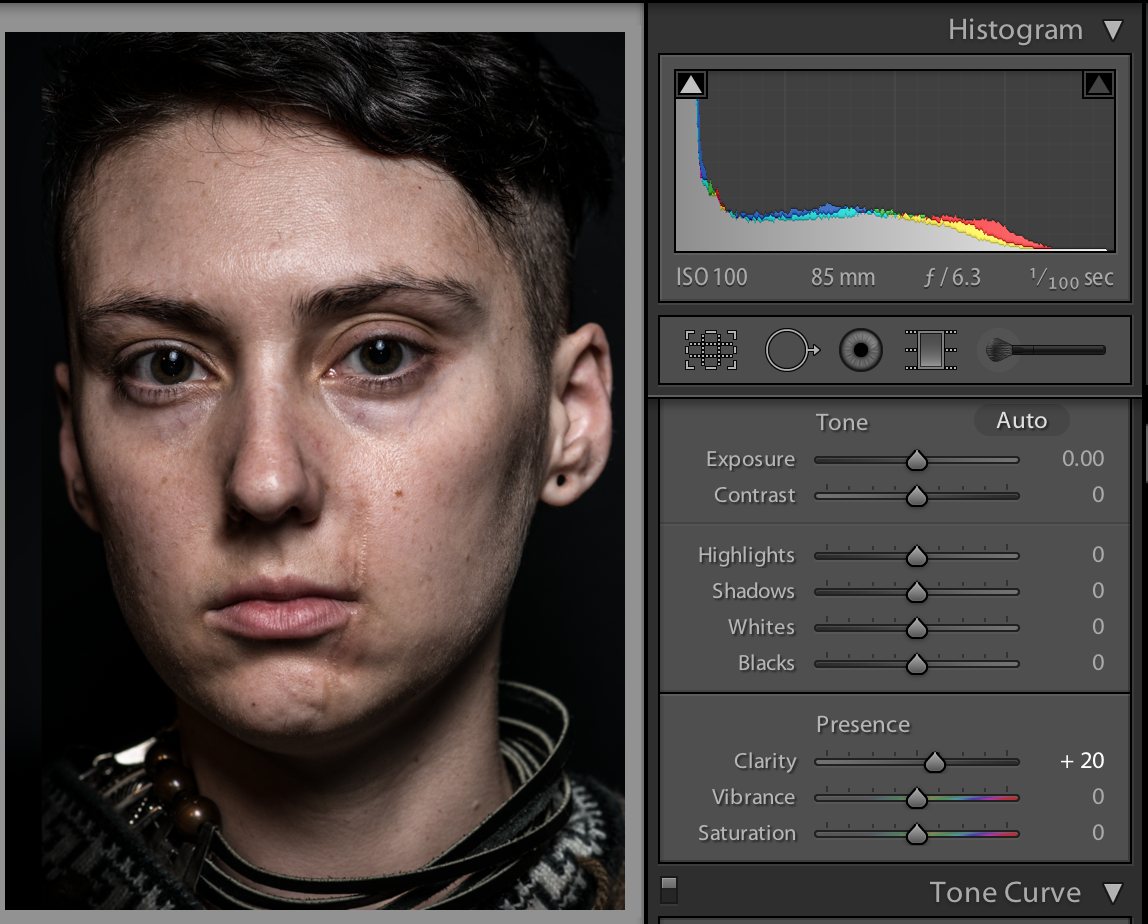
Increased clarity helped me easily create a grungy look.
2. Going right into Nik Color Efex Pro as a plugin from Lightroom, I used the Glamour Glow filter. If the portrait was of a “knight-like” character I would follow up with the Contrast Only filter. If the portrait was of a “princess-like” character, I would use Glamour Glow and then Dynamic Skin Softener instead of Contrast Only. If you don’t have NIK, lighten the skin for “princess-like” characters creating a spotless and glowing face, and use contrast and define scars & blemishes for “knights”.
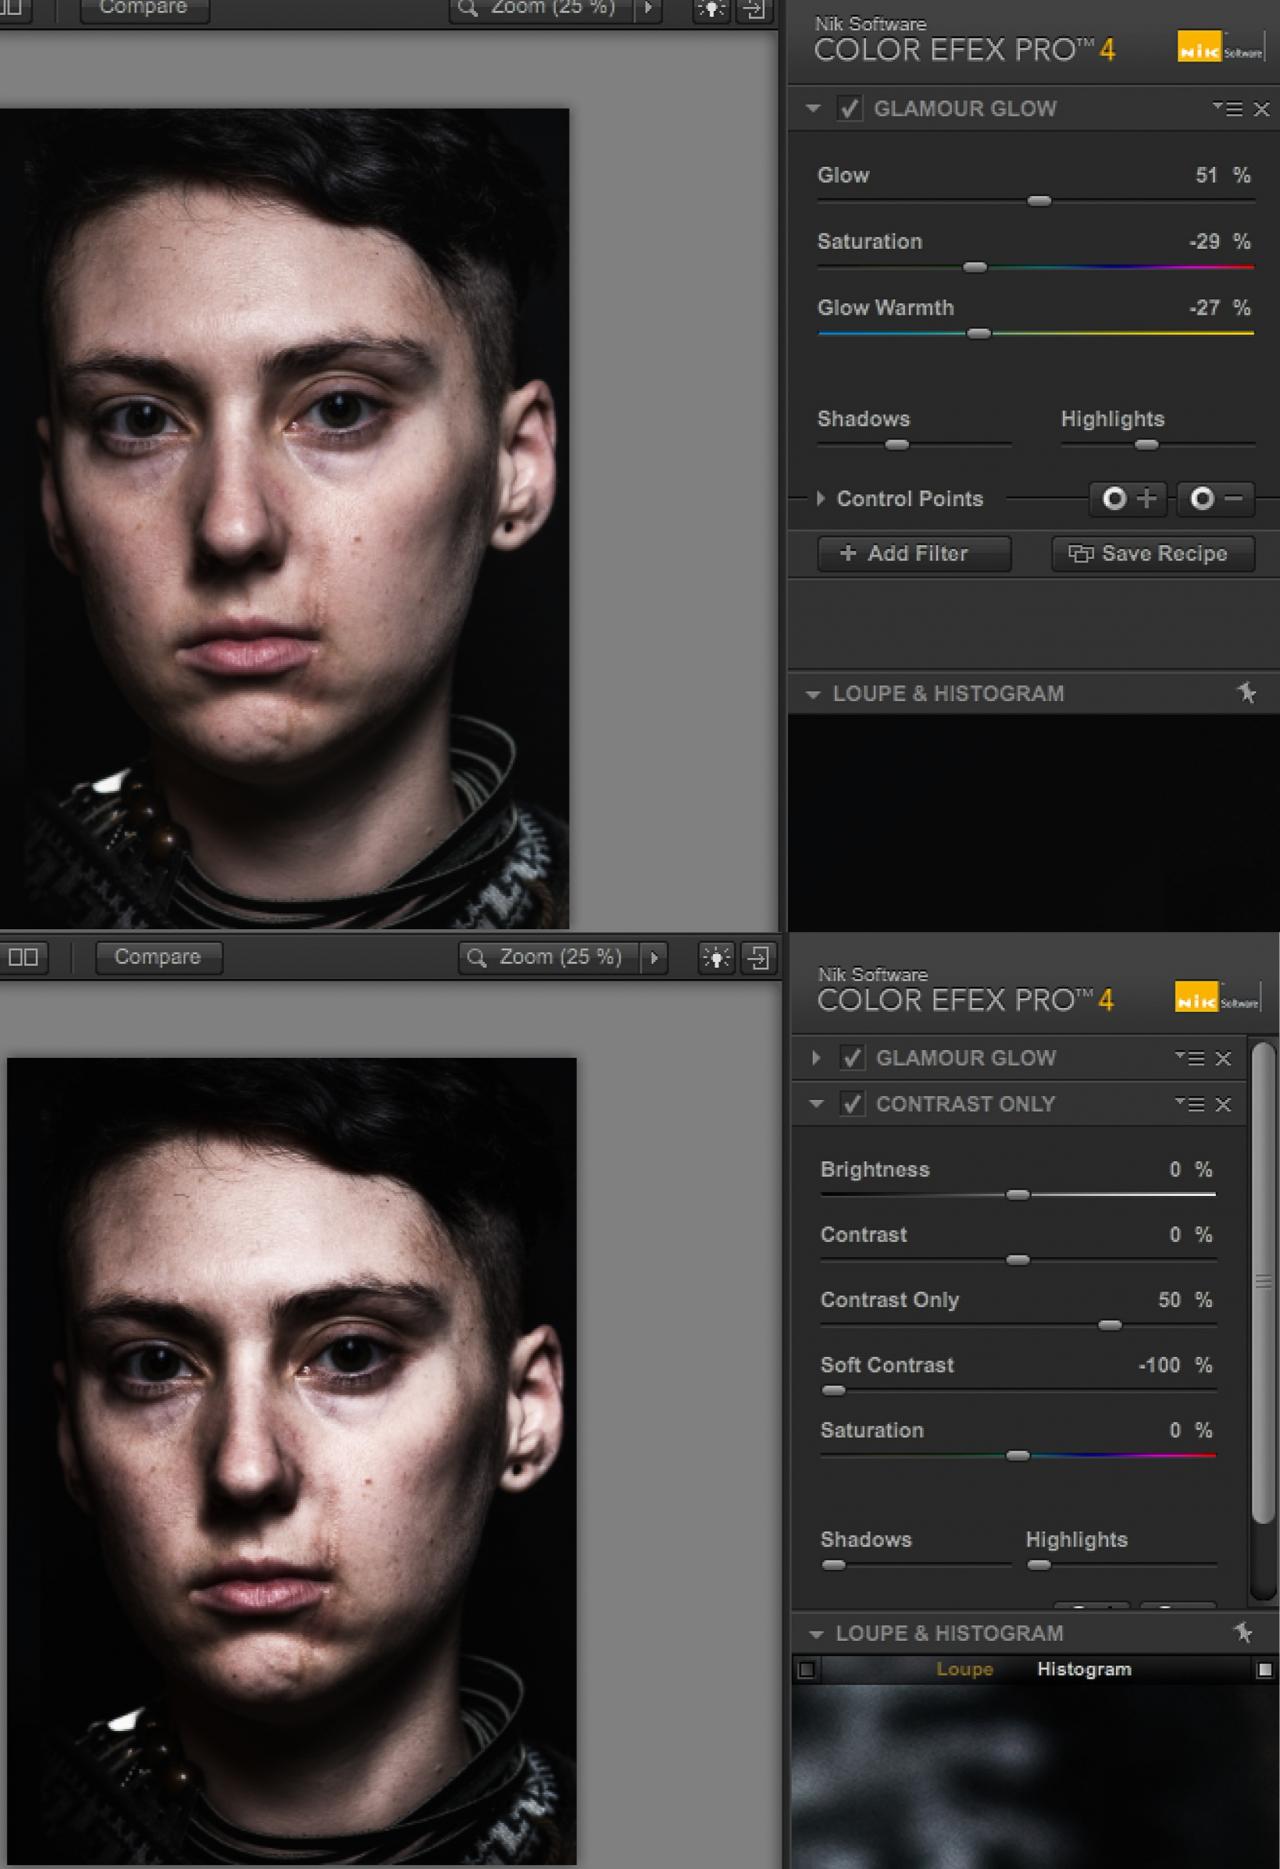
The image after getting the Glamour Glow and Contrast Only filters from the Nik Software’s Color Efex Pro plugin for Lightroom.
3. Adding all of those filters darkened the eyes considerably. You can use Control Points in Nik to prevent a filter from affecting certain areas of your picture, like eyes. If eyes get too dark just brighten the eyes with increased exposure or dodging, be careful to work within the eye area only.
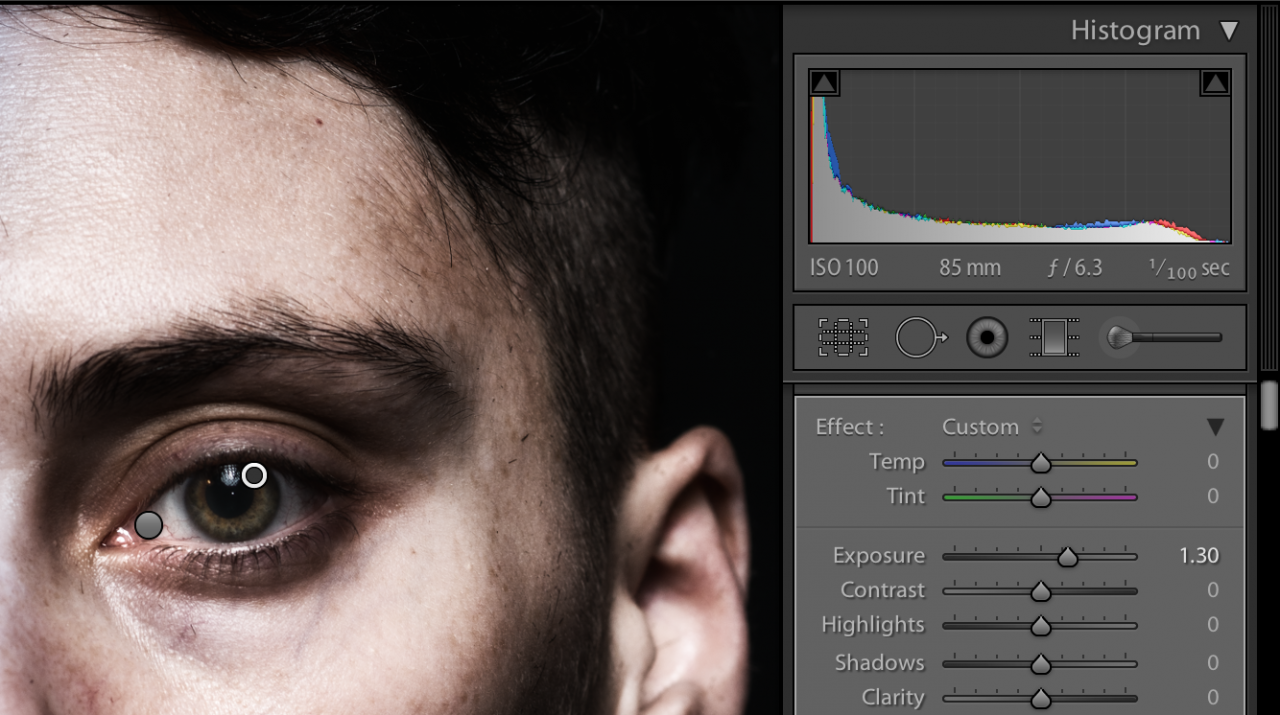
Sometimes eyes get over-edited but added intensity worked for these images.
4. Using my Adjustment Brush, I select the area of the face I want to be blue. There are several ways to add a blue hue to a portrait but for mine I just increase the temperature of the White Balance considerably for that area. If you find that it is not blue enough for your taste, make a second pass using a high temperature and the Adjustment Brush. If your blue looks too blue, push the Tint slider into the greener end of the spectrum to make your blue look a little more turquoise or teal.
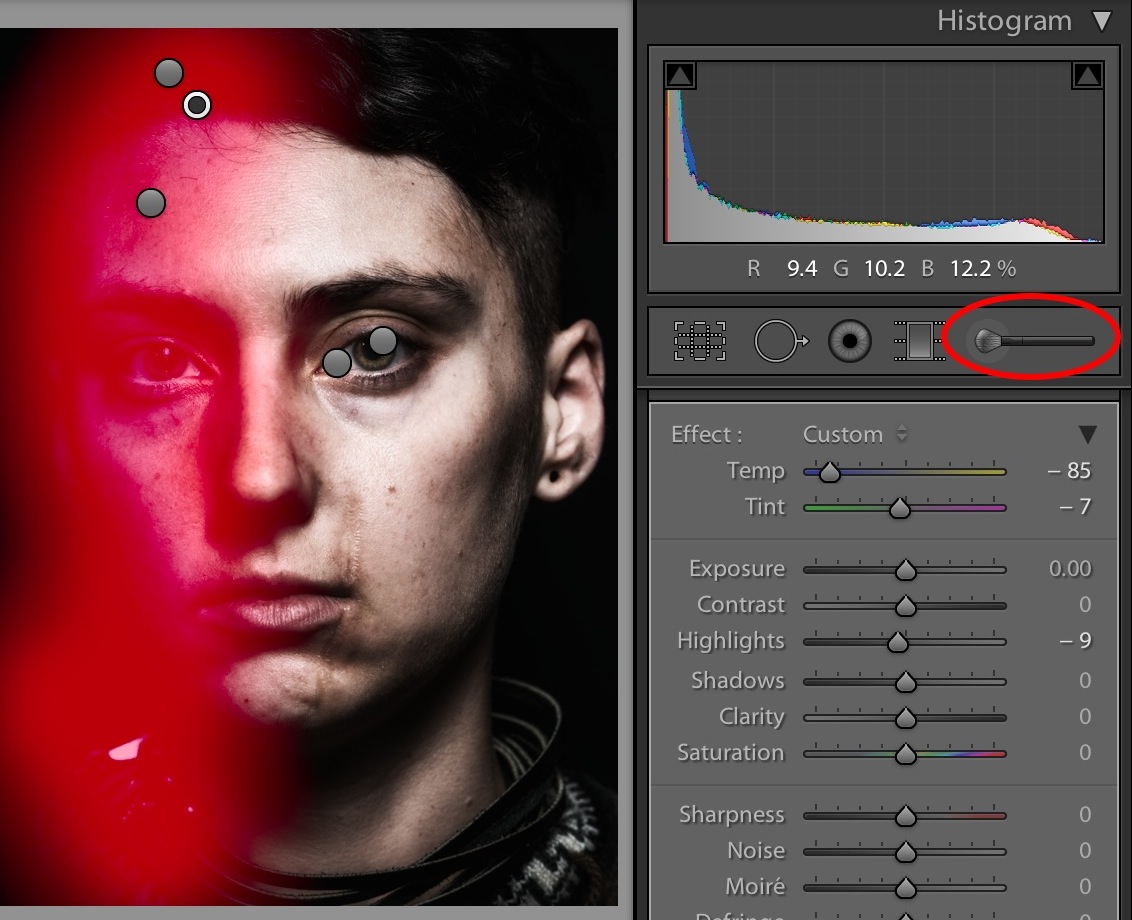
I used the Adjustment Brush and increased my temperature in key spots to create my partially-blue face.
5. If you look at the real Game of Thrones character portraits, the blue isn’t perfect. It is mottled a bit with what appears to be a tinge of yellow/brown. Using my Adjustment Brush again, I go over some of my blue with a warmer/lower White Balance to add some color-based texture to that side of the face.
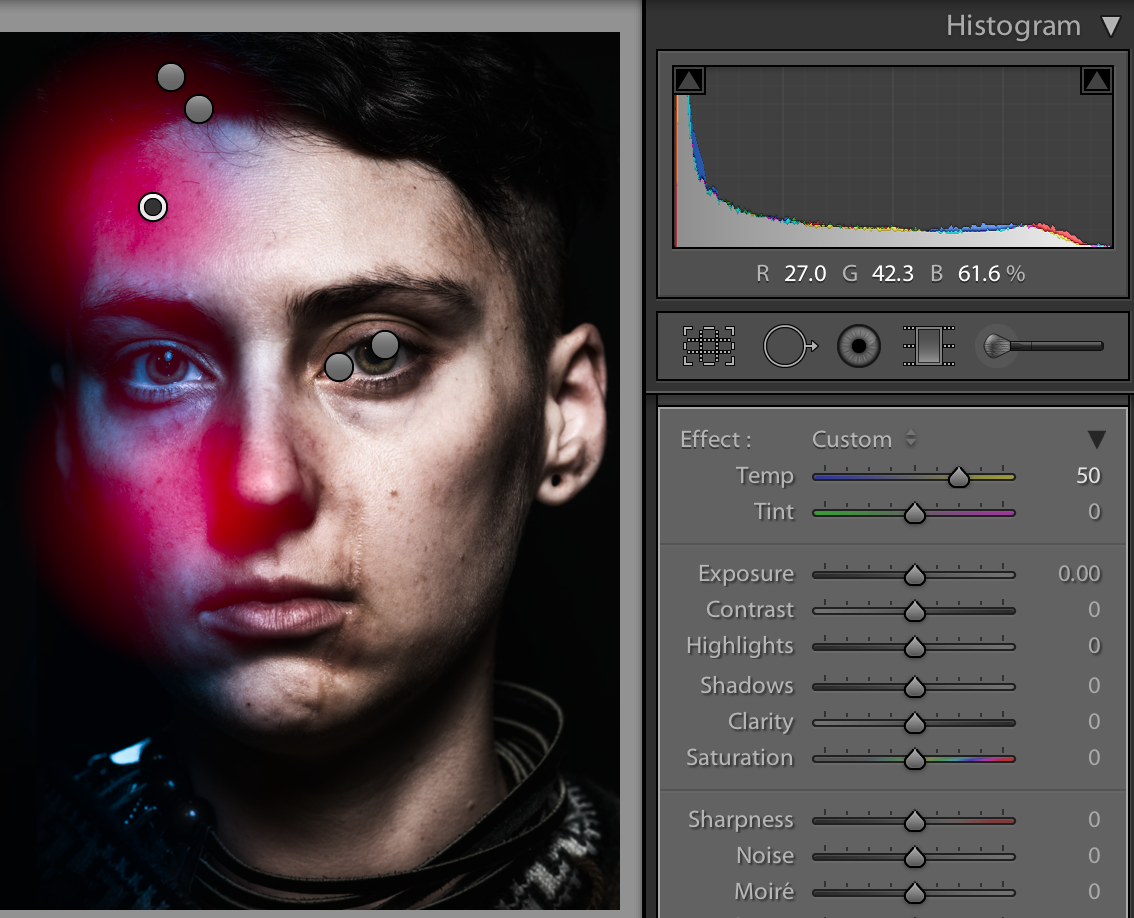
I went over the blue areas with a slightly warmer color to create the illusion of texture.
6. This is optional, but sometimes I went back in and bumped the eye on the blue side of the face a bit more and increase its exposure. The blue sometimes makes that eye look a little too dark for my taste. Lastly, I increased the grain on the image by just a little bit. I find this gives the overall image a slightly older, more “painterly” look.
This is pretty much what I did for all of my character portraits for this project, with the exception of a little extra skin TLC for the “princess-style” shots.
The final results. After a couple of hair and make-up changes, I was able to achieve two characters out of one person. I used almost the same editing process and the same lighting for both of these portraits.
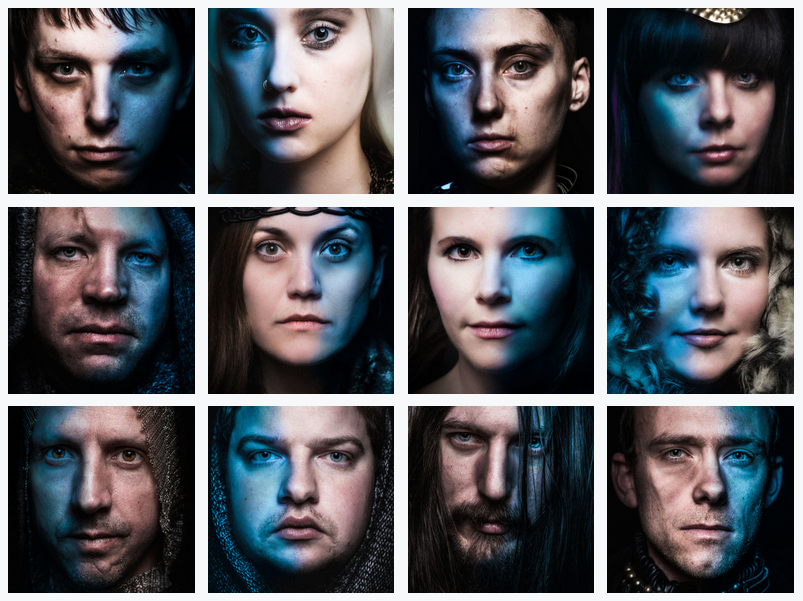
Have fun creating your own cast of characters using some of these tips!
See all of Alex’s Game of Thrones-style portraits.
Follow Alex Huff to see more of her portrait work. Or to just say hi, visit her 500px page.