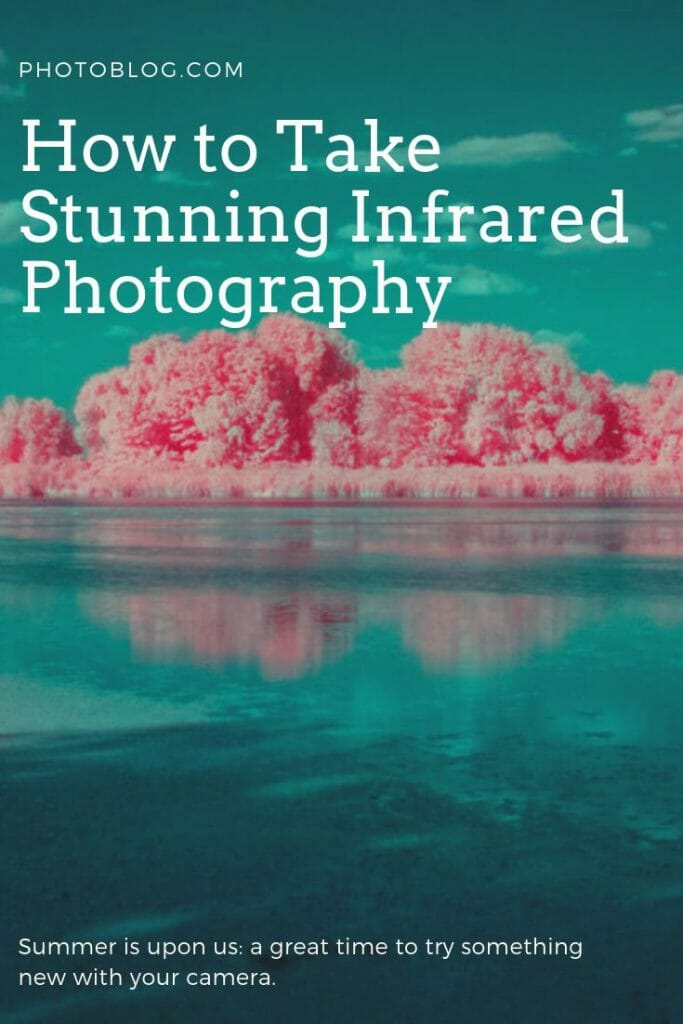
Summer is upon us: a great time to try something new with your camera. And sunny days are the perfect conditions for infrared photography.
You may have heard of infrared photography, but not actually know what it is. Or you may think it comes at a price. Well, good news–you can do it on a budget.
Let us guide you through this awe-inspiring genre and show you how to take stunning infrared photography on a budget.
What Is Infrared Photography?
The word ‘photography’ comes from the Greek meaning ‘drawing with light’.
Infrared photography is similar to normal photography, however, it uses infrared light rather than visible light: this is a game changer in terms of the look of your images.
Usually, when we discuss light in photography, we are talking about visible light–a mere 0.0035% of the whole electromagnetic spectrum.
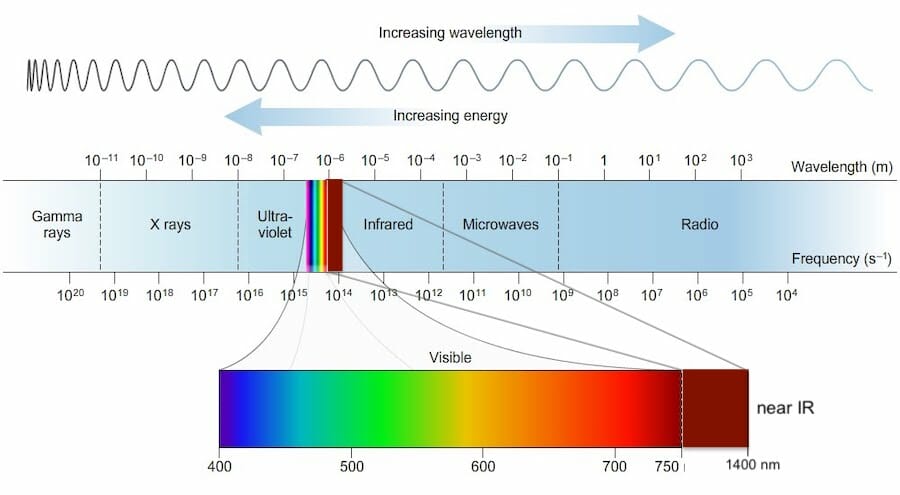
And the colors we see are just the way our brain interprets the different wavelengths in the visible spectrum.
At the edge of the visible spectrum, we find ultraviolet and infrared light. Ultraviolet light has shorter wavelengths than violet light (400 nm), while infrared light has longer wavelengths than red light (700 nm).
Reasons Why You Should Try Infrared Photography
Infrared photography captures the world using infrared light, rather than visible light.
Objects absorbing infrared light, such as bodies of water or a clear sky, will appear dark.
Conversely, objects reflecting infrared light, such as green grass, puffy clouds or human skin, will appear light.
Before I get too technical, let me give you 3 reasons why you should try infrared photography.
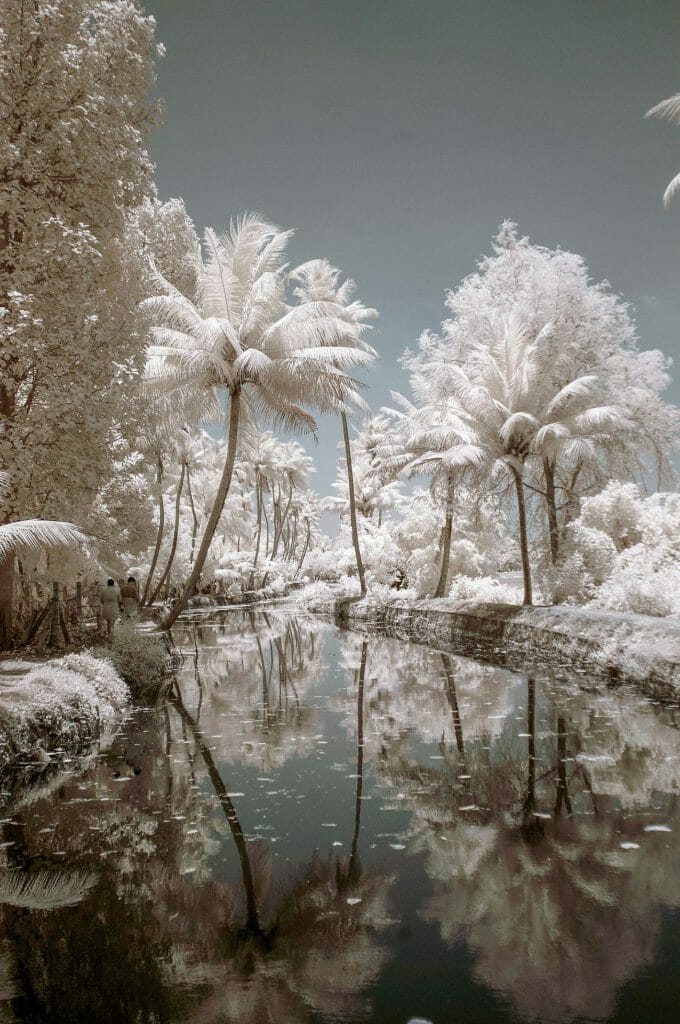
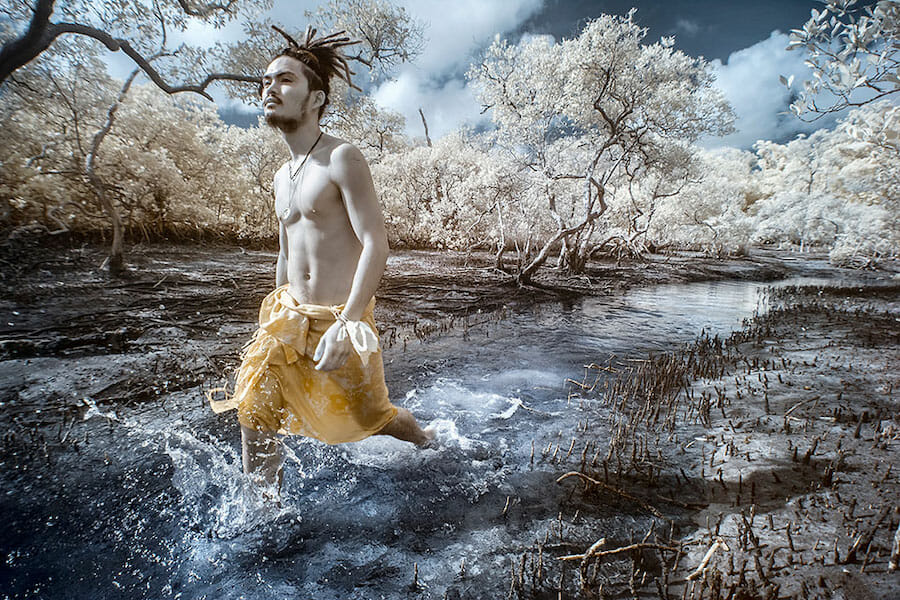
1. Infrared Images Have the Wow Factor
One of the best things to do in photography is to show your viewers a familiar scene, captured in an unexpected way. Infrared photography is a great way to do just that.
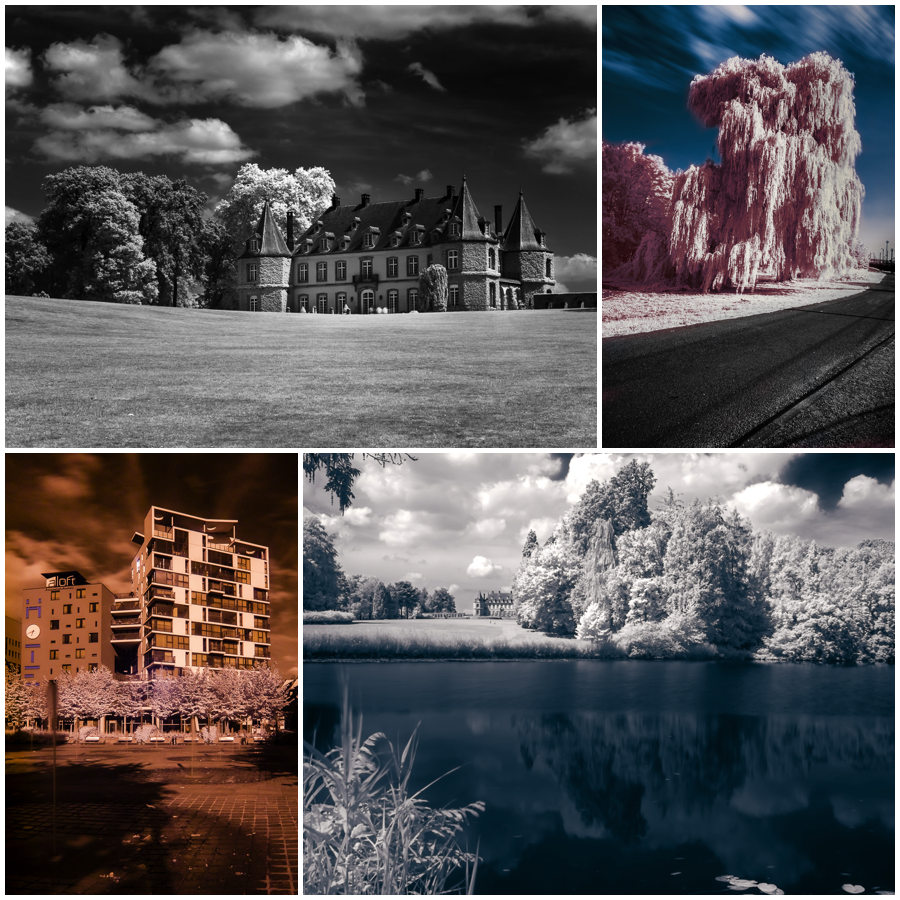
This pond is located in the park of Chateau de la Hulpe, just outside the city of Brussels, Belgium.
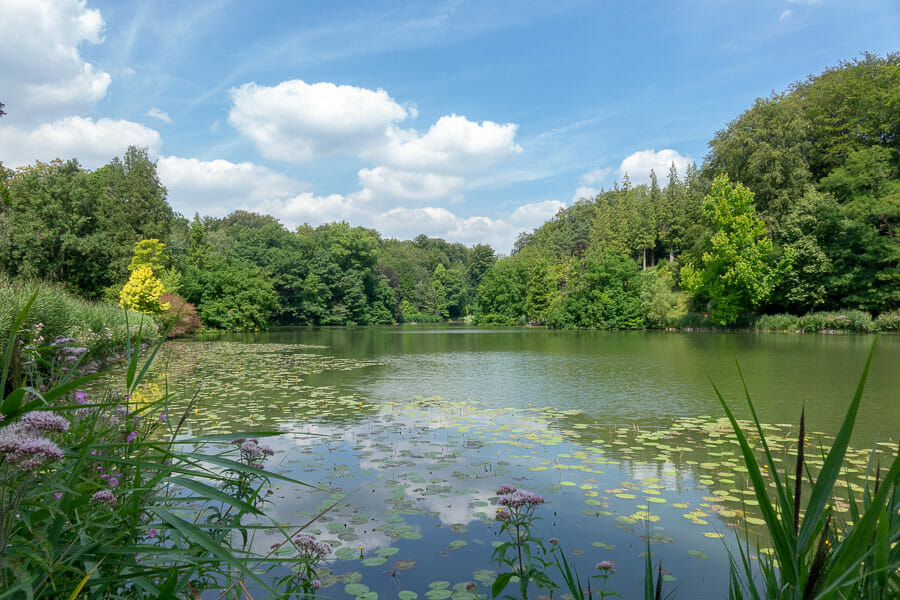
In normal visible light, at least in the summer, the view is okay, but not very interesting or special.
Now, check out the same place photographed using infrared light: the difference is quite shocking.
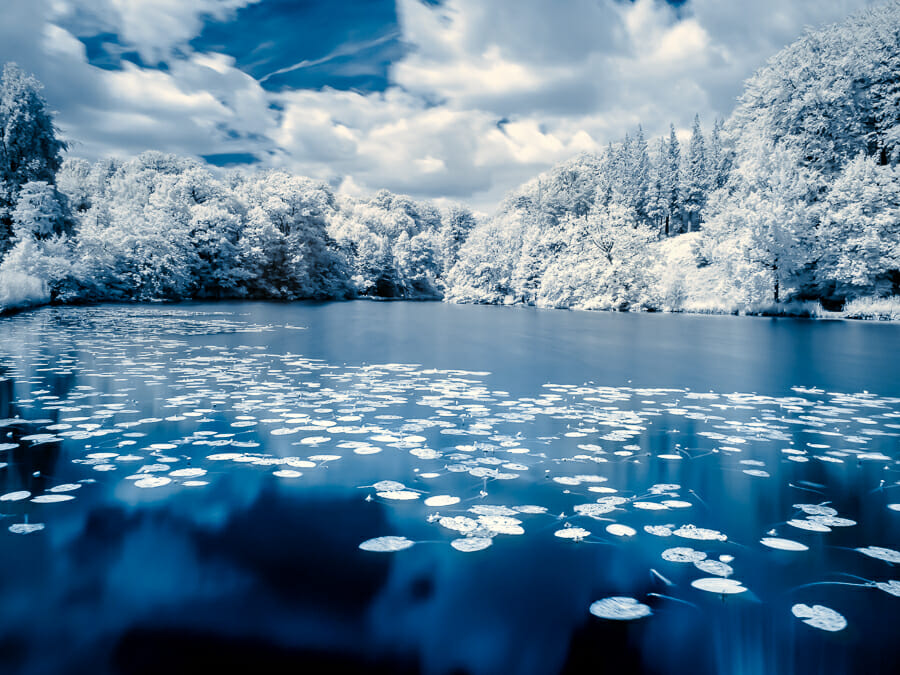
By using infrared light, I turned a rather common summer photo of a pond into something that looks like the photo of an alpine lake in winter. This has been edited for ‘false colors’, which I will explain later.
2. Landscape Photography Really Suits Infrared Images
If you are into landscape photography, you know how important it is to be out there when the natural light is at its best.
This often means you must get up before dawn, to be at location during the blue and golden hours: the hours just before and after sunrise/sunset.
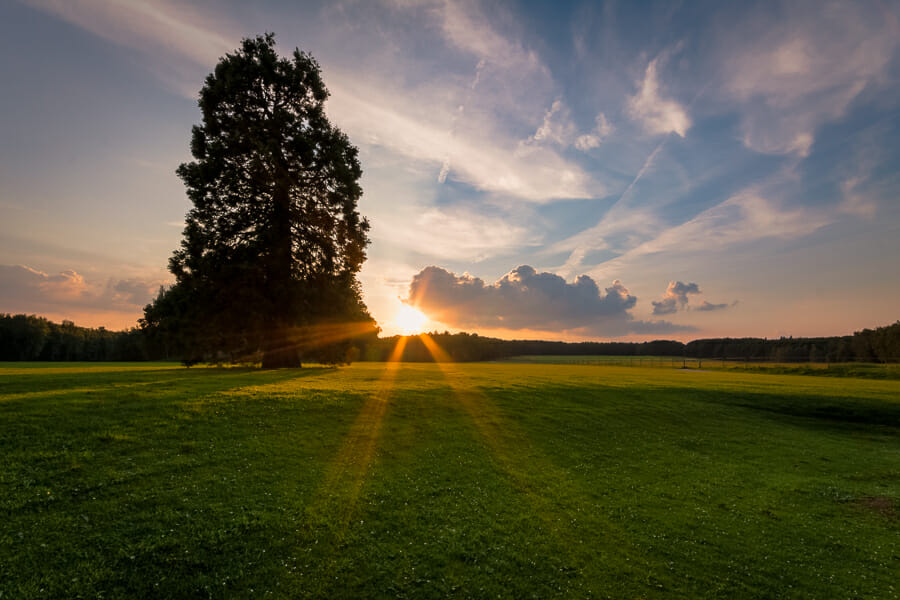
While most landscape photographers avoid the harsh midday light, this is often the best time of the day for infrared photography.
Why? Simply because more sunlight means more infrared light is available.
Infrared photography is a great way to get the most from your landscape photography: take shots in visible light earlier in the day, then switch to infrared later on.

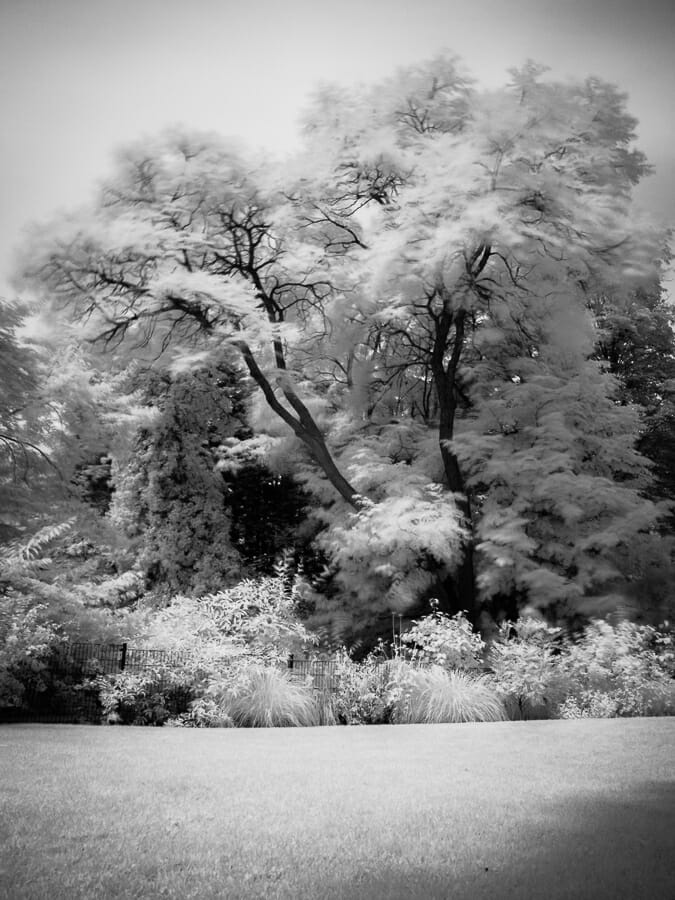
3. Infrared Photography is Family Friendly
Because infrared photography needs plenty of light, great images can be taken almost anywhere during the day.
This means you can combine infrared photography with family outings.
For example, I shot this photo in a small public garden in Brussels, while playing with my kids.
How to Take Infrared Photography?
The good news is that you don’t need to invest a lot of money to start having fun with infrared photography.
Sometimes it can be as simple as purchasing a screw-on lens filter. Let’s take a look at how to get started in infrared photography.
1. Best Camera for Infrared Photography
In principle, all camera sensors can see ultraviolet (UV) and infrared (IR) light.
In order to improve image quality, an internal UV/IR cut filter is usually present in front of your camera’s sensor. This limits the amount of UV and IR light your camera can see.
Because of this internal filter, you will most likely be forced to create long exposure infrared photography.
However, if you want to be able to capture a variety of infrared photography, e.g. handheld photography or portrait photography etc, you will need to modify your camera.
You can send your camera away to companies who will convert it for infrared photography. It will cost you more than doing it yourself, but it is the easier option.
2. Test Your Camera’s Infrared Sensitivity
How much infrared light your camera can see depends on the efficiency of your internal filter.
There is a simple test for this: point a TV remote control at your camera lens, take a photo at the same time as pressing a button on the remote.
If the infrared LED of the remote lights up when you press a button, your camera is sensitive to infrared light and it has passed the test.
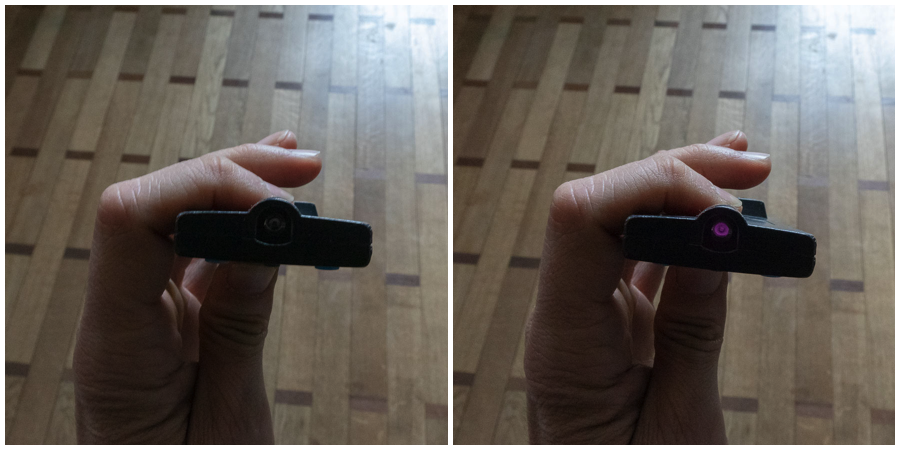
If the LED remains dark, your camera can’t see enough infrared light and you need to modify it.
3. Beware of Infrared Lens Hot Spots
Camera lenses are optimized to work with visible light and in some of them, the internal coating creates an infrared hot spot on the images.
This spot is usually brighter than the rest of the photo and lacks contrast. It can also have a slightly different color.
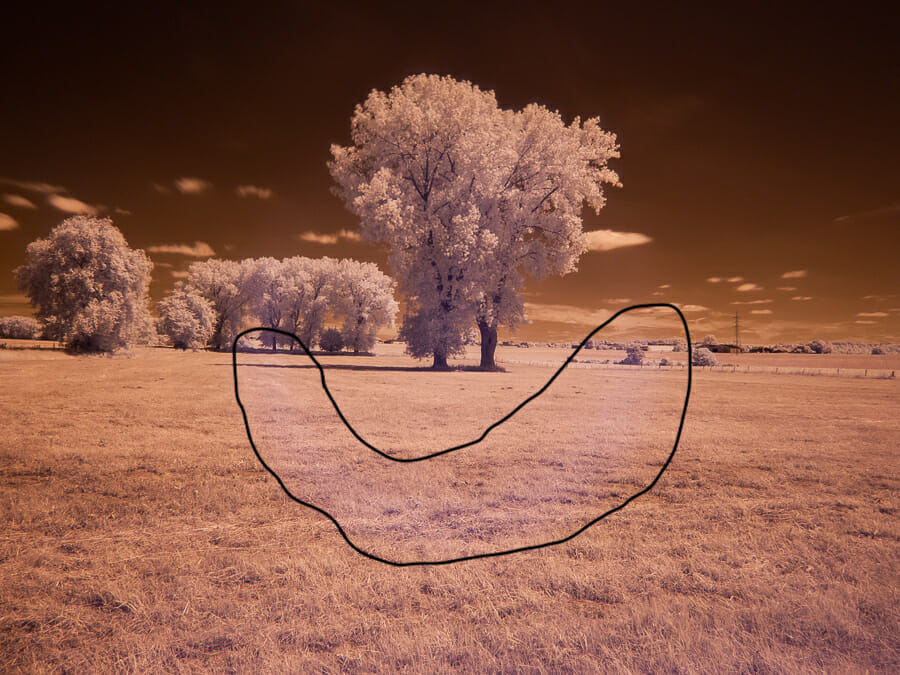
A mild infrared hot spot can be corrected in post-production, however, a severe one will ruin your image.
But don’t worry, Kolari Vision has created a Lens Hotspot Database, where you can find a complete list of the infrared performances of many common lenses.
4. Use an Infrared Filter
If your camera passed the test and can see infrared light, all you need is a screw-on infrared filter.
Infrared filters cut light with wavelengths shorter than a given value while letting the longer wavelengths pass.
For example, an 850 nm infrared filter will cut all visible light, meaning you will see nothing in your optical viewfinder.
A more popular and easier filter to begin with, is the HOYA R72 (or equivalent).
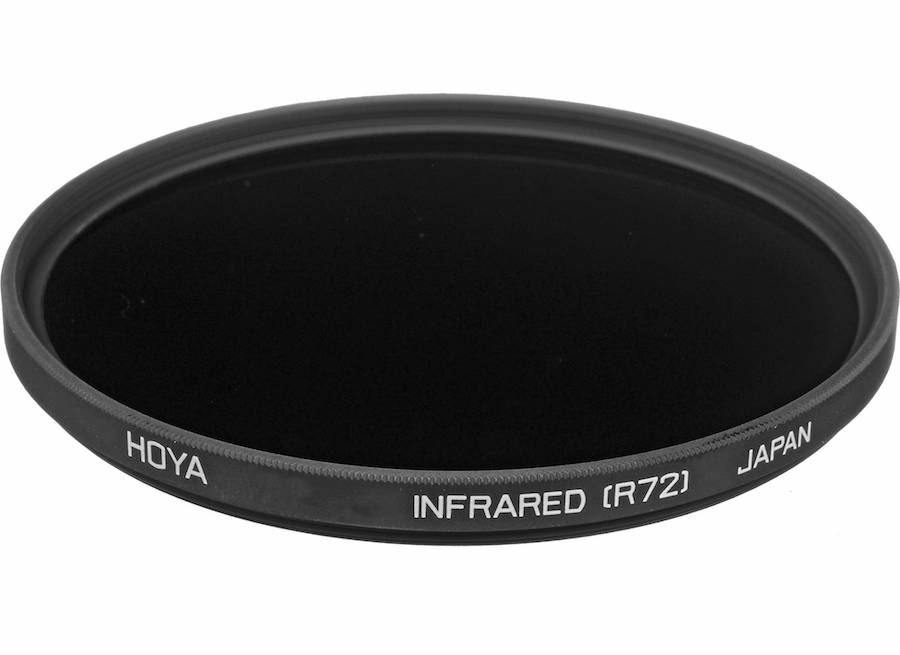
This filter cuts all light having wavelength shorter than 720nm, allowing some visible red light to pass through. Being able to see the scene via the red light makes it easier to check composition, focus, and exposure.
5. Use a Tripod and Remote Shutter
When shooting long exposures, a tripod is an absolute must.
In order to avoid camera shake, use a remote shutter or the built-in 2-second shutter delay. With DSLR cameras though, it is better to use the mirror lock-up.
Camera Settings for Infrared Photography
Camera settings for long exposure infrared photography are similar to those used in landscape photography: low ISO and wide apertures.
Since the autofocus and light meter can be less accurate with infrared light, I often manually focus and bracket my exposures in order to work quickly.
Finally, remember to shoot in RAW and to turn off the lens stabilization: this will avoid blurring when your camera is mounted on a tripod.
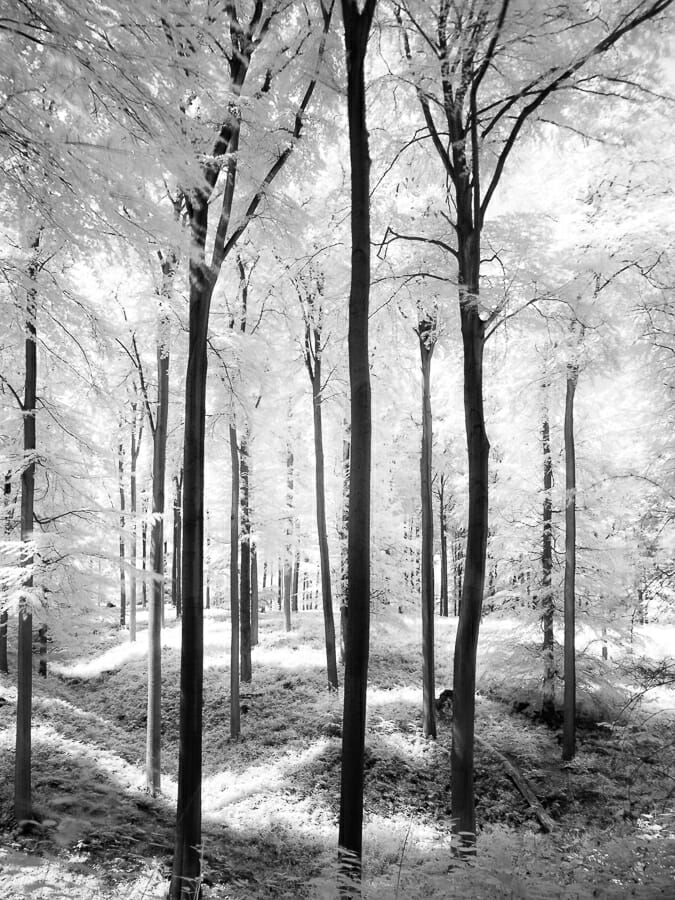
Best Subjects for Long Exposure Infrared Photography
Natural landscapes are good subjects for infrared photography, as they often contain strong contrasts.
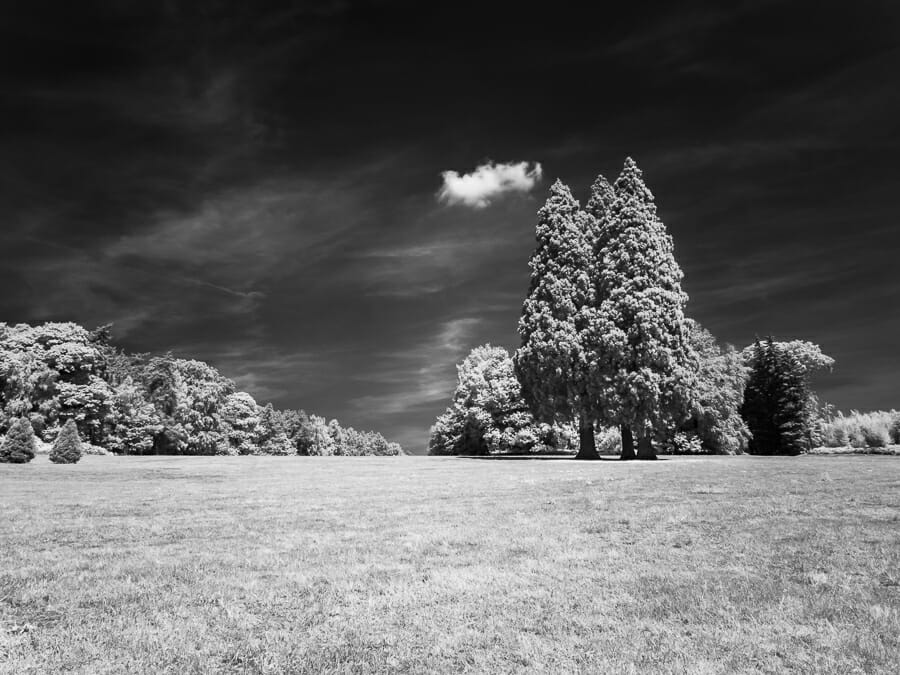
Trees are ideal subjects, thanks to the strong contrast between trunk and leaves.
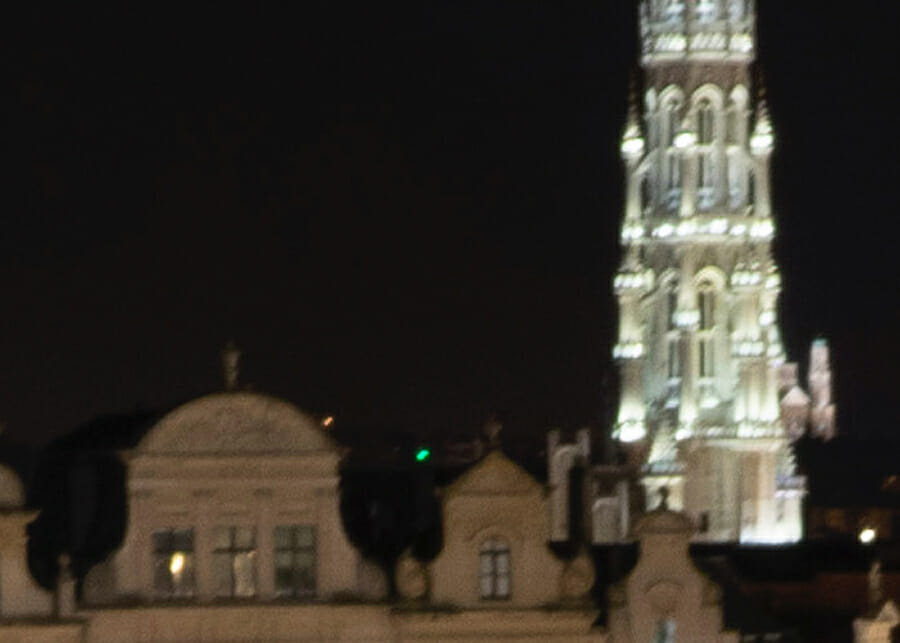
But don’t limit yourself to natural landscapes: the city can offer a lot of opportunities for infrared photography too.

Editing Infrared Images
Your images will need to be edited. If you use the HOYA R72 infrared filter, your RAW images will turn out like the red photo shown below.
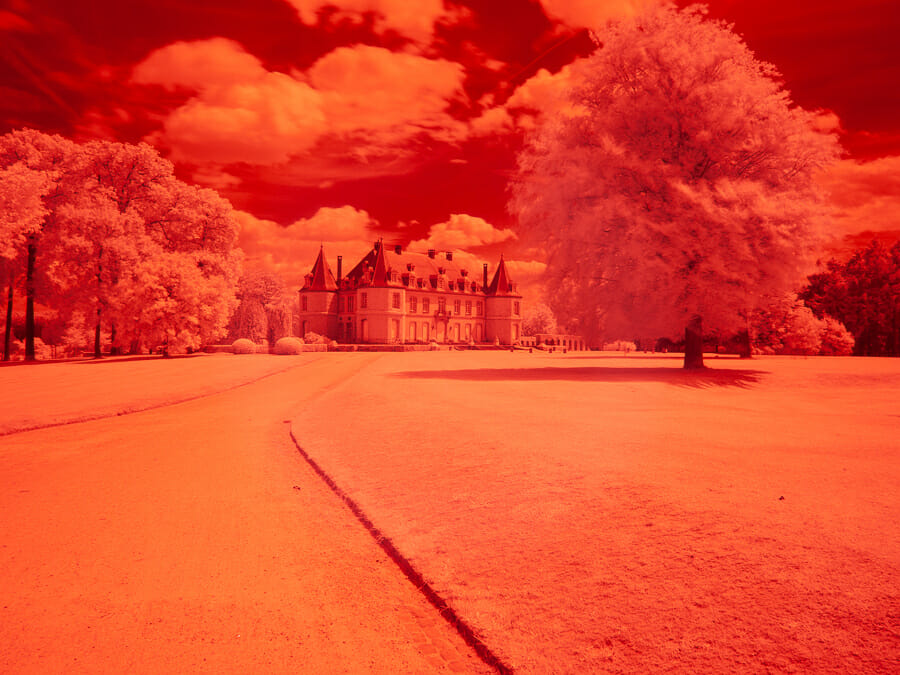
There are many different ways to edit an infrared image: here is where your creativity can make all the difference.
You can choose a black and white style or use ‘false colors’ to make your image more interesting.
Let’s have a look at the different styles, so you can find one to suit you.
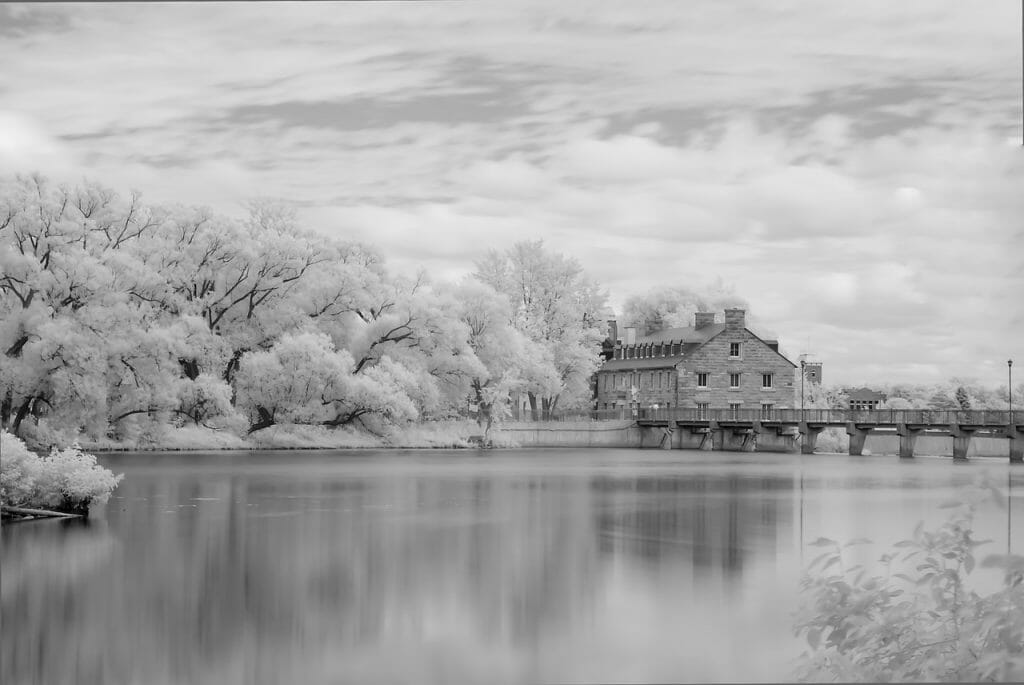
1. Black and White Infrared Images
Black and White editing style is the easiest one, to begin with. If you are using Adobe Lightroom, this very simple 4-step procedure will give you a good base image:
- Use the eyedropper tool to set a custom white balance by sampling an area of the image you know should be grey/white;
- Convert the image to black and white;
- Apply the built-in ‘B&W->B&W Landscape’ preset; and
- Make any final adjustments/finishing touches.

2. Infrared Photos Using False Colors
To create a ‘false colors’ image, Adobe Photoshop (or similar software) is a better choice than Lightroom.
Let’s start with the RAW image shown above: say you want to have a blue sky? To do this, you can follow these steps using the Photoshop channel mixer:
- Open the RAW image in Camera Raw and use the eyedropper tool to set a custom white balance;
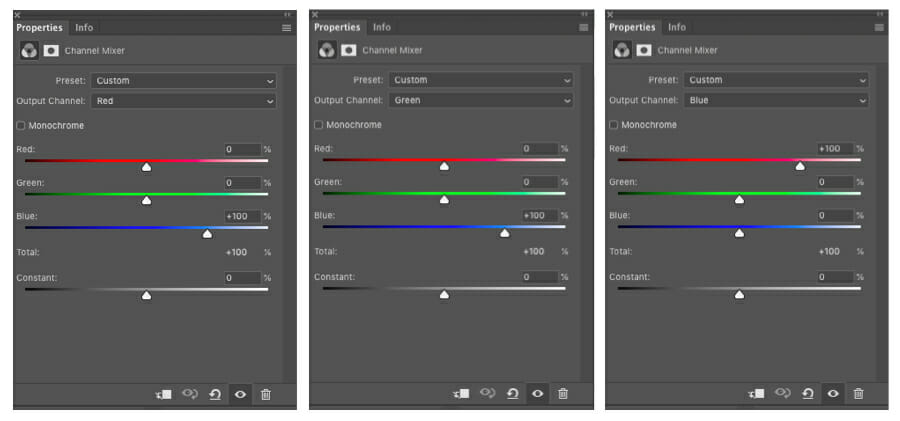
- Go to ‘Image->Adjustments->Channel Mixer’: this allows you to swap the red and blue channels;
- From the drop-down menu, select the Red channel and set the amount of Red, Green, and Blue to 0%, 0%, and 100%, respectively;
- Next, select the Green channel from the drop-down menu, and set the amount of Red, Green, and Blue to 0%, 0%, and 100%, respectively; and
- Finally, from the drop-down menu, select the Blue channel and set the amount of Red, Green, and Blue to 100%, 0%, and 0%, respectively.
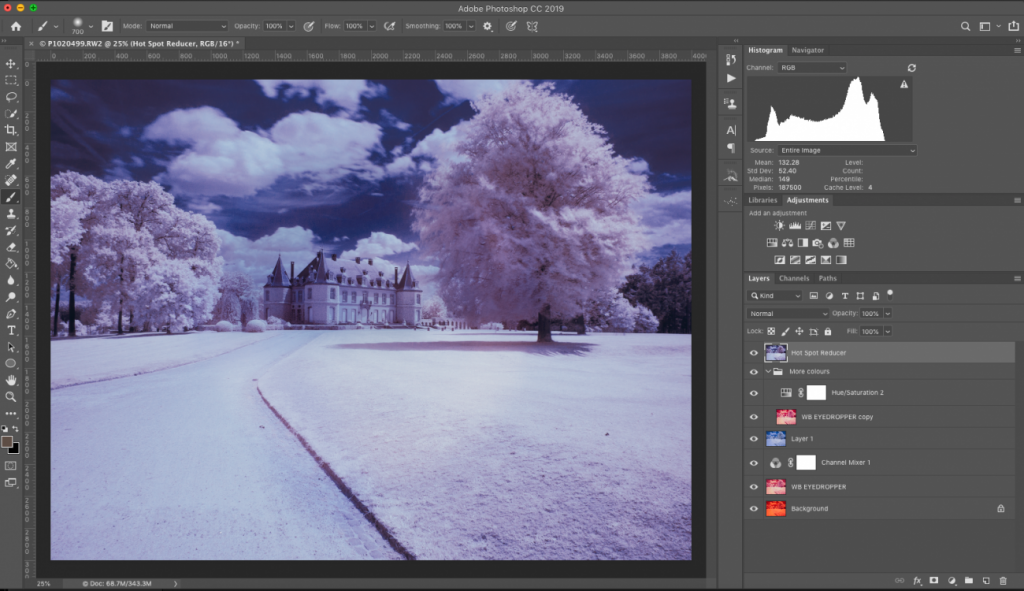
Now you will have an image where the darker areas, typically the sky and the water, are blue.
You can now make final adjustments to the image or introduce more colors, like a magenta tone, to the trees. To do this simply:
- Create a group and copy the layer with an image after the custom white balance;
- Use the Hue/Saturation adjustment layer to change the colors of the image until you are happy with the result; and
- Set the blending mode of the group to ‘Overlay’ and use the opacity slider to control its effect on the image.
If your image contains an infrared hot spot, you can merge the layers and then use the brush tool in Camera Raw to correct it.
Go and Try Your Hand at Infrared Photography
Whether you are stuck in a photographic rut or looking to expand your technical knowledge, infrared photography is a great new skill.
It doesn’t require expensive gear and is a great way to spark your creativity. You can create captivating images with a fresh look.
Have you tried infrared photography? Do you edit in Lightroom or Photoshop? Let us know in the comments below.
Now that you’ve learned these tips for stunning photos, you’re a better photographer.
Guaranteed.
But the fact is, the journey doesn’t stop there. There are more tips, tricks, and secrets–all of which will help you take gorgeous photos.
And if you want to learn all of these secrets, I recommend you sign up for the PhotoBlog newsletter. We send our subscribers all sorts of great stuff–including the tips, tricks, and secrets, straight from the experts. All to help you capture world-class photographs.
Did I mention that it’s all totally FREE?
(Oh, and we’ll send you a natural lighting cheat sheet–designed to help you use light in ways you’ve never considered.)
So to start taking stunning photos, enter your email: