Photo by Yulian Alexeyev
In the last few years we’ve seen a huge rise in popularity of drones, especially camera drones. Both the UAV (Unmanned Aerial Vehicle) and the camera industry have reached a level of technological progress that has enabled companies to produce consumer-affordable camera drones on a massive scale. Today, drones are used for all kinds of purposes, with aerial photography sitting on the top of the list. Unsurprisingly, both amateur and professional photographers have seen an opportunity here – to utilize their knowledge and skills of cameras and photography and apply it up there, in the air.
You can capture all sorts of footage from the air, pretty much anything you can imagine, but there’s one field of photography that especially sits well with the aerial view – landscape photography. Just imagine flying over an iconic landscape, recording images from the eagle’s point of view. For all those who are new either to photography or drones, we bring you this comprehensive Introduction to drone landscape photography.
Choosing the Right Drone for Landscape Photography
Just like with any electronic consumer product on the market, there are a ton brands and different drones to choose from. Luckily, we are focusing on a relatively specific type of drone, one that is best for landscape photography.
Photo by David Marcu
RTF Drones
First, you need to understand that not all drones are ready to dive into the air out-of-the-box. Those that are all called RTF (Ready-To-Fly) and we’ll be focusing exclusively on them. You also have DIY (Do-It-Yourself) drones, BNF (Bind- ‘N-Fly) drones and ARF (Almost-Ready-to-Fly). As we said, we’ll be focusing on RTF drones, so we won’t get into details about the others.
Camera
Obviously, the first thing you need to look for are drones with cameras. Most built-in drone cameras don’t have sensors as large as APS-C or Full-frame on DSLRs, but that doesn’t mean they’re not good. DJI Phantom 3 Professional is one of the most popular drones for photography. It has a 12MP 1/2.3 CMOS sensor capable of shooting 4K video. More importantly, this camera can record images in RAW format. You will want a camera capable of RAW because this will give you a lot more control over editing your images in post-production. Another camera feature to look for is bracketing, which will allow the camera to capture 3 to 5 consecutive shots, each at different exposure levels.
There are other options, too. You can go for a drone without a built-in camera that has built-in camera-ready mount, so you can choose what camera to mount on your drone. If you’d really like to go professional, you may want to consider DJI Inspire 2. In this case, you’ll be able to choose between several DJI’s cameras that are compatible with the Inspire 2 and sold separately. There is Zenmuse X4S, X5S and X7. These have a 1-inch, Micro Four-Thirds and a Super 35mm sensor, respectively.
You might also want to consider a drone that comes with GoPro-compatible Gimbal, in case you’d want to use a GoPro camera. Interesting options here include GoPro’s own GoPro Karma, DJI Phantom 2 for GoPro and the 3DR SOLO Quadcopter.
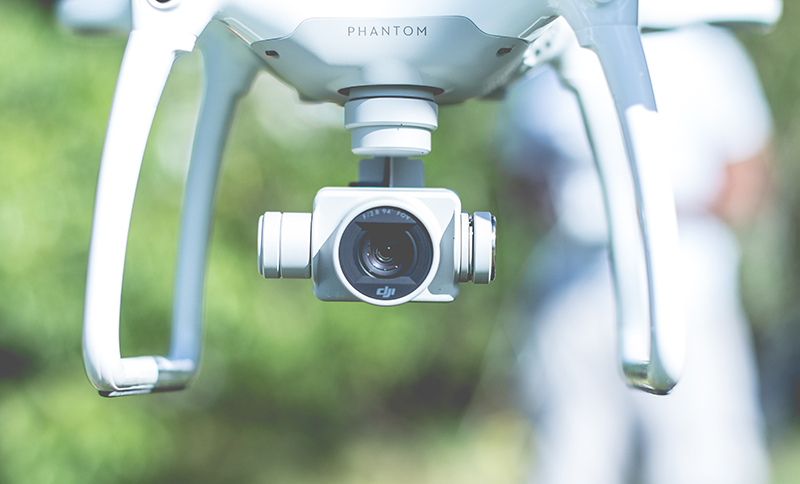
Photo by William Stitt
Stabilization
Drones that are serious about aerial photography come with a built-in camera Gimbal, which includes a mechanical stabilization system. This stabilization system is very important for a landscape photography drone, as it allows the camera keep still in the air and compensate for movements and vibrations due to wind while you take your shot. This will also allow you to shoot longer exposures up to several seconds without motion blur, as well as utilize the bracketing mode without ghosting artifacts. Some cameras will have a stabilization system of their own, be it digital or optical, which should provide additional stabilization.
Wide Angle Lens
Though most drone cameras come with wide angle lens, including those such as GoPro’s cameras which are bought separately, you’ll want to check how wide the lens are exactly. Wide angle lens are perfect for landscape photography, but some lens are ultra wide angle, i.e. fish eye lens which produce visually distorted images.
Maximum Range, Altitude and Flight Time
Some drones can only fly as far a few dozen meters, while other can travel for several kilometers before they get out of range. The same goes for maximum altitude. As you can imagine, this can mean a great deal in terms of flexibility and composition. You see a mountain ridge you want to capture? Make sure your drone can handle the distance and altitude.
One of the weak points of drones in general is the maximum flight time, or battery life. Entry-level drones can only fly around for 5-10 minutes, while higher-end drones allow for about 25-35 minutes of uninterrupted flight. Whichever drone you choose, we recommend getting some extra batteries.
FPV
This is one of the most important drone features for any drone landscape photographer. FPV stands for First-Person-View. Drones that come with this functionality send a live video feed from its camera directly to the pilot, in real-time, usually onto your smartphone or tablet screen. This enables you to see what the drone camera sees, so you can properly compose the shot. Some drones even come with FPV goggles, allowing you to immerse yourself into a true first-person view. This is not essential, but it does provide for an interesting experience.
Okay, So You’ve Got Yourself a Drone. What’s Next?
So, you’ve got your done and you’re ready to capture some amazing landscapes. Before you do, let’s review some essential tips that will make your life as a drone landscape photographer easier, and help you produce better looking landscape photos.
Preparation
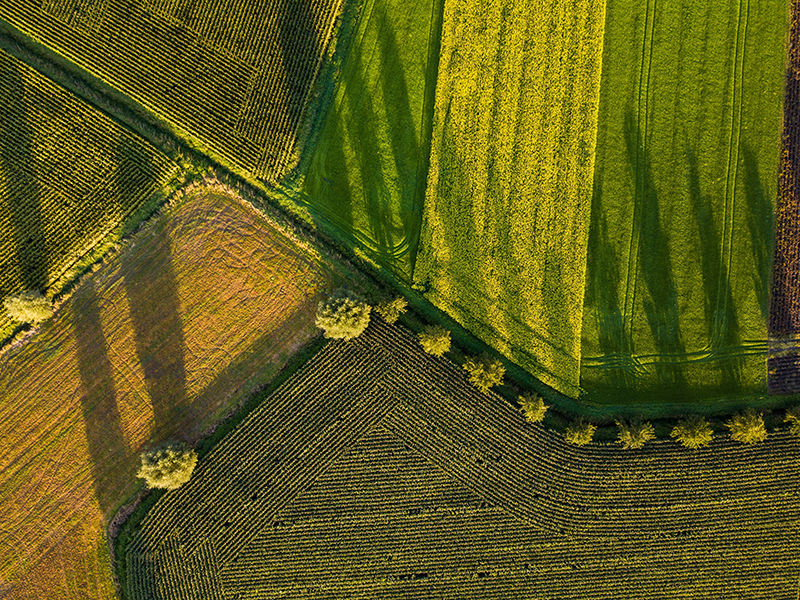
Once you find yourself at the desired location, stop. Don’t go flying just yet. Take the time to explore the environment, walk around for a bit and think about possibilities of what you could capture. Is it a traditional landscape, such as a seaside with the setting sun on the horizon, or perhaps you’d like to take a top-down 90-degree shot of the ground?
Once you’ve got some ideas, go ahead and set up your drone, turn it on, and dig into settings. You should familiarize yourself with all the different options such as how to use its hover mode or how to tell the drone to ‘return home’ when the time is right.
Settings
We’ve already talked about how drones have relatively short flight-times. That’s why you need prepare the shooting parameters beforehand. If you’re using manual settings, as you should, set the desired ISO, shutter speed, F stop and white balance. If you have previous experience with photography, you should know what each these means. Just in case, we’ll go over the basics.
ISO – Sensor sensitivity. Higher ISO means brighter images with more noise. Set this as low as possible.
Shutter Speed – The longer the shutter speed, the more light the sensor can gather, thus eliminating the need for high ISO levels in less than ideal lighting situations.
Aperture (F Stop) – The larger the F number, the greater the depth of field. For example, if you’re up close to a tree, you set a low F number, such as F/2.0, you’ll get slightly blurred background with the subject in focus. If you want everything sharp and in focus, use a large F number.
We’ve already stated this in the camera section, but it’s important to say it again. In the drone camera settings, select either RAW or JPEG + RAW option so you can properly post-process your photos.
It’s important to set these parameters as accurately as possible before you take off, so you don’t waste valuable time in the air fiddling around settings.
Bracketing & HDR
Landscapes shot with a drone can be challenging for any camera, because they capture so much in one composition, often including the sun, that the camera simply can’t handle that much dynamic range. If you notice your photos have overblown highlights or that the shadows are too dark, you might want to use your drone’s bracketing feature.
The idea here is to tell the camera to capture several shots at a fast rate at different exposures. You’ll then later merge these images into one single composition with a high dynamic range (HDR) using software such as Photoshop or Lightroom.
Photo by Martin Jernberg
A Few More Things to Note…
The demand for these flying machines is record-breaking, and of course it is – who wouldn’t want to fly a remote-controlled aircraft with a real-time video feed? For better or worse, this surge in popularity has been accompanied by both positive and negative public reaction. That’s not surprising, considering the term “drone” itself sounds scary. Just to look at some examples – drones are infamous for their use in modern warfare, and then you also have Borg drones (Star Trek, anyone?). People naturally feel threatened by any new “next big thing” they don’t fully understand and that could potentially jeopardize their privacy. For example, some folks are not aware that most consumer drones use wide angle camera lens, and not those super-zoom satellite lens they see on the movies, so there is very little danger of someone’s face actually being distinguishable by a drone passing overhead.
In our case, those concerns are further diminished by the fact we’ll be using drones for a specific form of aerial photography – landscape photography. This means we’ll be primarily working in remote areas, away from people and cities, in the mountains, open fields and the countryside. So, not much chance for people giving you the suspicious look and asking questions.
Just to be on the safe side, in case you do decide to fly over a populated area, make sure you are very familiar with any government regulations regarding UAVs in your country and that you follow them – this is immensely important, for all of us. This also applies to parks as the rules and regulations differ.
Drone landscape photography is no doubt an extremely exciting chapter for photography. We can capture the same locations we’ve always known from completely different perspectives, unbound by limitations of our traditional cameras. Anyone can master it with a little effort and dedication. If you’re planning on taking on this trip, we wish you the best of luck in capturing some amazing photos!
