Before we start with the tutorial we have to go over a not-so-exciting bit first, as this tutorial involves fire and possible injury please read two disclaimers below.
WARNING: The following tutorial features handling of dangerous materials, creating and handling fire, and requires appropriate attire and supervision at all time. 500px Inc. and Steven Biseker advise against imitating this tutorial if you do not realize that this is dangerous.
WAIVER OF LIABILITY AND ASSUMPTION OF RISK: By reading this you acknowledge full responsibility of attempting this tutorial and hereby waive and release 500px Inc. and Steven Biseker from any and all liability arising should you attempt this tutorial.
Step 1: Preparation & Equipment
Before going out and shooting you need to prepare. First you need to gather the right equipment and second scout a remote location with wet conditions. Do not attempt this indoors, at home or in your backyard.
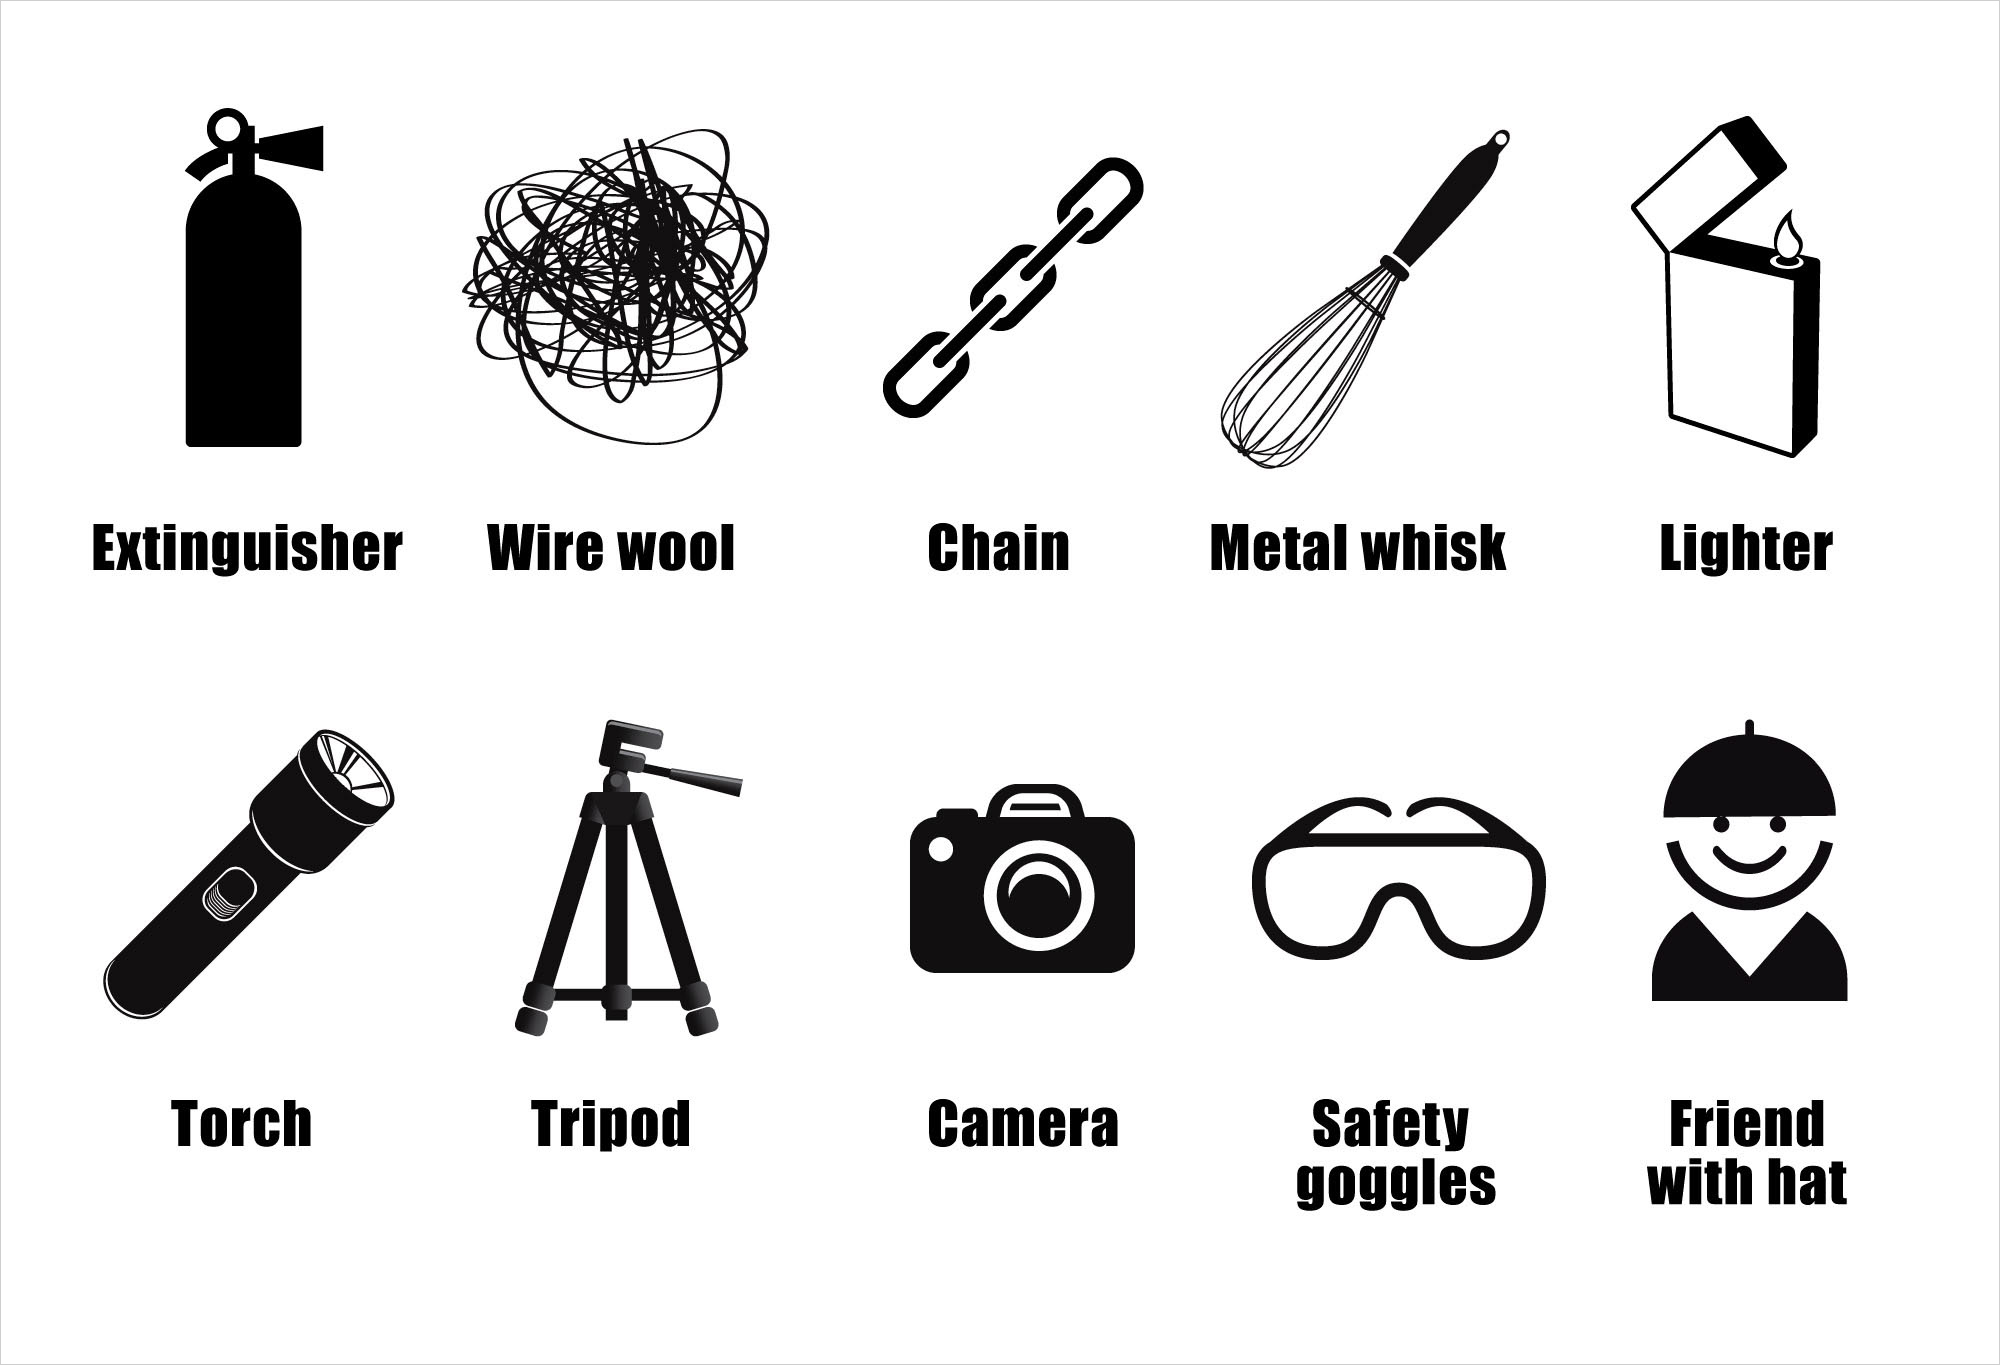
What you’ll need:
- Wet blanket and/or fire extinguisher
- Metal dog lead/chain
- Metal whisk
- Fine wire wool
- Lighter or matches
- Camera
- Tripod
- Torch
- Daring friend or assistant (with protective hat, clothing and goggles)
- Attire: Hat or hoodie, long sleeves, long pants, closed toe shoes, gloves, and goggles. Black/dark clothes work best
Step 2: How to do it
1. Arrive on location & Set up
Your friend or assistant, whoever is going to spin/hold the wool (while you are taking photos) has to dress in the right attire first, see a list above. You have to dress in the same attire as well. Now all dressed head out to the location with all the equipment. Take a moment to set up and figure out the best location to steady the tripod and to place your subject. Keep a good distance between yourself+tripod+camera and person with whisk fire wool, at least 12 feet.
2. Attach the whisk to the end of the chain
A cheap whisk with a loop at the end of the handle and a dog chain with a quick release catch are ideal for this.?
3. Load the whisk with wire wool
Use enough wool to fill the whisk without it being too compact.
4. Set your camera
Set up your camera position on a tripod. Use the torch to focus on the position where the wool will be lit. Once the focus is set make sure you have turned auto focus OFF. Although your settings may vary to your own tastes, I used F13 at 20 seconds to make sure I achieved sharper embers moving towards and away from the lens. Feel free to play around with shutter speed, aperture and ISO settings.
5. Get a friend or assistant to light the wool
Use the lighter on the wool, which should start burning bright embers. It will not start a flame.
6. Friend/assistant swings wool on chain
Once the wool is lit it can be swung with various techniques. Above the head, to the side, to the side whilst slowly rotating or randomly. The speed of the swing will also affect your results. The wool should last burning between 30-60 seconds.
Swinging hot wire wool round your head results in red-hot embers flying off. These continue burning wherever they land and, sometimes, larger clumps can fly out so keep away from anything that you could burn of injure. Also have a wet blanket or fire extinguisher handy in case a spark accidentally lands and catches fire. Put out fire no matter how small it looks right away!
7. Take photos
Go for it and experiment. This is good fun if you keep it safe.
8. Post-processing
You could leave the images as they are, straight from the camera. I added a simple hue change to the color of the ember trails using a layer mask effect in Photoshop. You could also experiment with layer painting and layer transparency in Photoshop or use Gradient and Paintbrush for colour changes in Lightroom.
9. Tip
You don’t have to take photos late at night when it’s pitch black. Try times shortly after and during sunrise/sunset.
10. Keep it safe, have fun and share your techniques and results
That’s it – that’s how you do it so go get great results, take all the right precautions and stay safe!
Thanks to Steven for sharing this tutorial and thanks to his fellow 500px photographers Adam Abbott, Richard Lockwood, and Richard Youden for shooting idea and company.
Do you have photos taken using this technique? Upload them to 500px and share links in the comments below, we’d love to see your results : )