 Today’s article is by guest writer Aaron Hockley
You’ve just returned from a family trip to the zoo, or maybe you just got back after a night exploring the city. Perhaps you’re on vacation and you’re back at your hotel room downloading photos after playing tourist for the day.
Before you wrap things up… STOP!
Many photographers (if not all) have been burned at some point by grabbing their camera and not realizing that something wasn’t quite ready to go. It’s a better habit to form to put the camera back on the shelf, or in the bag, ready to be used the next time, than to hope you remember to check everything at that point
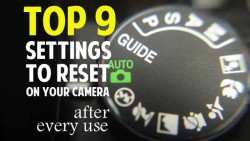
 Before You Put Away Your Camera, Check These Settings
- MODE DIAL
- Do you normally shoot in (P) for Program Mode? Or (A) for Aperture Priority? Whatever your preferred camera mode, rotate that dial and get it back to your usual setting.
- ISO
- This can bite you if you’re not careful. Make sure to reset your ISO back down to a low setting (like 100 or 200 ISO). While modern cameras are great at high ISOs up to 1600, 3200, or more if you need great low-light performance, for ordinary shooting situations that high setting might result in unwanted digital noise. I try to keep mine at 100 or 200 for general use.
- WHITE BALANCE
- If you leave things on Auto White Balance, you’re set. If you’ve changed to a custom white balance for a particular scene, be sure to change back to Auto when you’re done (if that’s your go to setting).
- DRIVE – Single vs. Continuous Shooting
- Are you a one-shot photographer? Or do you like to blast away in rapid-fire mode?
- IMAGE SIZE AND QUALITY
- RAW vs JPG? Big files vs Small files? Make sure that if you’ve changed your file size that you change it back to your preferred configuration (generally it’s advisable to shoot on the largest size, highest quality most of the time – you can always downsize later but making it bigger is tricky).
- EXPOSURE COMPENSATION
- Reset this to zero (0) so that you don’t start your next photography adventure with your images all coming out either under or overexposed.
- AUTOFOCUS
- Is it turned on or off? What should it be set to?
- METERING MODE
- You probably use evaluative metering most often, but if you’ve switched to spot metering, be sure to change that back.
- AUTO EXPOSURE BRACKETING (AEB)
- this is a great feature when you’re creating HDR photos or otherwise want to bracket your shots, but if you leave it on you’ll end up scratching your head as you review your next set of photos. If you start shooting with AEB turned on by accident, you’ll start making photos and wondering why some images look good, some are overexposed, and some are underexposed. Better to turn off this feature when you’re done shooting. (and if you have “weird” stuff going on just check it anyway)
What are the “right” settings to use?
Many of these settings are personal preferences; there’s not a “right” configuration but it’s important that you’re consistent so that when you grab your camera and start making photos that you get the results you’re expecting!

About Aaron Hockley
Aaron Hockley has been a Vancouver, Washington photographer for around twelve years; folks have been paying him for his photo services for the past four. Professionally he works most often with small businesses, creating images to help tell the stories of the people, places, products, and events that drive local commerce. Aaron can often be found writing and speaking about topics for the modern photographer (check out his writings at Splat Photo). Most recently he’s spoken about social media for photographers at SmugMug meetup groups in California, Utah, and Oregon. He’s also been interviewed twice for This Week in Photo. It’s entirely possible that he’s also made several of the mistakes referenced in the article above and that he learns by experience ?
Find Aaron online: