Long exposure is a technique that you may hear discussed often when it comes to landscape photography. It’s a great tool to have in your arsenal, so if you have never tried it before, you should certainly consider learning how to do it. Here’s everything you need to know to get started with long exposure landscape photography.
What is long exposure?
First up, let’s take a look at what this technique actually involves. The name refers to the fact that you leave the shutter open for a longer period of time than normal, but other than that, the rules are open. There’s no distinct time at which a photograph stops being a ‘normal’ exposure and becomes a long exposure – it’s more about the image that you capture than about the specific settings that you use.
Generally, long exposure is used for movement. When you leave the shutter open for longer, items which are moving can become blurred, and light sources will leave streaks across the image when they move. If you leave it open for long enough, then things that move very quickly won’t even be recorded.
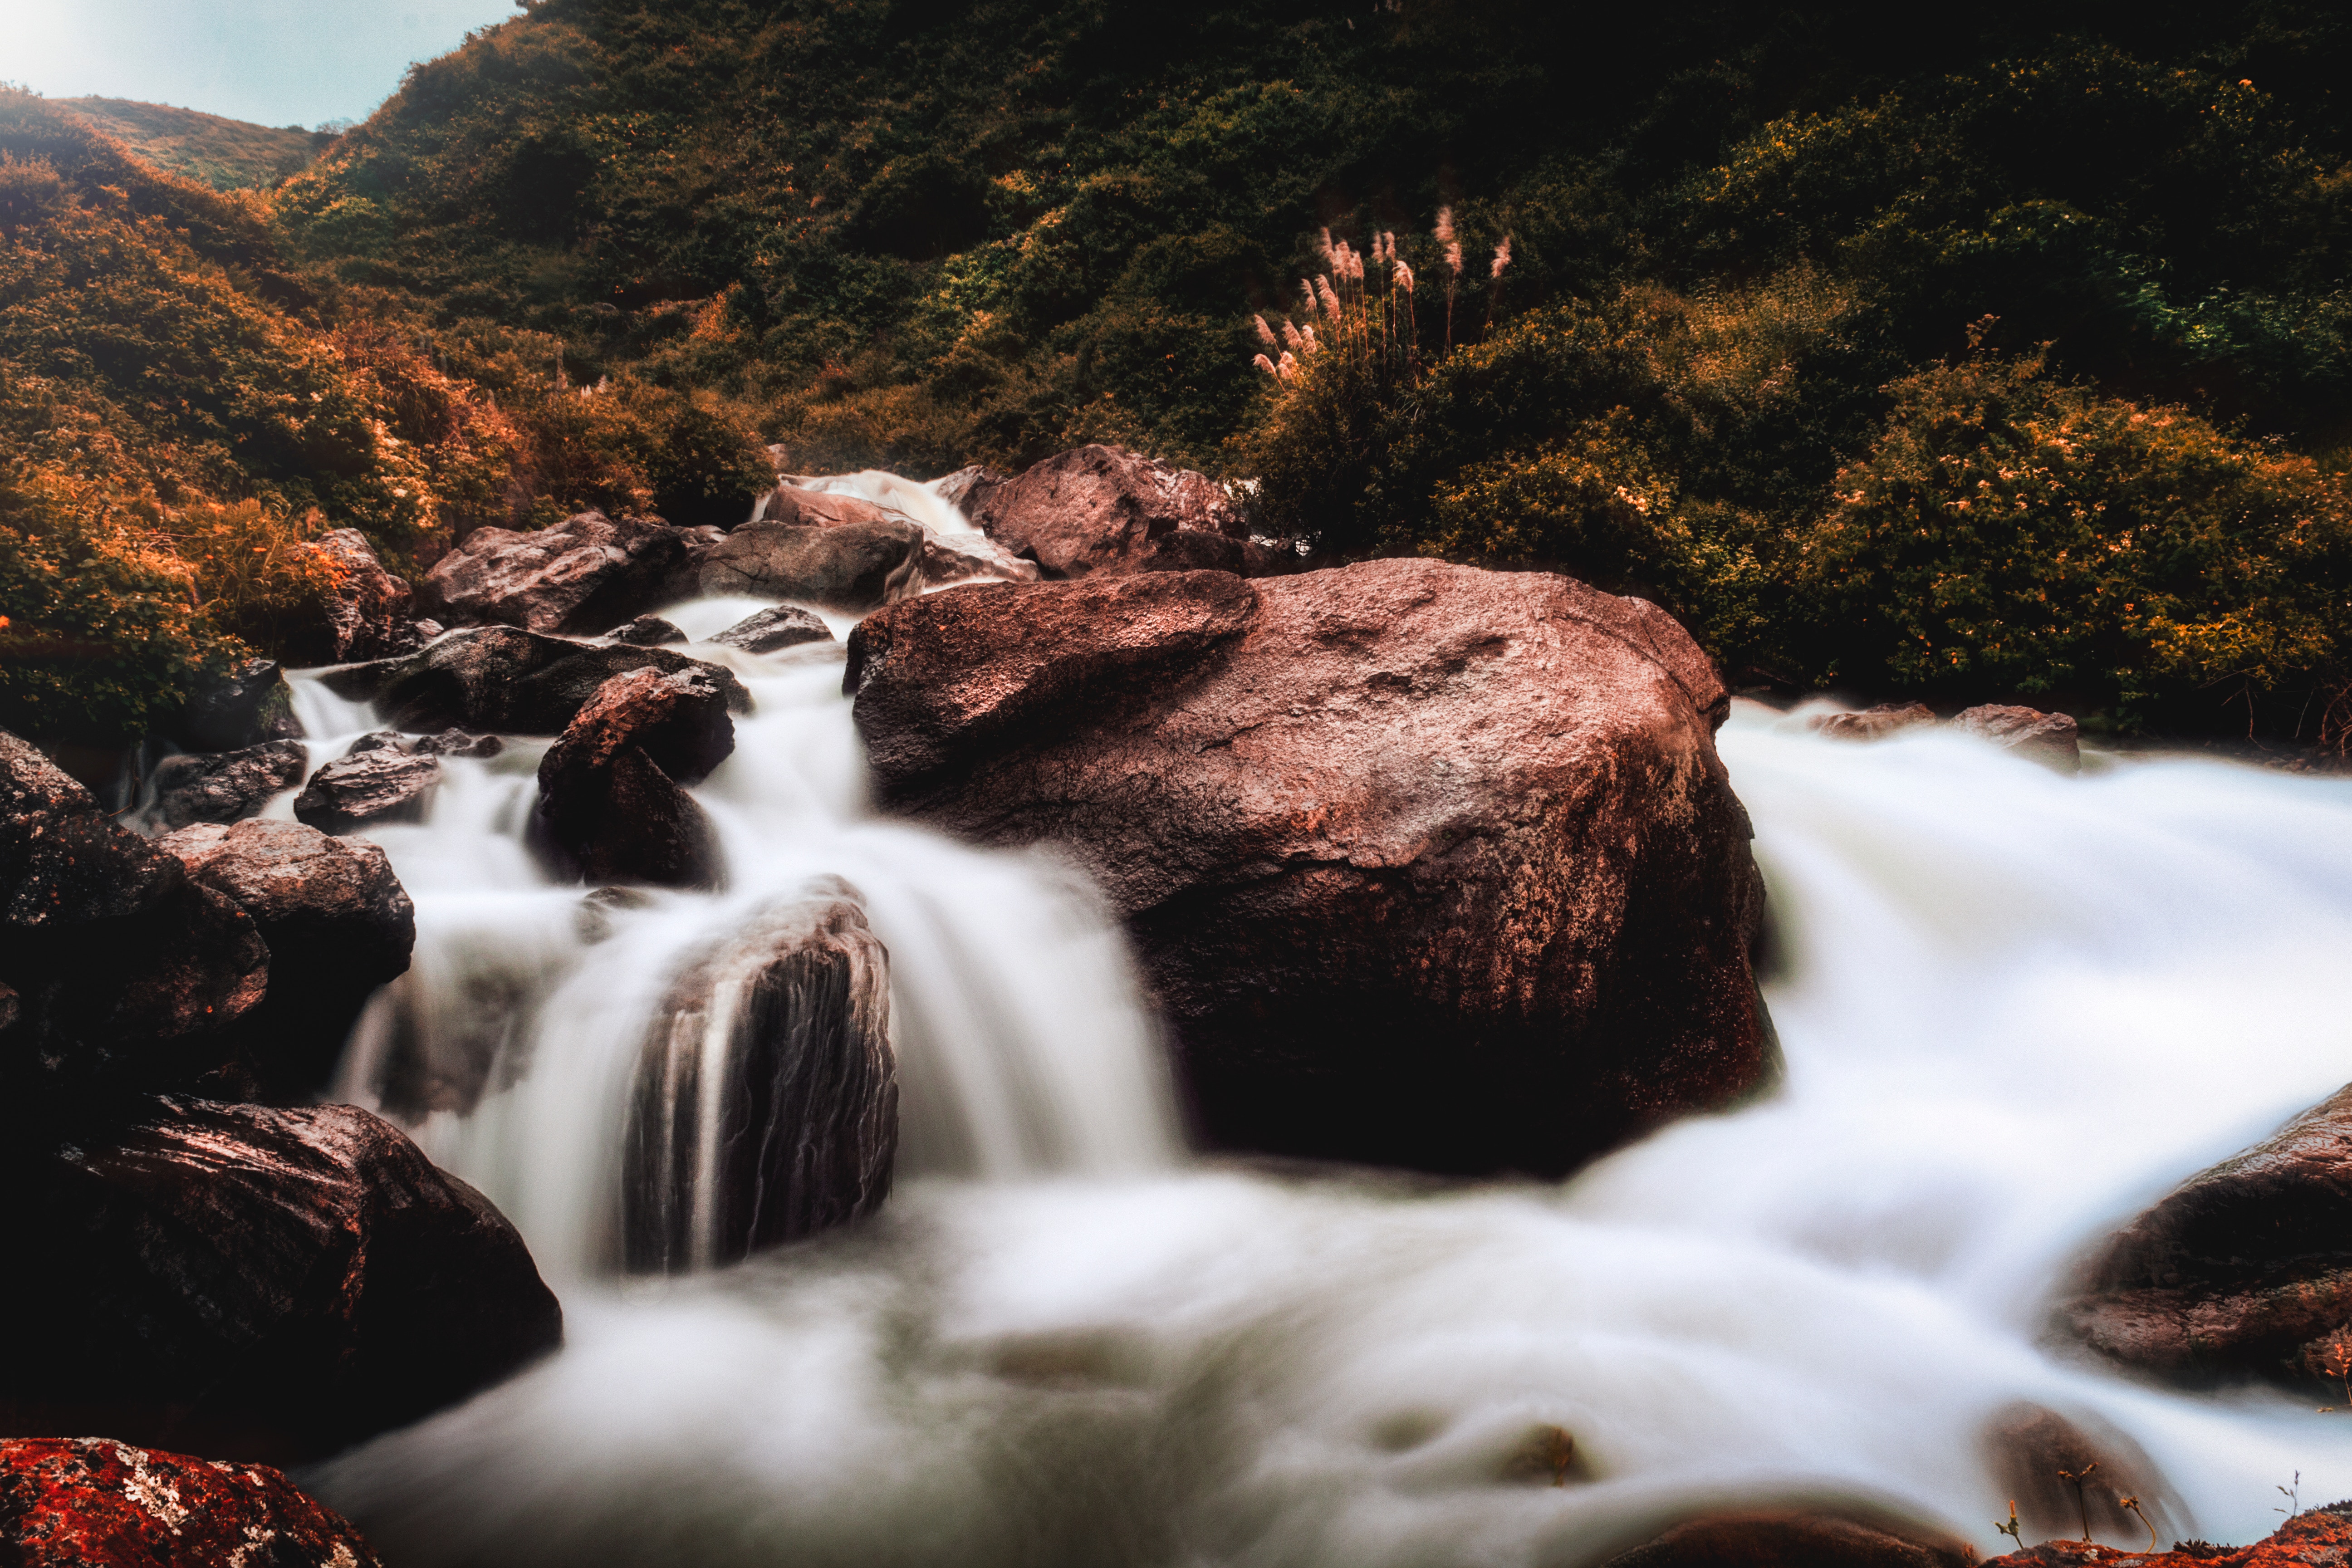
Some examples of long exposure photography that you have probably seen before including car headlights leaving red or white lines above a road; stars leaving white lines across the sky; waterfalls, rivers, or streams with a silky, glassy look as the water rushes by; and people leaving ghost-like impressions as they move across the frame. These are some of the common tropes of long exposure photography, and the interesting thing is that all of these can be achieved within the landscape niche.
The other way in which long exposure can be used is to properly record an image in a very dark environment. If you were photographing at night-time, for example, you might want to leave the shutter open a little longer in order to capture more light. However, while the same technique may be used, we usually understand the term long exposure photography to refer to the capture of blurred motion, rather than a way to add light to a dark image.
What do you need?
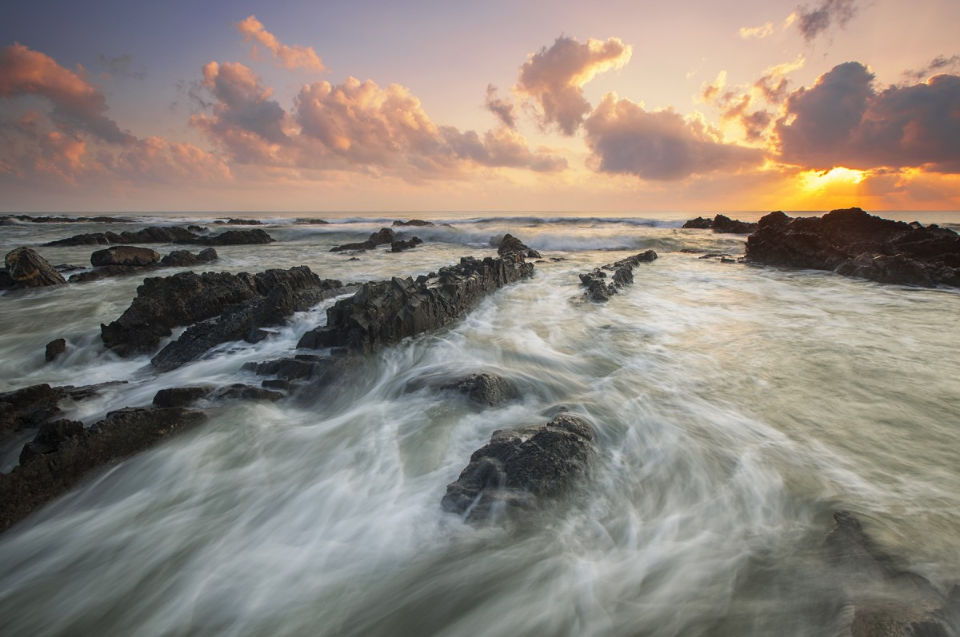
photo by: pxhere.com / CC0
You don’t necessarily need anything other than your camera and any lens of your choice to capture long exposure. Film or digital, full frame or cropped, mirrorless, or otherwise – none of it matters. All cameras are capable of capturing long exposures, with the potential exception of point and shoot cameras which may not allow you to control the exposure time yourself, such as Polaroids.
It may be handy to have a tripod, however. Your camera needs to remain still and stable for the duration of the long exposure, otherwise the image will be blurred in a very different way. It may also be useful to get a shutter release cable, or use a camera which has remote release control via an app. This will allow you to take photographs without touching the camera, which means you won’t accidentally introduce any shake when you press the shutter.
If you are taking longer exposures during the day, you’ll notice that more and more light will enter the image. You can bring your ISO down to 100, and try to use your f-stop to counteract this, but at a certain point, you won’t be able to stop it from being overexposed. For this reason, you can add a neutral density filter to your kit. This will block some of the light from coming in, allowing you to get those longer exposures without it looking too bright. With a filter attached, basically doing the job of being a pair of sunglasses for your camera, you can manage exposures that are several minutes long easily. If you’re short on budget or have no time to pick up supplies, then you can also use this as a hack: literally place a pair of sunglasses in front of your lens. They will need to be big enough to cover the whole lens, completely clean, and stable on the surface in front of the camera so they won’t move during the exposure. The results may not be perfect, but they will certainly be interesting!
If you plan to leave your camera outside for a long period of time, particularly overnight, you might want to invest in a cover which will hide all but the lens and protect your camera from moisture and other potential materials. Insects, wild animals, dust and dirt stirred up by the wind, and rain are all potential hazards that could affect the working of your camera, so prepare for these ahead of time.
Finally, you might also want to add a dark cloth to your kit. Light can sometimes leak in from the camera body itself, in all the tiny hairline gaps that you wouldn’t normally notice. Placing the cloth over the top of the camera body will help minimise this effect.
What should you photograph?
Anything is game, particularly if it moves. However, there are some more obvious options that you might want to cover, particularly when you are practicing the technique. We discussed some of those above, and they include the following:
- Moving water, including the sea
- Clouds
- Stars
- People, such as hikers in a landscape or shoppers in a city
- Cars and other vehicles
- The effects of wind (for example, on a field of wheat)
- Birds and other animals who live in large colonies, particularly during periods of migration or mass movement
The most effective way to use long exposure techniques is to couple the moving object with a background or foreground which is still. For example, you might capture stars or clouds moving above a mountain range, or a stream moving through a quiet countryside. The contrast makes the long exposure more effective. If the whole image contains motion blur, it might not capture the attention quite as well.
How should you prepare?
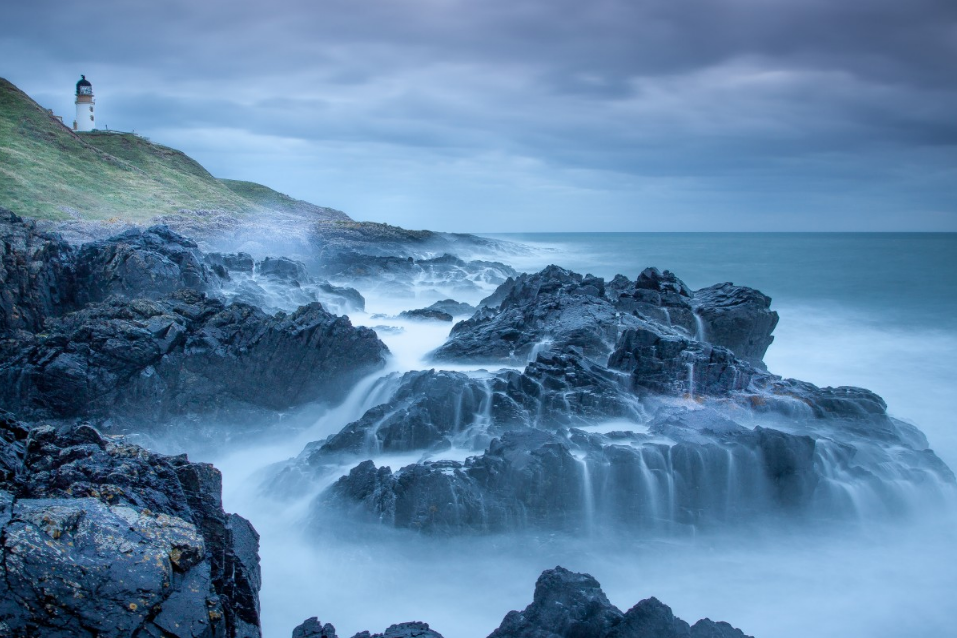
photo by: pxhere.com / CC0
Before you go out to shoot, there are definitely some things to watch out for. Because you’re only taking a few very specific photographs, which will take longer to set up than normal, you want to think more carefully about your plan. Use the tools at your disposal on the internet to choose a location, and look at the kind of frame you might want to set up.
You’ll also want to know what the conditions are going to be like. You’ll need 40% or more cloud cover to capture a silky sky with movement, and you will want to know the status of the tides of the height of the water if you’re setting out to capture that kind of motion. Wind plays a part, too: the windier it is, the fast the clouds or water will move.
How bright will the sun be, and when will it set? If you’re shooting at night, what phase of the moon should you expect? These are all questions that you need to answer ahead of time, as they will affect the way that you shoot. On the other hand, while you’re still getting the hang of doing long exposure, it might be fun to just head out there and try a range of different conditions, to find out what happens with each.
How should you shoot?
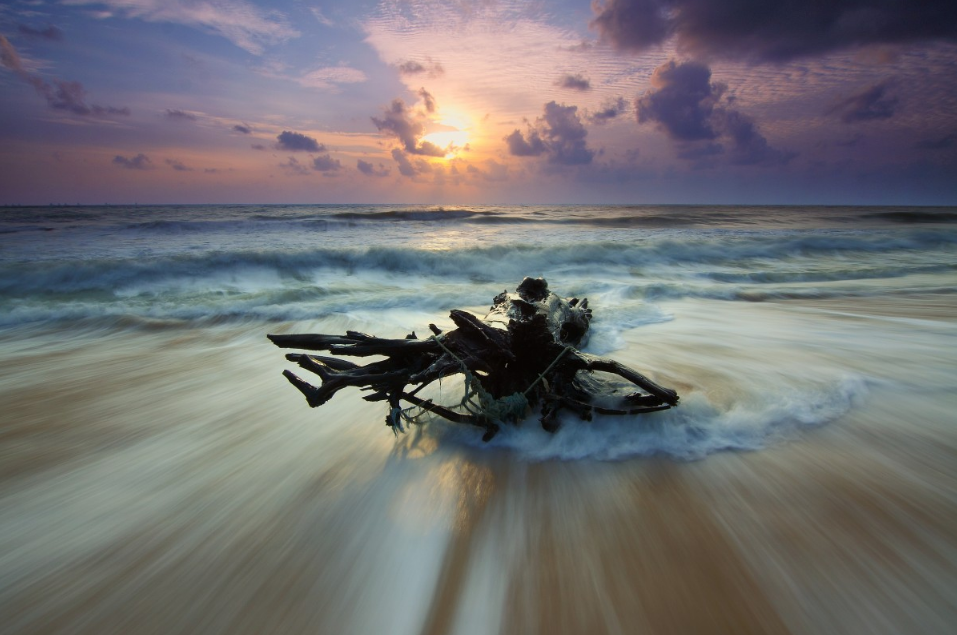
photo by: pxhere.com / CC0
It’s recommended that you capture RAW files when shooting long exposures. Your neutral density filter might add a magenta or blue colour cast to your images, which means that you should be able to remove the cast easier with a RAW file.
Some photographers like to use an app that will calculate the exposure time they should be using, taking the neutral density filter into account. Others prefer to just set the shutter going and see what happens – and adjust afterwards if needed. If you have a lot of patience or you like to learn things until you can do them intuitively, this approach should work for you.
To reduce some of the noise and shake problems that sometimes come up with long exposures, make sure to set your ISO to 100 and turn off image stabilisation. Set your f-stop to somewhere between f/7.1 and f/11 in order to get a clear and crisp image across the frame. Set up your focus, and then make sure to switch to manual focus so that nothing will change when you press the shutter.
You can now use your app to make calculations by taking a test shot and following instructions, if you are taking this step. Afterwards, you can attached your neutral density filter. If not, feel free to add the filter at this stage anyway. You should then double-check that your focus or frame have not been knocked at all.
When using a DSLR, set it into Live View or use the mirror lock-up function to ensure the mirror won’t move while you shoot. This will prevent any camera shake from internal functions.
Set your camera to bulb mode, often marked with a ‘B’ or an image of a lightbulb. Next, you can take the shot using your shutter release cable. If your release has a lock, use this to ensure that the shutter stays open even if your finger twitches or shakes. Use a timer or count in your head until you need to release the shutter, according to your app calculations or your own estimation.
After your image is complete, it will usually benefit from some attention in Photoshop and/or Lightroom to get it looking a lot sharper and with better contrast levels, as well as more accurate tones.
That’s all you need to know to get started with long exposures. The rest will come with practice and experience, as you learn how to make them work better for you!