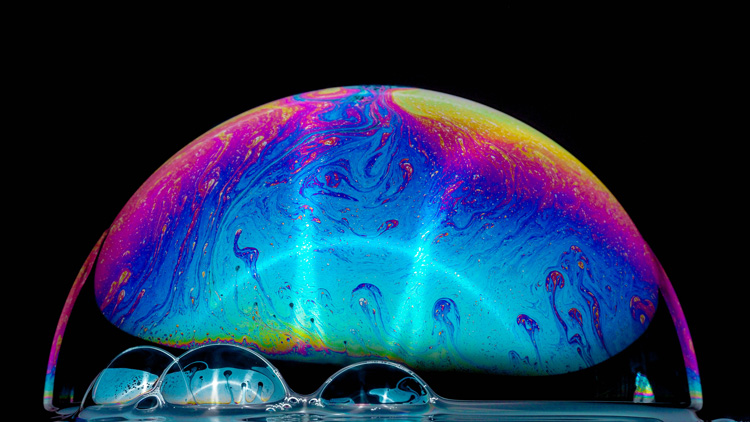
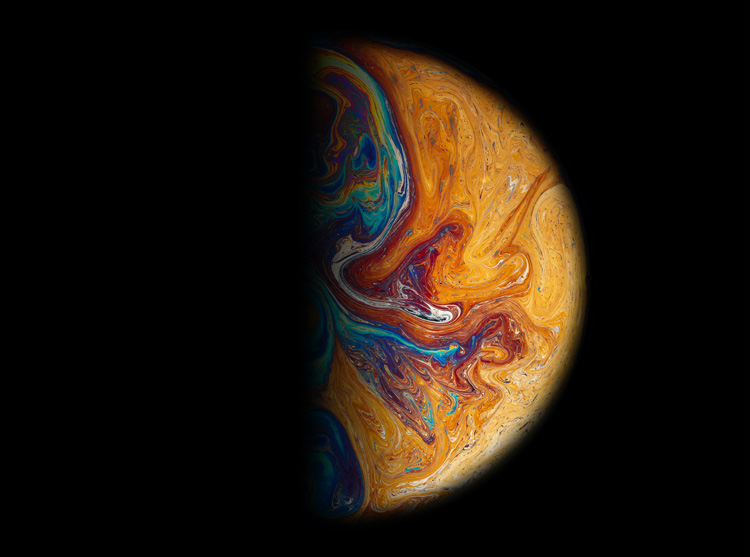
Here is something really fun for you to try at home. I scoured YouTube for videos on how to do soap bubble photography to find the best ones for you.
The best part is you don’t need a lot of expensive gear to do this. So if you wanna see how to create images this, read on and watch the videos below.
Gear needed to do soap bubble photography
As I mentioned above, you need minimal gear to do soap bubble photography, but there are a few things that are essential. Then once you’ve tried that, if you want to take it up a notch there are some other optional items you can add to the setup.
Essentials
Here is a list of the must-have items that are essential for doing soap bubble photography.
- Camera with adjustable settings (you’ll want to use Manual Mode).
- A lens that has a close focusing distance, ideally one that is not a wide-angle lens (if you have a macro lens use that).
- A 5-in-1 reflector with a translucent inner portion (you can get a small 32″ one for under $20).
- A black lens cap (to use to hold the soap solution).
- A tripod (this is essential, you cannot hand hold this kind of shot.
- Liquid soap (ordinary dish soap will work fine).
- Glycerine (this will help to keep the bubbles from popping too fast).


Optional upgrades
If you want to go the extra mile you can use a macro lens (or extension tubes or close-up filters) to get closer and make the bubble bigger in your frame.
You can also use flash (a speedlight) if you have one, and it gives you more control over the lighting. But if you don’t have a flash, the first video below shows you a method of doing this with just the sun and a small reflector. So we got you covered.
Here is a list of optional items if you want to take it up a level:
- A speedlight or flash.
- A remote trigger to fire your camera.
- A method of getting closer (a macro lens, extension tubes, or close-up filters). You can get a set of inexpensive filters for under $20 if you want to try it (just make sure you buy the right size to fit your lens).
- A small softbox to soften the light so you get a nice highlight on the bubble.
- A rain cover or protective gear for your camera (just in case you’re messy and splash).


I’ve made up a shopping list for you if you need to pick up a few things. CLICK HERE to see all the items needed to do soap bubble photography.
If you just need a tripod and need advice on buying one, read this: Stress-Free Tips for Buying a Camera Tripod. Then make sure you’re confident using your tripod by reading this: 9 Tripod Mistakes That Could Be Ruining Your Images and Putting Your Camera at Risk.
For a list of options if you want to expand your repertoire into flash photography CLICK HERE to go shopping (I’ve included many budget options under $100 as well). Then start reading my flash tutorials here: How to Use Your Flash – Tips for Total Beginners.
Okay, ready to get started?!
Soap Bubble Photography – Video #1
This first video is from Mike Smith. He does a great job of explaining and demonstrating how to do soap bubble photography.
This is the one you will want to watch if you do not have a flash (starting at about the 15:30 mark). Make sure you still watch the first part about setting up and making the soap solution too though so you don’t miss some critical steps.
He also goes into using extension tubes and shows how to get closer.
Read more on using those here: How to Use Extension Tubes for Macro Photography.
Soap Bubble Photography – Video #2
This second video is from Stewart Gibbs. He demonstrates how to do this using just a simple kit lens so regardless of what gear you have, you can follow along.
He also shows some processing tips at the end to make the colors pop in your bubble images.
He also has a newer updated version where he shows a different technique. It’s a bit more involved and complicated because you’re attempting to catch the bubbles in midair like this:
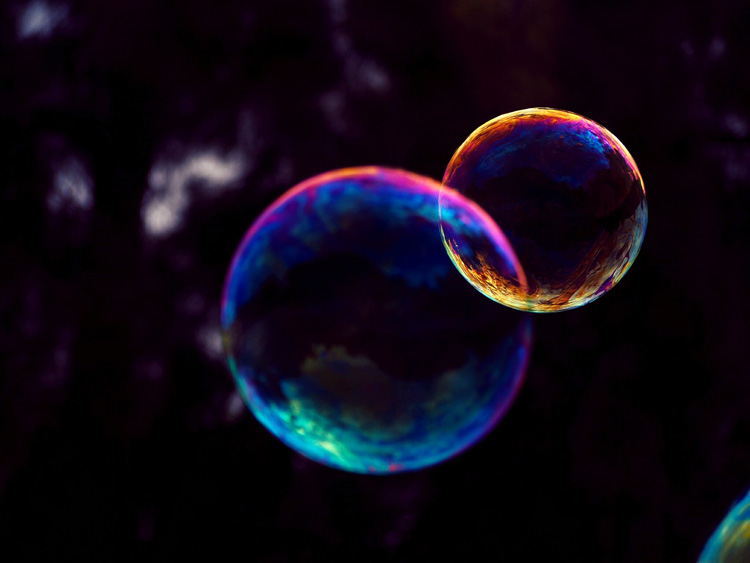
So if you want to challenge yourself, give this one a watch.
Your turn!
Well, I don’t know about you but I want to try this! I’m not sure how my cats will behave with the bubbles but I think this one could be a lot of fun.
I’d love to see your soap bubble photos if you give this a whirl. Please share them in the comment area below, and if you figure out any good tips do tell us!
Cheers,