Viktor Elizarov is a travel photographer and educator from Montreal, Canada. He travels around the world and shares his experiences on his popular travel photography blog. Visit Tutorials section of his blog for free tutorials (including original raw files) and free Lightroom presets.
2014 was a year of big changes in my photography.
The changes were triggered by two realizations. First: I realized that my photography gear had quickly become the limiting factor in my photography. Secondly: I realized that I spent too much time processing photos, which kept me away from traveling and shooting.
Over the last 12 months, I dedicated time to streamlining and simplifying my photography, starting with my equipment and processing method.
The biggest change in my photography happened at the end of 2014 when I sold all of my Canon equipment and switched to the Sony Mirrorless. This change allowed me to reduce the size and the weight of my camera bag by more than half.
Next, I managed to dramatically reduce the time I spend processing my photos. First, I shifted the weight of editing from Photoshop to Lightroom where I now complete 90-95% of my processing. Second, I implemented a Lightroom Preset-based workflow by creating my own Lightroom presets that fully reflect the style of my photography.
The only part of my photography that I could not fully optimize for quite some time was long exposure photography.
I love to photograph water. Actually, most of the photographs in my portfolio have some type of water feature in them. And, because of my fascination with water, long exposure photography is a big part of my style.
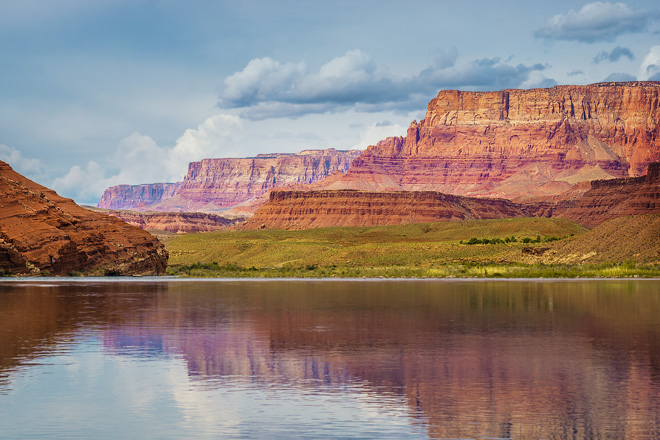
Photo taken on a tripod with 10 stop ND Filter
However, long exposure photography required extra gear. I always needed a tripod and, if I was shooting in daylight, ND (Neutral Density) filters.
This is why I started to experiment with various techniques in an attempt to hack long exposure photography.
Recently, I returned from 10 days on a 5000 Km driving trip to the American Southwest where I put my new technique to the test in real travel photography scenarios. After I started to produce consistent results, I knew I was ready to share the technique so others can also achieve a long exposure effect without using a tripod and ND filters.
I call this technique the Align + Blend.
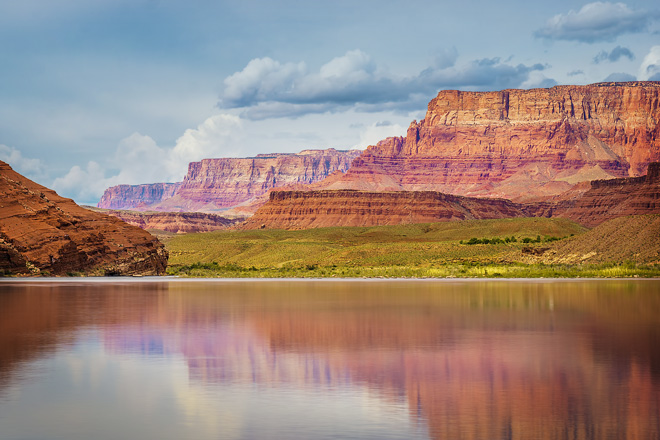
Photo taken using the Align + Blend technique. No tripod or ND Filters were used.
Shooting
In 99% of cases, I use the bracketing mode (AEB) but, for my Align + Blend technique, I had to set the camera to the Single Shot Mode.
I took a few test shots and, with the help of the histograms, I pinpointed the right exposure settings: f/9, 1/320sec, ISO 100.
I switched to the Manual Exposure Mode (M) and took 10 consecutive shots of the scene, trying to be as steady as possible, without any movements.
My shooting speed was approximately 1 shot per second, taking 11 seconds to complete the sequence, which I learned from metadata.
That was it. The shooting part of the technique was over. The rest of the technique was achieved in post processing.
Processing
1. I imported the 10 RAW images into Lightroom.
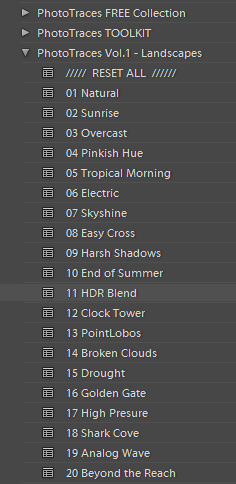
2. I applied one of my Lightroom presets (HDR Blend from Landscape Collection) to all 10 shots.
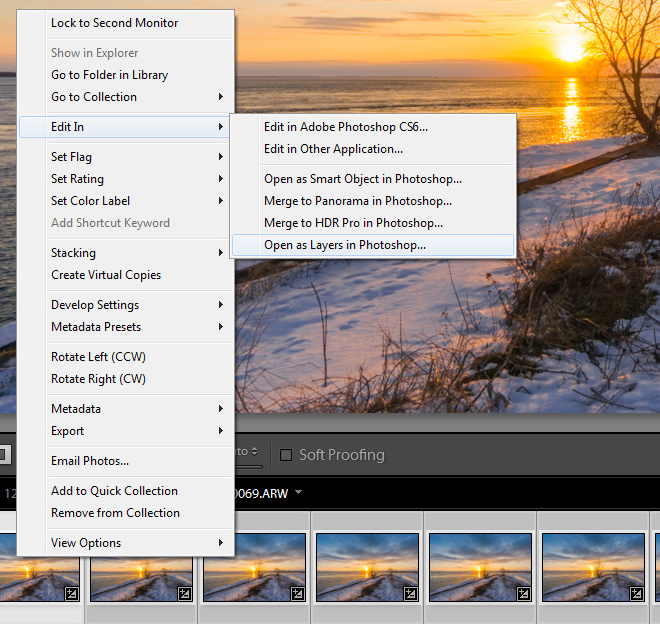
3. I selected the 10 images in Lightroom and opened them in Photoshop as the layers in a new document.
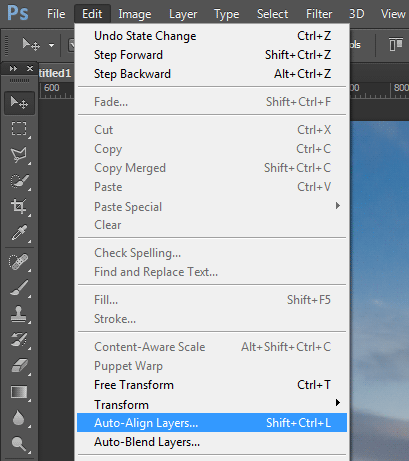
4. In Photoshop, I selected all 10 layers and auto aligned them using the Auto-Align Layers tool.
5. I selected all 10 layers and converted them to a Smart Object.
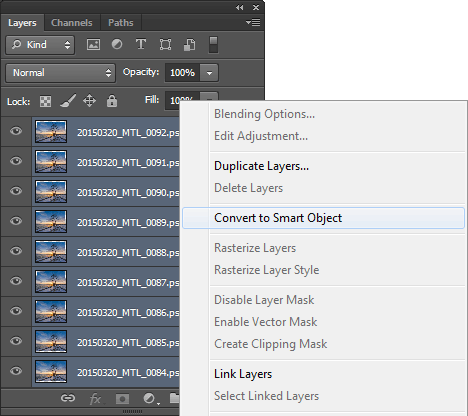
6. I used the Stack Mode functionality in Photoshop to blend the 10 original layers inside of the Smart Object. I used the Mean Stack Mode option.
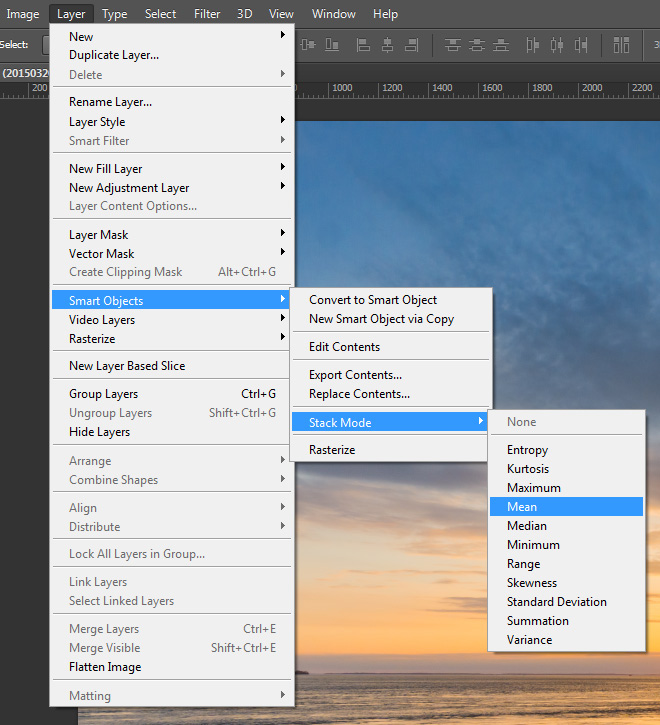
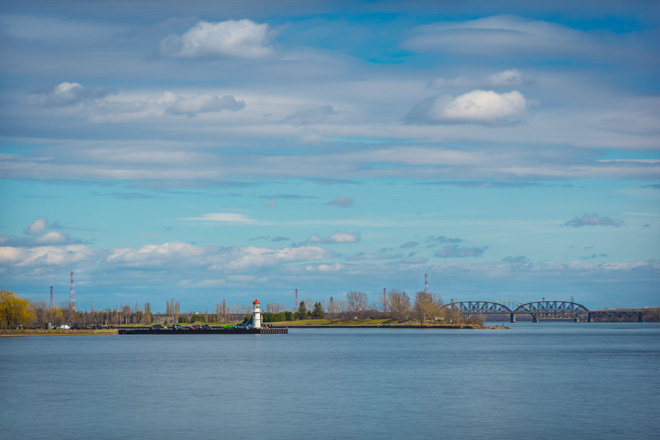
This resulted in a long exposure effect by moving elements of the scene (water, sky). As you can see, I managed to achieve the long exposure effect without a tripod:
Do not get me wrong, I am not planning to ditch my tripod anytime soon but, at the same time, this technique gives me the flexibility when I need to travel light and cannot bring it with me.
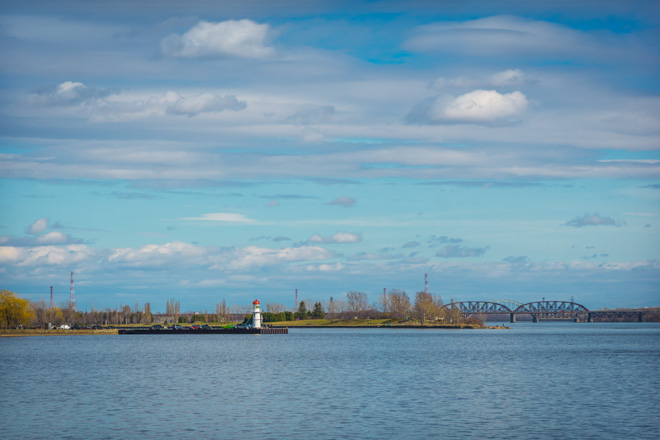
Below are more examples of the Align + Blend technique.
