Are you looking for an affordable but also electronic macro lens? Or maybe you have an old kit lens that’s just sitting around, collecting dust since your last upgrade? Well then read on, because in this article I am going to share one cool hack that will allow you to transform almost any kit or standard zoom lens into a capable macro lens!
I am not talking about reversing the lens or mounting it on extension tubes, we’re actually going to convert the lens for good. And it’s incredibly simple.

The Theory
The basic design of zoom lenses in general is similar: the extendable front element produces a projection of the image into the lens barrel, where the next group of movable elements picks up on this image and projects it further down the lens barrel. The distance between the front element and this inner group, as well its distance to the sensor plane, determines how large the original projection of the front element will be when it arrives at the sensor.
In other words: the distances between the lens groups/elements to each other and to the camera sensor decide the zoom factor. This also explains why the minimum f/number increases as we zoom into the scene—a smaller portion of the image circle leaves us with less light.
But what if we were to remove the front element from the equation? Then we would have a lens that focuses very close. Close enough to shift the focus plane into the extendable zoom tube of the lens barrel.
Remove the zoom tube from the equation as well and we have a capable macro lens.
Note: This a non-reversible procedure in many cases; however, with some lenses you can simply unscrew it, such as in the example below.
I have already modified a few lenses this way and so far it has worked for all of them. The video below shows the conversion by the example of an (otherwise pretty useless) old Sigma 18-50mm f/3.5-5.6 DC lens.
The basic steps of the conversion are:
- Remove the front element of the lens.
- Remove the extendable zoom barrel or fixate it with glue.
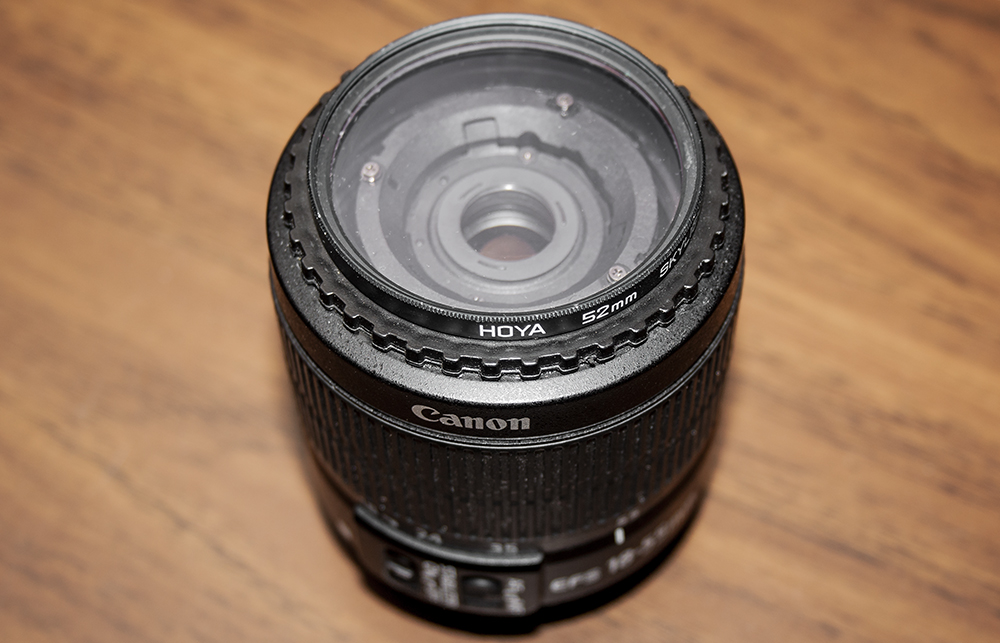
- In case you decide to remove the zoom barrel and the filter thread is gone, you can glue the screw ring of a tulip lens hood to the front of your lens, such as I did in the photo below.
- Attach a UV or Skylight filter to prevent dust from entering the lens body.
- Alternatively you can glue the filter directly on to the lens body to gain a few millimeters more working distance. If you decide to do so, ensure that the filter is perfectly clean, and that you use a glue that won’t leave fume residue on the glass.

Images say more than words
That’s why I put together a few photos that I took with the Canon and Sigma lenses mentioned above, so you can get a better idea of the images they produce and their quality.


Pros and Cons
As with any lens, converted zoom lenses will have their own pros and cons.
Let’s get the cons out of the way first:
- Due to the nature of this modification, the lens will have a very short working distance. This makes it more suitable for still subjects, but with a bit of luck and patience shots of insects are manageable.
- Flare. Without their front element, many zoom lenses become susceptible to lens flare. To prevent this you can use a flash modifier or a step-ring to serve as a lens hood, whilst not taking away from the working distance. In some cases a UV- or skylight-filter will help too.
- Distortion around the edges of the frame. Since we removed an element from the chain of spherical correction, distortion will become visible around the edges of the frame. This is rarely noticeable though and only an issue with flat-lay subjects such as stamps for example.

Don’t worry. There are some pros, too:
- First of all, this conversion gives you an electronically operated lens that, unlike many other macro lenses, covers quite a magnification range—typically from around 1 to 2.5 times life size on an APS-C sensor.
- Macro lens for less. Let’s take the Canon EF-S 18-55mm II IS as an example: this lens typically sells for less than $100 used. Remove the front element and you get a fully functional and electronically controlled macro lens with image stabilization and focus confirmation (it won’t lose its auto-focus capability either, but it won’t be very useful as it tends to hunt back and forth a lot).
- It is a neat way to breathe new life into dusty glass. Especially with lenses that have a defective auto-focus, as AF is no help with macro.
- In terms of sharpness, I have been positively surprised by almost all the lenses I have converted. Especially with the Sigma lens from the video above, as it appeared to be sharper at low f-stops after the conversion than it was before. All lenses that I have handled provided ideal sharpness when zoomed out with some fall-off when fully zoomed in. This is just a rule of thumb however, and varies between models and manufacturers.
- Most converted lenses have a very decent and sometimes even soap-bubbly looking bokeh.
Artistic Look
When I shoot my EF-S 18-55 wide open it renders images very artistically, with a gorgeous soapy Bokeh and strong aberrations in out-of-focus areas of high contrast. Sharpness is not exactly superior at f/3.5 but definitely enough to work with.

Sharpness
Stop the lens down to f/8 or so for a drastic increase in sharpness, even at its full magnification.

Zoom Range
To illustrate the magnification range of my EF-S lens (which is similar for all 4 zoom lenses I have tried so far), I photographed a couple subjects and took two photos each: one at its lowest magnification ration and one at its highest. Check them out below:


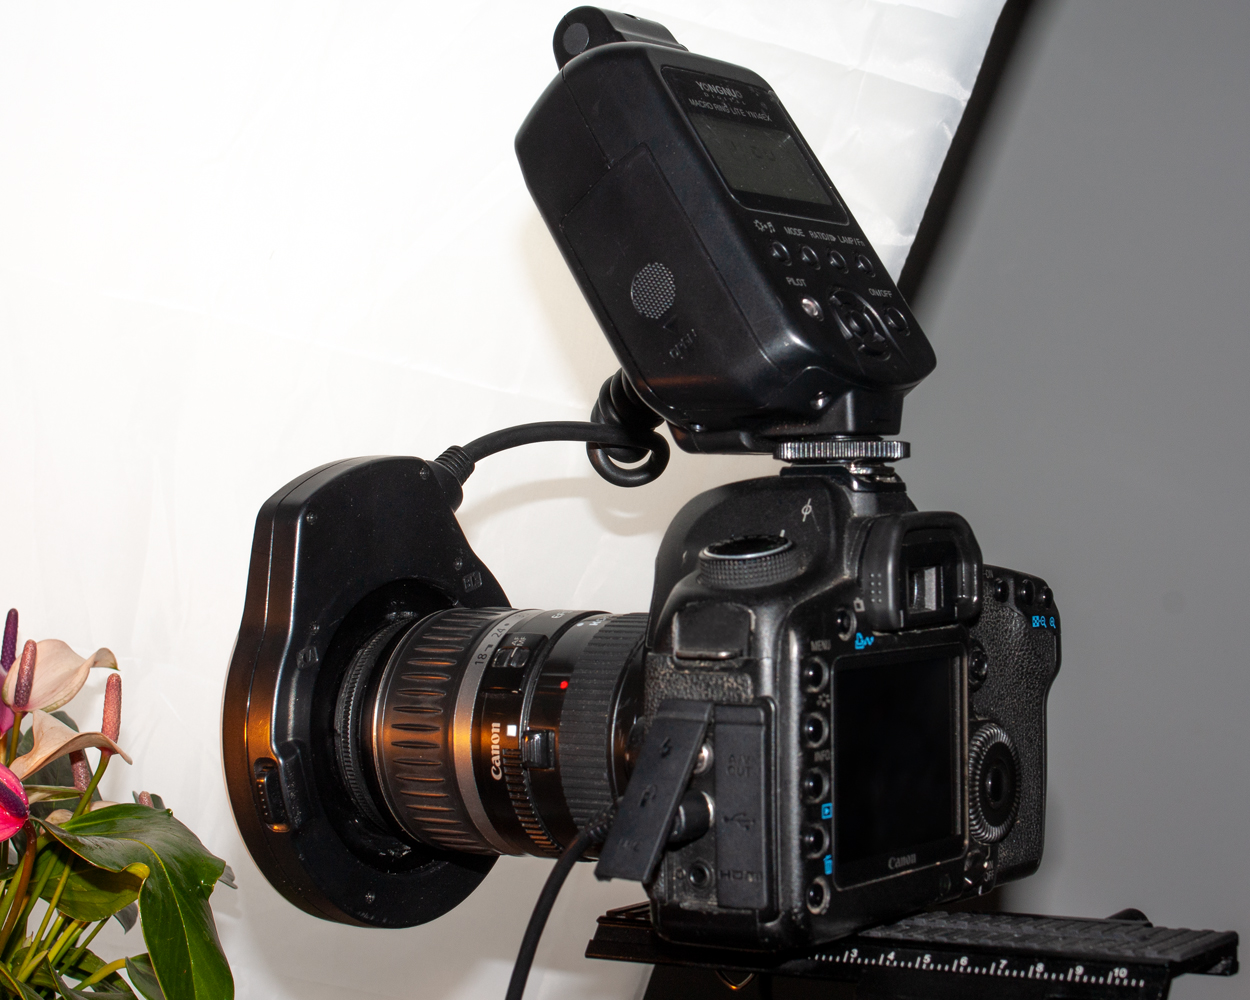
In the case of EF-S or other dedicated crop-sensor lenses that can not be physically mounted to full-frame cameras, you can use an extension tube in order to overcome the mount barrier. In the example below I used a 36mm Kenko tube to adapt my EF-S lens to a Canon 5DII body.
Even though the extension tube increases the magnification ratio, the larger sensor makes up for the difference and rewards it with better low-light capabilities and more megapixels.


The Bottom Line
In my opinion, the benefits of this lens conversion clearly outweigh its cons. I have had a blast using my modified lenses over the last few months and will definitely continue using them.
If you are looking for a cheap but effective macro lens or you have a zoom lens that you’re not using anymore, this conversion I something I would consider. Something I would do, actually, that’s how I found out about it. But then this might just be me; I enjoy this sort of thing and own a bunch of modified equipment.
I should mention that these converted lenses are not exactly easy to handle and will take a bit of practice. But if that’s worth it to you, this is a neat way of getting your hands on an electronically controlled and quite unique macro zoom lens for a great value.
About the author: Maximilian Simson is a London-based portrait and event photographer who also shoots fine art and macro photography. To see more of his work, visit his website. This article was also published here, and is being republished with permission.