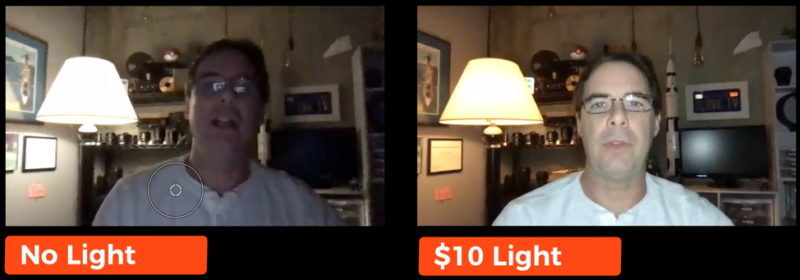
The single most important thing that you can do to look better in a Zoom meeting is to add better lighting. This will give you a significant quality improvement on a minimal investment. So… I decided to test out four different lighting options, ranging from a cheap little $10 ring light all the way up to a $1,000 professional studio light.
For the test, the same built-in laptop webcam was used for each light. Additionally, I recorded myself using each light in an actual Zoom meeting with the regular Zoom software. No color correction was applied to any of the footage shot with the lights.
Watch the test for yourself above or scroll down for a quick summary of the results.
Test Results

The bottom line? A $1,000 light doesn’t look that much better than the $30 light when you’re limited by your workspace and your computer’s built-in webcam.
While the $1000 light (an Aputure Storm C120D II with a light dome softbox) was beautiful, it’s absolutely overkill for a Zoom call! This is mainly because of the compression that’s present in the Zoom video feed (other videoconferencing apps too) once the signal has been processed and delivered to the end users.
I would say that the $30 light, when you’re talking about value for money, seems to be the winner here. However, having some kind of light, even a $10 light, makes a huge difference and looks a lot better than not having a light at all:

As you’ve now seen, adding a simple and even inexpensive light to videoconferencing setup can be one of the easiest and most notable improvement that you can make to your Zoom game.
Happy zooming!
About the author: Chris Lee is a corporate photographer, technical trainer, video editor located in the Atlanta area who created the pal2tech YouTube channel last year. He recently woke up one morning and realized that he loves teaching photography even more than actually taking photos. We know… he still finds that hard to believe also.