In the first installment of this 3-part 360 photography tutorial series, you will learn all the essential tips, tricks, and information you need to begin shooting and creating 360 virtual tours. I will cover the basics of what 360 photography is, the gear and software required, and the setup and shooting process. Future installments in this 360 series will cover topics such as 360 photography for interiors and linking virtual tours with hotspots and maps.
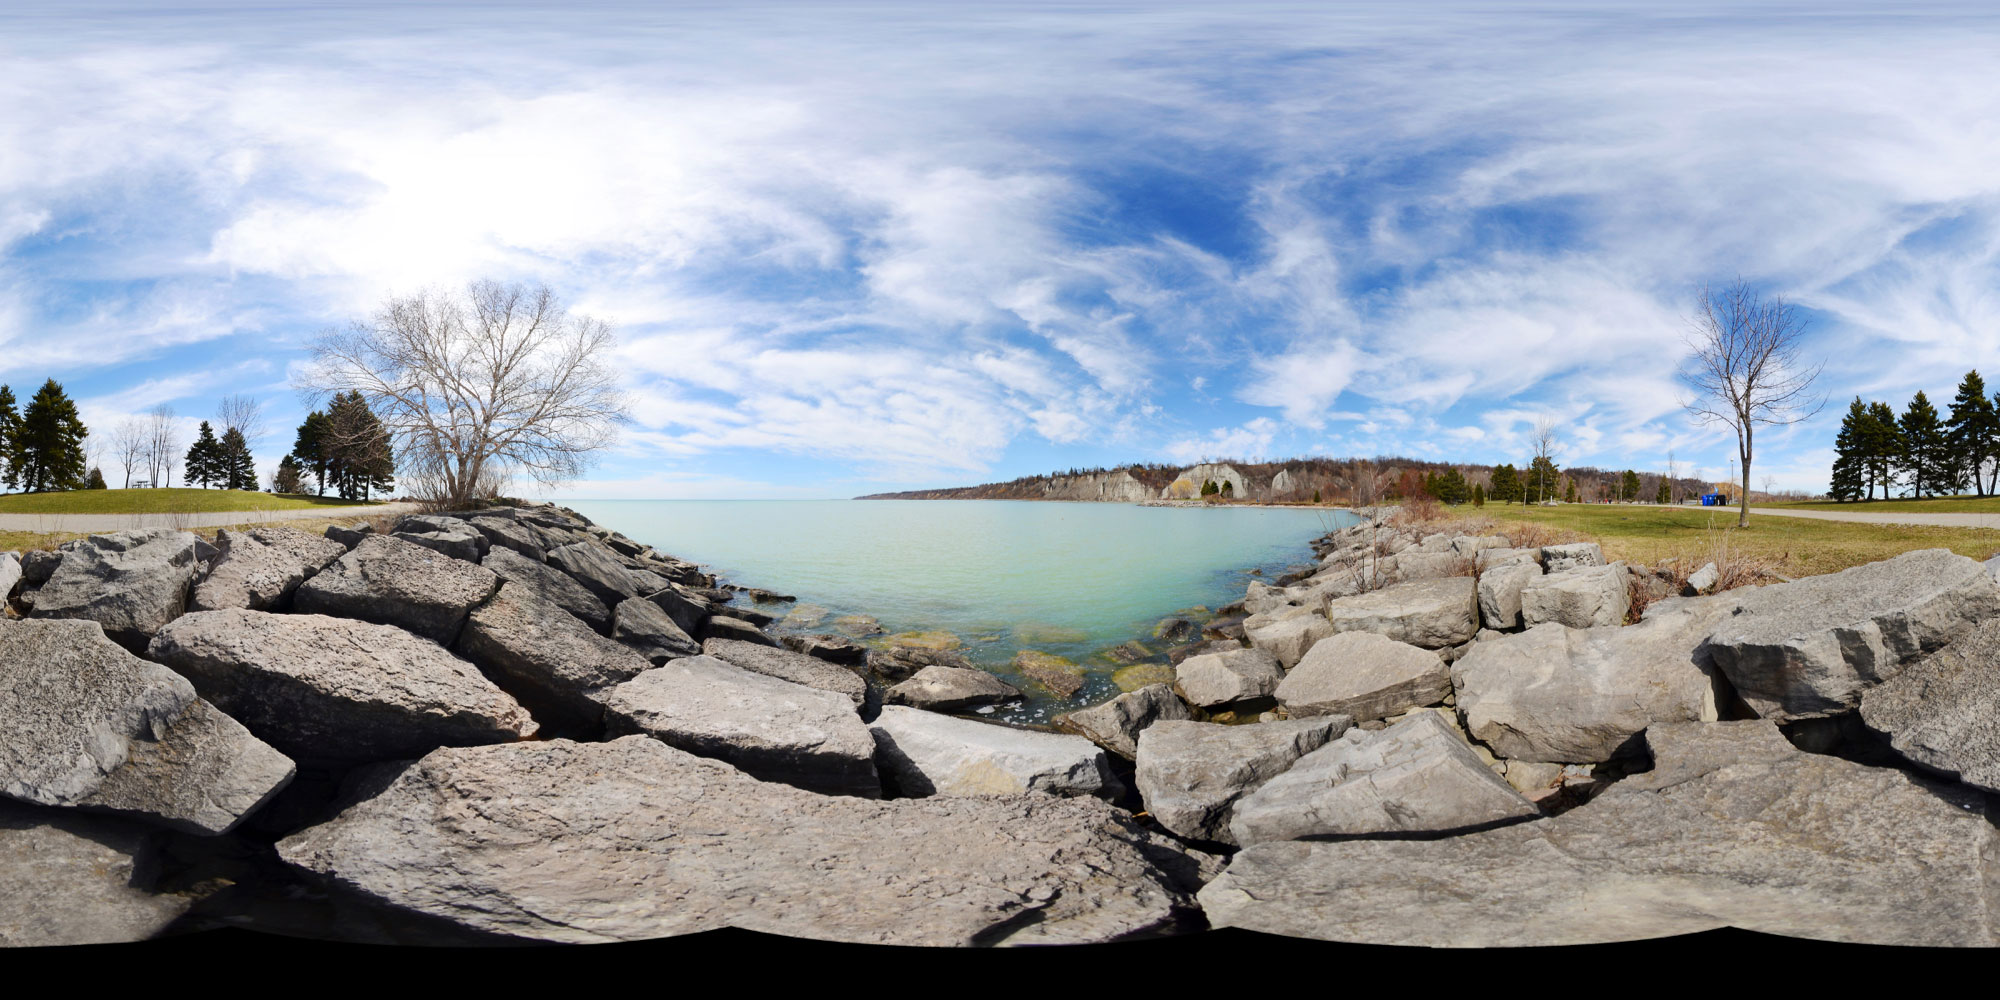
Click & drag your cursor to get the full experience. 360 Photo of Scarborough Bluffs, Toronto by Dave Fitzsimmons.
What is 360° photography?
To create a 360 photo, the photographer takes multiple photos in a complete circle, with the camera on a tripod, from a stationary position. The multiple images are then stitched together using software (such as PTGui) and converted into an interactive virtual tour which allows the viewer to look anywhere they want in the scene.
The type of 360 photos I will be discussing are spherical (360° x 180°) panoramic images, shot using a DSLR and a fisheye lens. Although there are convenient, one-shot options available for producing 360 photos and video, such as the affordable Ricoh Theta S, I find that the quality is best using the DSLR option with multiple shots.
What gear is required?
- Tripod
- DSLR camera body
- Fisheye lens with 180° FOV (field of view)
- VR head
- Shutter release cable or remote
- Software (PTGui and Pano2VR)
When you are first starting out with 360 photography, it can be a daunting task to try to figure out which equipment is necessary and best for you. There are a lot of different pieces of 360 photography equipment on the market, but the above list of required gear should meet most people’s needs.
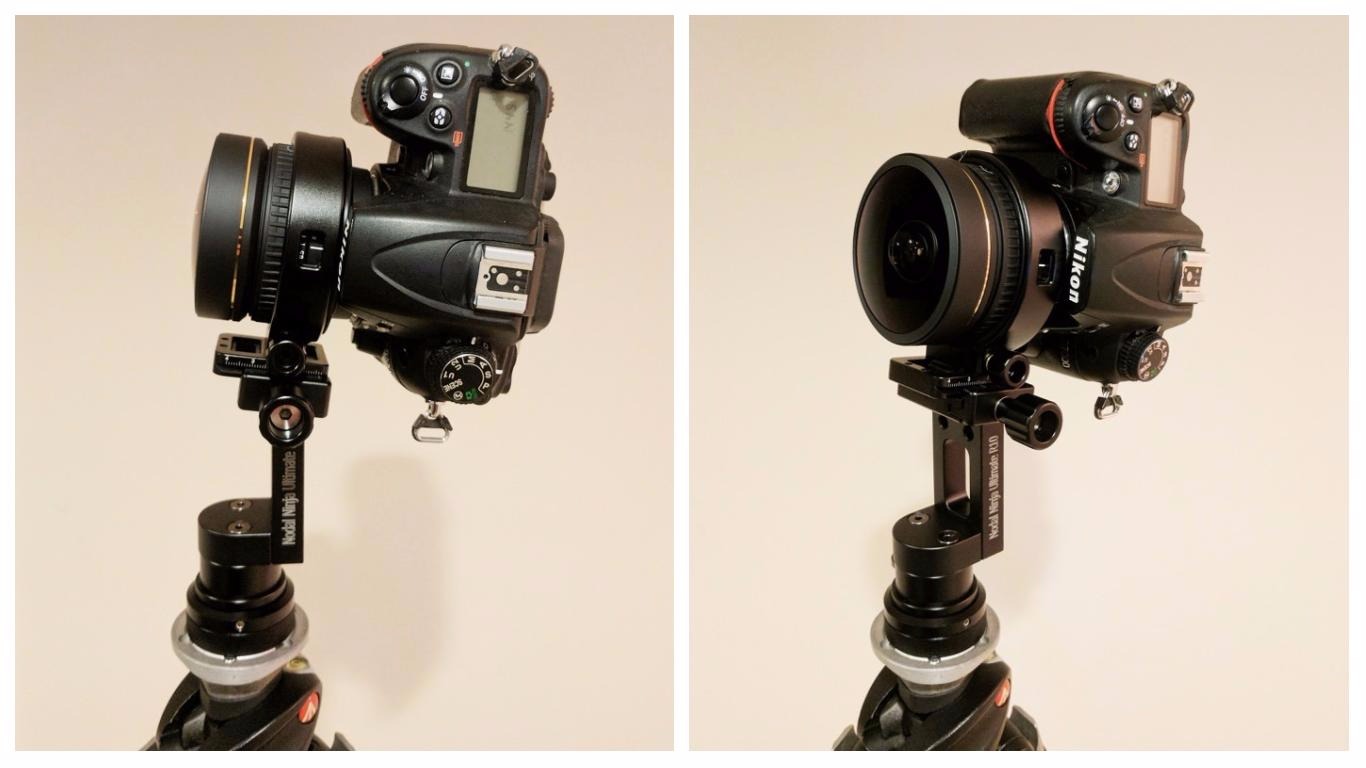
A sturdy tripod is an obvious place to start when it comes to gear. You need to shoot from a level tripod in order to get the best stitch quality and straight horizon. The type of DSLR body you use doesn’t really matter, but a fisheye lens with 180° field-of-view is required. The lens I use—and highly recommend for 360 photography—is the Sigma 8mm circular fisheye.
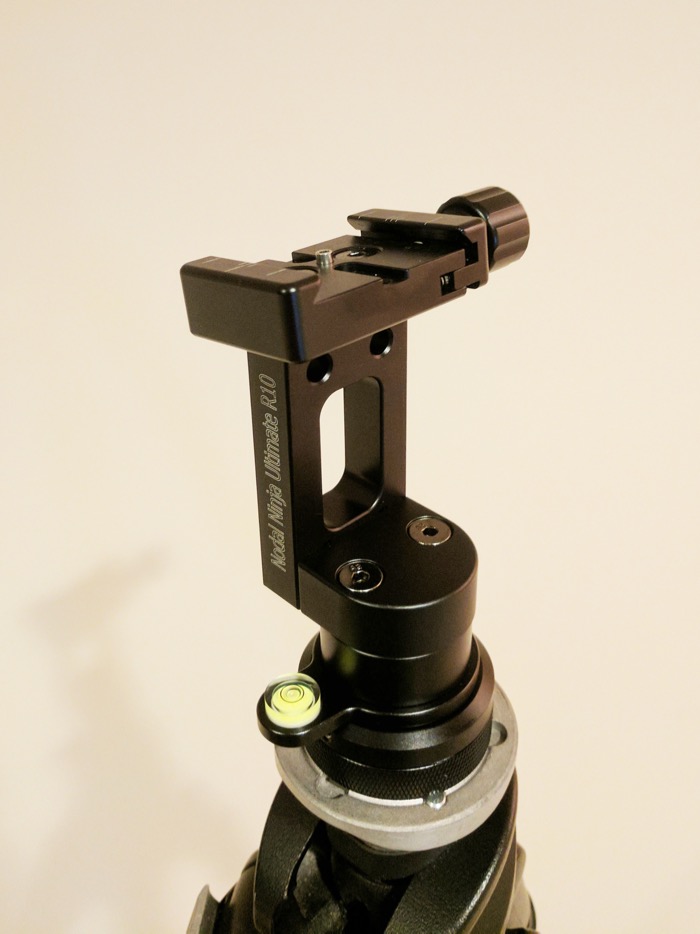
When it comes to a VR head, my personal choice is the Nodal Ninja Ultimate R10 7.5° Tilt with lens ring for Sigma 8mm fisheye. This is a high-quality, compact, and easy-to-use VR head kit that is designed to be used specifically with the Sigma 8mm fisheye lens. The Nodal Ninja is lightweight, easy to calibrate, and delivers professional results at an affordable price. It has a built-in bubble level, which is critical for properly setting up your equipment to shoot.
The final piece of gear I recommend for shooting 360 photos is a shutter release cable or remote. This is important because pressing the shutter button with your finger can cause the VR head to shift slightly, messing up the stitch alignment. There is little room for error when it comes to stitching 360 photos. If you do not own a cable release or remote, you can also use a 5-second camera timer to reduce possible vibrations or shake.
As far as which software to use for 360 photo stitching and virtual tour creation, I will cover that shortly after explaining the setup and shoot process.
How do you shoot a 360 photo?
Setup
The first step in shooting a 360 photo is to figure out where the best spot to place the camera is and set up the tripod. With a 360 photo, you don’t think about composition in the way you would with traditional photography. Camera placement is key. You need to consider your surroundings, and ensure that you choose a camera location that has interesting content on all sides.
Once your location is chosen, you need to decide on tripod height. Generally, setting the tripod at about 5’ high provides the most natural viewing angle, comparable to what a person would see with their eyes if they were standing there. The exception is if you are shooting an interior space with low ceilings. Then you would want the camera height to be approximately equal distance between the floor and ceiling.
Next, you need to level the tripod (this is a critically important step, so take your time and be precise). With the Nodal Ninja VR head mounted to the tripod, adjust the tripod legs as needed until the bubble is exactly in the centre of the circle on the level. You don’t want to have the camera attached at this point because it will get in your way of looking straight down at the level.
With your tripod and VR head now leveled, you can mount the camera onto the Nodal Ninja and connect the shutter release cable. (Note: Although I won’t get into the details of calibrating the VR head in this article, this PDF provides setup instructions).
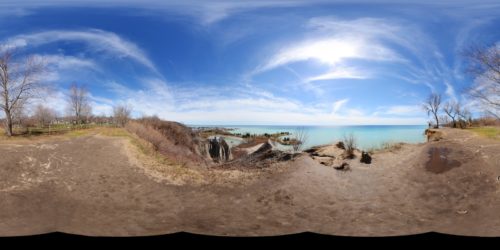
Click & drag your cursor to get the full experience. 360 Photo of Scarborough Bluffs, Toronto by Dave Fitzsimmons.
Camera Settings
Now that all of the equipment is set up, you are ready to shoot the 360 photo. Because 360s are multiple photos stitched together, it is crucial that all of the camera settings remain exactly the same from shot to shot; otherwise, the photos won’t blend seamlessly. For this reason, you must shoot 360 photos with all of the camera settings in manual mode.
Focus: When you are setting up the lens ring that comes with the Nodal Ninja, you will be taping the focus ring in place (set to focus about 1 meter away) before locking the ring in place on the lens. Therefore, your focus is already set and the camera should be switched to manual so that it isn’t trying to autofocus as you shoot (details about this can be found in the Nodal Ninja setup instructions PDF ).
Aperture: I suggest always shooting 360 photos at an aperture of f/8. This creates a sharp image from foreground to background (which is desirable for 360 photos) and provides the best quality.
White Balance: You don’t want the white balance changing from shot to shot as you rotate the camera, so don’t use any auto WB settings. The best option is to set your white balance manually using the degrees Kelvin (K) option. For most exterior photos, setting the white balance to around 5000-5600 K will get you in the right area. Increasing the number will make the photo warmer; decreasing the number will make it cooler.
Shutter Speed: Since the aperture is going to stay at f/8, you want to only adjust the shutter speed to set the exposure. Ambient light is all that will be used for 360 photos—no flash, since you want the lighting to remain exactly the same from shot to shot. Shutter speed controls the exposure for ambient light, so this is the only adjustment required to set the exposure. When you think you have the correct exposure, shoot test shots all the way around in a circle in each VR head position and make sure that exposure works for all shots. Adjust the shutter speed if needed to set the best average exposure for all positions.
Shooting
Now that the camera settings are all locked in, you are ready to take the photos. As you rotate the Nodal Ninja VR head, you will feel it click into positions every 90° as you rotate in a circle. These are the positions at which you will take the photos. Using the Nodal Ninja VR head with the Sigma 8mm fisheye lens, you need to take 4 photos in total (at 0°, 90°, 180° and 270°) in order to complete a 360° image. So start at 0° and take the first shot using the cable release. Then gently rotate to 90°, allow the camera to settle and take the second photo. Rotate again to 180° and take the third photo. Finally, rotate to the last position at 270° and take the last shot.
Pro tip: always rotate the VR head clockwise as you are shooting, never counterclockwise. Rotating the head counterclockwise can actually unscrew the VR head and cause possible misalignment.
How do you stitch a 360 photo?
After the shooting is complete, you now move into the realm of post-processing. The photos need to be stitched into a seamless panoramic image. This is done using specialized software, such as PTGui.
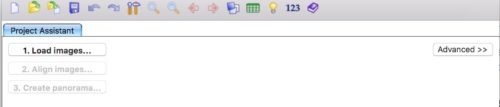
PTGui is an easy-to-use program that does an exceptional job of stitching 360 photos. You simply click “1. Load images…” and import your 4 photos. Then click “2. Align images…” and the software will automatically stitch and align your photos. Then click “3. Create panorama…” to export the JPEG file.
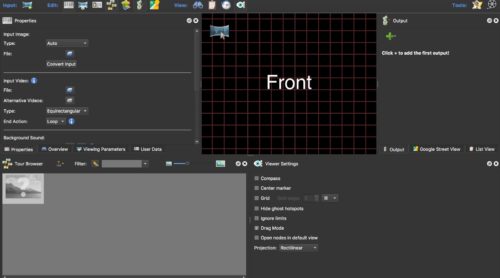
Now that you have exported a stitched panoramic JPEG image, the next step is to turn it into a 360° virtual tour. The program I recommend for this is Pano2VR by Garden Gnome Software. Pano2VR allows you to export your 360 file in different formats, such as HTML5 (for mobile/tablet gyroscopic support), Flash, and QuickTimeVR depending on your needs. Pano2VR offers video tutorials for a more detailed explanation of how to use the software.
With these steps done, you now have a full-functioning virtual tour ready to embed wherever you like! Remember, 360 photography requires extra care and attention to detail, so don’t rush it. Take your time and create some awesome images!
If you have any questions for Dave about 360 photography, leave them in the comments section below.
Dave Fitzsimmons is Senior Photo Editor at 500px, and owner of hotel photography company, Photoworks National.
500px: 500px.com/davefitzsimmons1
Instagram: @fitzsimmons_dave
Website: Photoworksnational.ca