Need a new idea for your next photo shoot this Halloween season? Get inspired with this exclusive tutorial by Alexandria Huff of BorrowLenses.com! Learn how to mix natural and flash lighting and take moody images simply by controlling your shutter speed. In this tutorial, Alexandria demonstrates which settings control flash exposure and which control environmental lighting, so that you can mix both to capture available light while still using a flash on your main subject. This is a great trick for shooting with candlelight—read on!
by Alexandria Huff
Every year, in celebration of the fall season, I create a still-life image. Last year, I showed you how to arrange and light a 17 Century Dutch-style Vanitas. This year, I will show you how I exposed for both my candles while still using a flash as my key light.
Equipment
After setting up my scene in a small room (still life photographs are a great activity during the cold months when shooting outside is undesirable), I put 1 Nikon SB-700 on a stand and behind a scrim to mimic window light. I used the Nikon 58mm f/1.4G lens on a D810. Opposite my main light I had a silver reflector on a Justin Clamp.
The Basics of Mixing Ambient and Flash Lighting
Once you learn this simple lighting guide, your shooting creativity will soar:
Aperture = Flash Exposure
Shutter = Environment Exposure
ISO = Both
You can remember this the following way:
ISO = Your overall film sensitivity. Higher ISO makes everything more sensitive – flash and environmental lighting.
Shutter = The amount of time you’re letting the environmental lighting “burn” into your film. No matter how long you leave your shutter open, the flash pops at its same, quick duration and doesn’t make a meaningful change to your exposure (while the environmental light gets more and more exposed). I’ll show you examples soon.
Aperture = The bigger the hole, the more flash light gets through to the film. You are letting in more ambient light, too, but it is with aperture where flash makes its biggest impact.
Examples
Here is my still life scene, fully finished and edited:
When approaching a scene like this, I choose my ISO first and stick to it. It affects both flash and ambient lighting exposure and I don’t want to confuse myself so I choose a speed that is good for the amount of grain I am willing to tolerate. In this case, I picked ISO 200. I also picked a flash setting beforehand and stuck to it because it was not convenient for me to change the exposure on the flash during the shoot – I decided to only control flash power using my aperture settings.
So now that I have chosen my ISO and my flash settings, I only have to worry about shutter speed and aperture – much easier than thinking about 4 settings!
Shutter Speed
To show the effect shutter has on ambient light but not flash light, here are 3 examples all taken at the same flash power and ISO 200:
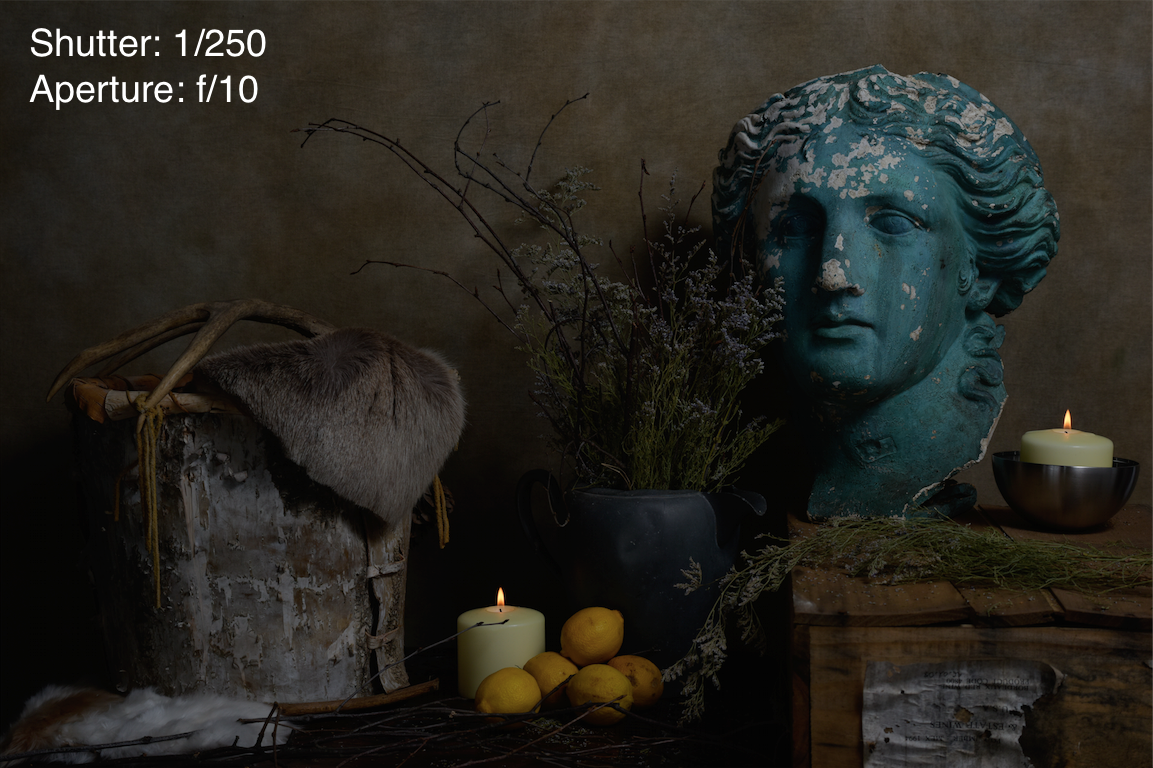
At these settings, my flash is illuminating the scene and my candles are just little pinpricks of light.
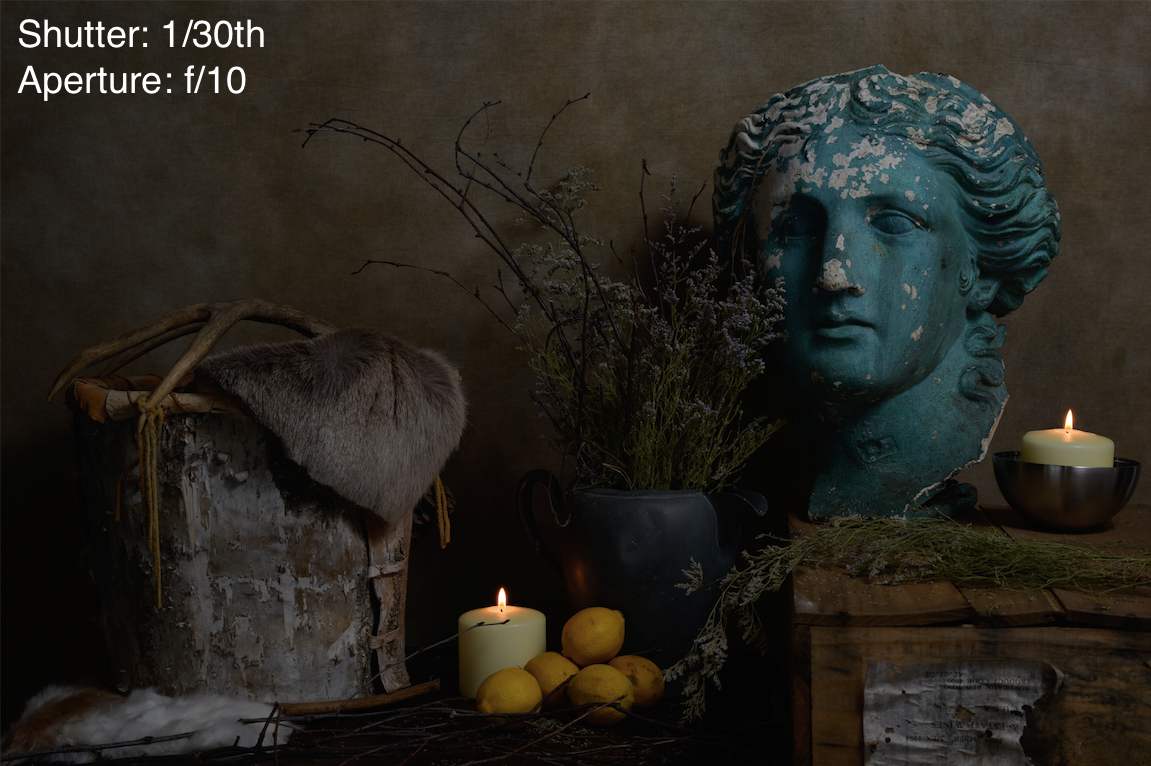
Slowing down my shutter brings in the glow of the fire a little while my stone bust and overall exposure stays the same.
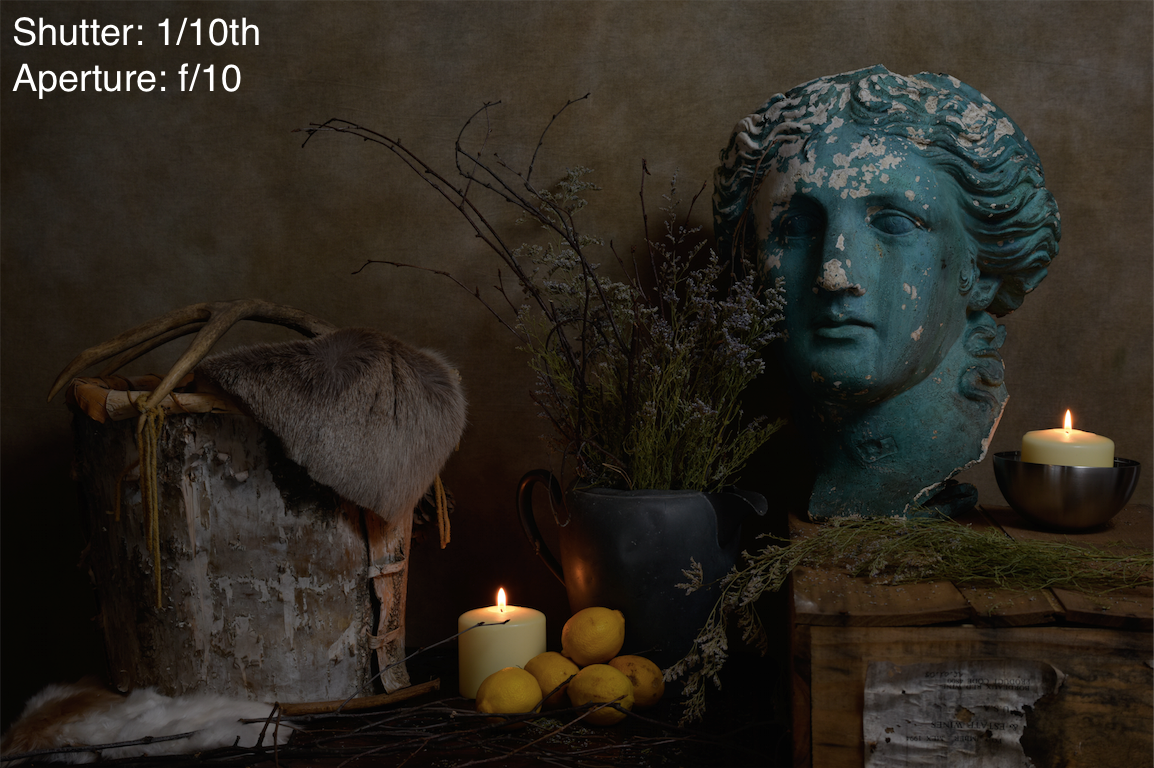
At an even slower shutter speed, the glow of the candles are coming along while everything else that is illuminated by flash is the same.
Practice this on your own – anything that you want to show an environmental glow for while still using flash merely requires the slowing down of your shutter. You do not have to turn down your flash or move it in any way.
Aperture
To demonstrate the effect aperture has on flash exposure, here are 3 more examples:
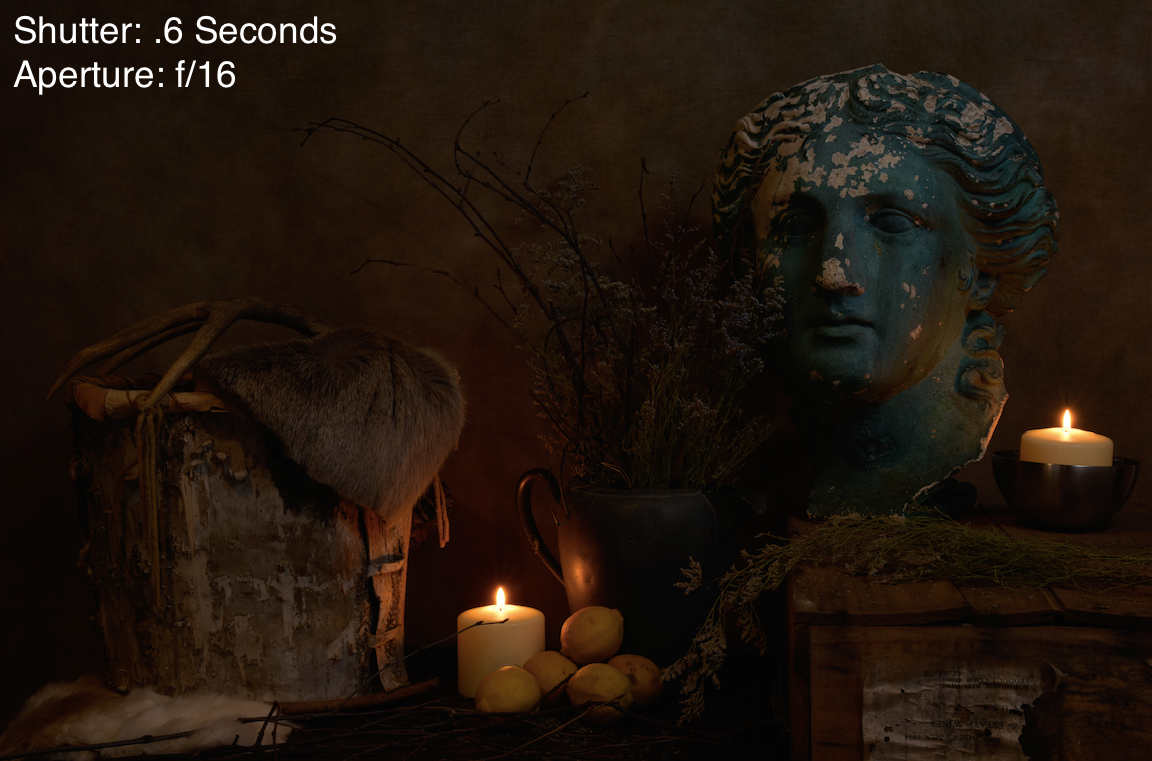
The glow of the candles at .6 seconds is very nice but at f/16 hardly any flash light is coming through on the rest of my scene.
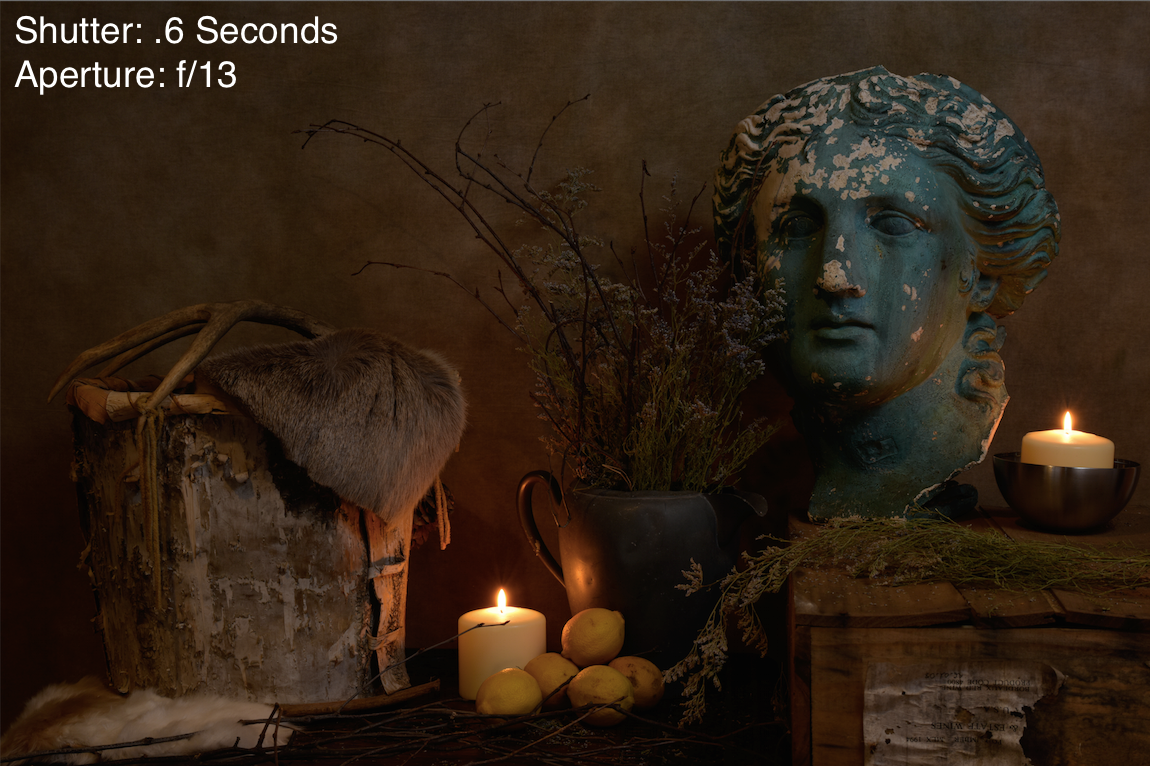
I kept my shutter speed the same and opened the aperture up to let in more flash light. My candle glow is unaffected while the rest of the scene is brighter.
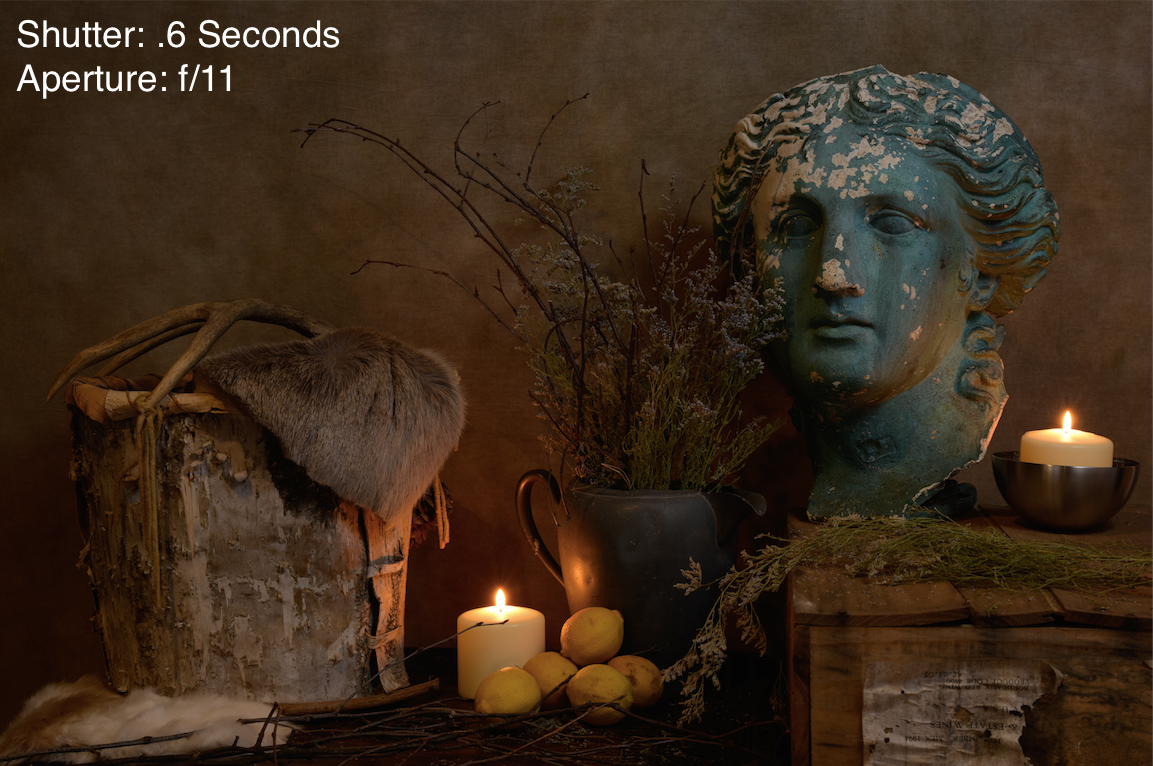
At f/11, I can now see much more of my scene while my candles still have their orange glow thanks to my consistent and slow shutter speed.
This is a technique used by architecture photographers to expose for the mood of lamps or fireplaces while still lighting the rest of the room with strobes.
This is also a fun way to photograph your kids with their jack-o-lanterns. Have you taken a shot of someone with their glowing pumpkin and the flame gets washed out by the flash? Keep your flash for the kid and slow down that shutter for the flame.
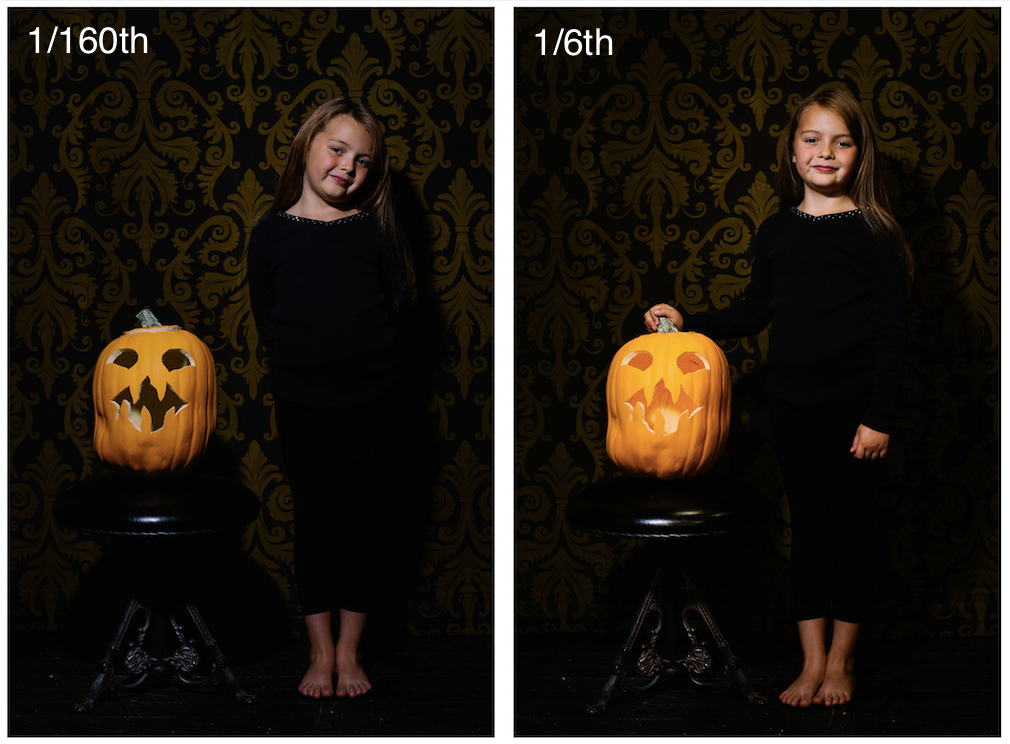
The slowed shutter draws in the glow of the environment without affecting the flash exposure on my main subject. Keep your other settings the same and just play around with “burning in” your ambient light. One caveat: really slow shutter speeds are fine for still life and interior shots but when photographing people you can still experience motion blur – even with a flash. You will also see shifts in white balance because you are mixing light temperatures. Experiment!
To see more of my work and images, you can follow me on 500px, or connect with me on Facebook and Twitter. Got any questions for me about this tutorial? Leave a comment below!